


Working with table top epoxy is a piece of cake, right? Just mix 1 part resin with 1 part hardener, stir, and pour. But if you don’t do it right, it’s easy to go from awesome to awful.
Besides the epoxy itself, there are other things that could go wrong – like embedded objects causing problems or the epoxy table top resin curing cloudy and sticky instead of clear and hard.
What is Table Top Epoxy and What is it Used For?
Table top epoxy is a two-part epoxy resin and hardener system that’s used to get that hard-as-nails, beautiful, clear, glass-like finish you see on restaurant tables and bar tops.
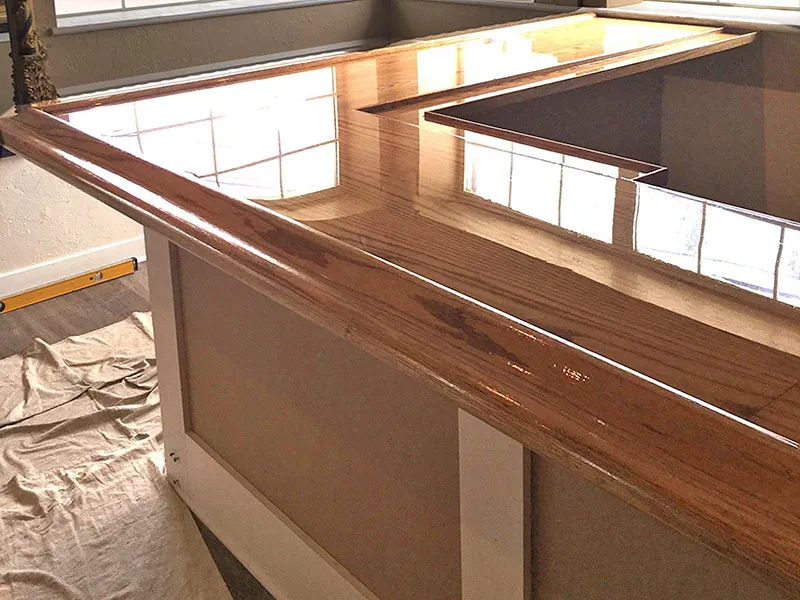
It’s a coating epoxy, rather than a casting epoxy, which means it’s meant to be poured in thin layers, not deep or thick layers.
In this post, we’ll tell you about fixes for some of the most common problems you can run across when creating an epoxy resin table top, such as how to fix ripples, how to fix dimples, and what to do if the epoxy doesn’t harden. And we’ll show you easy ways to prevent these problems so you get that gorgeous, wet, just-poured look that will really turn heads.
Table Top Epoxy Problem #1 – Cloudy Finish
A glossy clear table top looks so wet – even when it’s dry – you’ll be afraid to touch it! But if the finish is cloudy, chances are the wood wasn’t completely dry when the epoxy was applied. Any moisture in the wood will mix with the epoxy and turn the finish cloudy instead of clear.
If the wood was dry, the cloudy finish could’ve also been caused by high humidity. Excess moisture in the air can react with the mixed epoxy and turn it cloudy. Be sure the temperature in your work area is 70-80°F and the relative humidity is 0-90%.
If the temperature and humidity were good and the surface was dry, another reason for cloudiness is overly aggressive mixing. We’ve all done it! You’re excited about the results and you’re doing your best to do everything right – including mixing the resin and hardener components thoroughly. In your excitement, take care not to do any aggressive mixing, it’ll add air to the mixture, which can make the finish cloudy. Be sure to mix slowly and carefully, scraping the sides and bottom of the cup.
One last thing that can make your table top epoxy finish cloudy is using resin or hardener that was not clear to begin with due to crystallization. This can happen if the components are exposed to excessive cold temperatures.
Crystallization can make one or both components cloudy, solid or chunky. You have to make the components liquid again before you use them. This is very easy to do – see below for details.
 How to Prevent a Cloudy Table Top Epoxy Finish:
- Make sure porous substrates (like wood and concrete) are completely dry.
- Do not apply mixed epoxy if the relative humidity exceeds 90%.
- Stir the table top epoxy resin and hardener components together slowly and carefully.
- How to liquefy crystallized epoxy resin or hardener before dispensing and mixing – Make sure the lid is on tight and place the affected container in a warm water bath, maintained at about 140°F, until all the crystals are dissolved.
Table Top Epoxy Problem #2 – Trapped Bubbles
Bubbles are great for champagne and bath time, but they can ruin a perfectly clear table top.
Just know that bubbles happen, no matter how careful you are, but there are things you can do to minimize and remove them. Start by mixing the resin and hardener components slowly – aggressive mixing can whip a lot of bubbles into the mixture.
Bubbles can also spring from porous surfaces (think wood, or concrete) and embedded objects, so be sure to coat these with a thin seal coat of mixed epoxy before you apply flood (also called ‘float’) coats. You can use a brush to lightly coat embedded objects like bottle caps or sea shells with mixed epoxy, or you can dip the objects in mixed epoxy to coat.
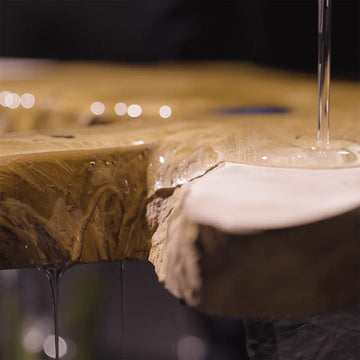
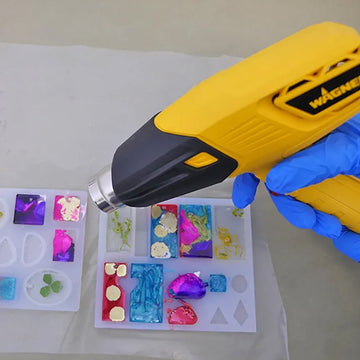
Finally, when you’re pouring a flood coat, pour slowly and you’ll create fewer bubbles. If you get a few bubbles – fear not! Bubbles are easy to remove with a heat gun or torch – see details below.
How to Minimize and Remove Bubbles in Table Top Epoxy:
- Stir resin and hardener components slowly and carefully.
- Apply a thin ‘seal’ coat of mixed epoxy to seal porous surfaces like wood and concrete.
- Coat embedded objects with mixed epoxy to seal them before gluing them to the table top.
- Pour mixed epoxy slowly onto the surface.
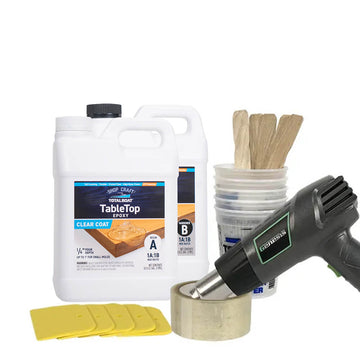
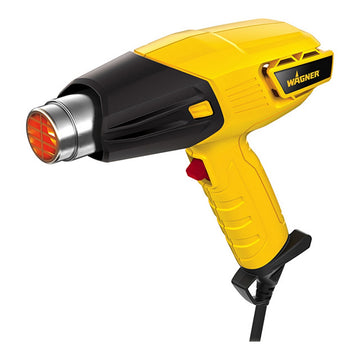
- How to remove bubbles from table top epoxy – Use a heat gun on its lowest setting. Wave it quickly back and forth a few inches above the surface, taking care not to get too close and scorch the surface. Bubbles will rise to the surface and pop, leaving the epoxy smooth and bubble-free.
Table Top Epoxy Problem #3 – Streaks or Swirls
If any contaminants get mixed into the epoxy, or if the resin and hardener components aren’t mixed thoroughly, you can get visible streaks or swirls in the cured tabletop epoxy surface. You might also be able to feel the streaks or swirls.
The best thing to do is sand the surface with 220-grit sandpaper to remove the swirls or streaks. Remove the sanding residue, wipe the surface with denatured alcohol and let it dry completely. Apply a flood coat of mixed table top epoxy and you’re all set – no more streaks or swirls!
How to Prevent Streaks or Swirls in Table Top Epoxy:
- How to stir the resin and hardener components properly – the 2-cup mixing method works best – add 1 part resin and 1 part hardener to a clean plastic mixing cup and stir slowly for 2-3 minutes, taking care to scrape the sides and bottom edges, then pour into a second clean mixing cup and stir for another 2-3 minutes.
Table Top Epoxy Problem #4 – Unlevel, Rough, Wavy, or Cracked Surface

Ripples, dimples, cracks, craters, waves and rough spots can put a dent in your enthusiasm, but don’t worry – they can all be fixed – or avoided altogether. To start, make sure your surface is level before you mix and pour – the epoxy will self-level on its own, but will only be as level as the surface.
You also want to be sure to keep the temperature in your work area between 70-80°F to apply AND cure the epoxy. If the temperature fluctuates, you can get dimples or ripples, and the epoxy might not cure completely. Dust can also cause small pits or dimples, so try to make your work area as dust-free as possible.
Too much heat (excessive exotherm) is another thing that can make epoxy cure rough or wavy – it can also cause shrinkage and cracks. Exotherm is a heat producing reaction that occurs normally when you mix epoxy resin and hardener – this heat is what makes the epoxy cure properly.
However, if you get too much heat, the epoxy can bubble, smoke, and melt your mixing cup – not to mention ruin the surface of your tabletop. See below for some quick tips to level the surface, prevent exotherm, and fix rough or wavy surfaces.
How to Level the Surface and Prevent Dimples, Waves, Rough Spots and Craters:
- Before you mix the epoxy, use a level to make sure your table top surface is level.
- Keep your work area as dust-free as possible.
- Maintain the temperature in your work area at 70-80°F until the table top is cured.
- When removing bubbles, keep the heat gun or small torch moving and wave it quickly back and forth.
-
How to prevent exotherm –
- Don’t exceed the maximum pour depth, which is typically 1/8” to ¼” per layer for table top epoxy systems. Mix only as much epoxy as you need for the layer you are pouring.
- Make sure the temperature in your work area doesn’t exceed 80°F.
- Mix the epoxy in wider, round-bottom containers, rather than taller containers, and pour and spread the epoxy immediately after mixing thoroughly.
Table Top Epoxy Problem #5 – Sticky Surface

Sticky resin means it didn’t cure properly. This problem can happen due to improper mixing, using the wrong mix ratio, surface contamination, using tints or colorants that are not compatible with epoxy, or because the temperature in the work area was just too cold.
Here are a few things you can do to ensure your resin cures rock hard.
How to Ensure your Epoxy Hardens and Cures Properly:
- Use the exact mix ratio (typically 1 part resin to 1 part hardener for table top epoxy systems), whether measuring by weight or by volume. Too much hardener in epoxy resin will not make the epoxy cure faster. It will do just the opposite and make the epoxy not cure at all.
- Mix components thoroughly using the two-cup mixing method: Add resin and hardener to a dry, clean plastic mixing cup and stir slowly for 2-3 minutes. Scrape the sides and bottom edges, then pour into a second clean mixing cup and stir for another 2-3 minutes.
- Be sure you’re using the table top epoxy resin and hardener from the same manufacturer and the same epoxy system. All 1:1 epoxy systems are not created equally.
- Keep the ambient temperature in your work area at a consistent temperature between 70-80°F.
- If you’re tinting the epoxy, use epoxy-safe coloring agents such as mica powder, universal pigments, alcohol inks, and paste pigment dispersions.
Table Top Epoxy Problem #6 – Cured Epoxy Table Top is Dirty or Yellow
If the cured epoxy looks dirty, not crystal clear, the cause could be dirt or dust that contaminated the epoxy somehow. Using dirty mixing cups or mixing sticks can do it. So can forgetting to tighten the resin and hardener caps before storage.
If the cured epoxy is yellow, the cause could be excessive exotherm, which means the epoxy got too hot while curing. Read below for tips on how to prevent dirty or yellow epoxy.
How to Avoid a Dirty or Yellow Table Top Epoxy Finish:
- Make sure your mixing tools are clean and dry before adding resin and hardener. You can reuse mixing cups as long as they are clean. Here’s how to reuse mixing cups.
- To avoid excessive exotherm – mix only as much table top epoxy as you need for the layer you are pouring; mix components in a clean round container that is wide, with straight sides, instead of a tall, thin container, spread epoxy over the surface evenly and allow it to self-level.
- Note that if the epoxy cured clear, but it’s on a table top that sits in direct sunlight, the UV exposure can make the epoxy turn yellow. Prevent yellowing by coating the cured epoxy surface with a clear UV-stable varnish. Check here for how to make epoxy UV stable.
- To preserve the gloss and clarity of the epoxy finish, do not place items hotter than 125°F on the cured surface or it will discolor and distort.
Table Top Epoxy Problem #7 – Cured Epoxy Didn’t Stick
Delamination happens when the cured epoxy doesn’t stick to the surface. If the epoxy doesn’t form a strong bond to the table top surface, chances are there was contamination or moisture involved.
How to Make Sure Table Top Epoxy Sticks to the Surface:
- Be sure the surface is clean, dry and free of contaminants like dust, dirt, oil and grease. Do a solvent wipe with denatured alcohol and let the surface dry completely before you apply a seal coat or flood coat of table top epoxy.
- Porous surfaces like wood and concrete can emit moisture, which can cause an improper bond. Make sure the wood or concrete surface is completely dry, especially if using a large slab of concrete. This is because the table top epoxy may initially form a strong bond, but if the concrete emits a lot of moisture, the moisture can become trapped, which could cause delamination in areas.
Table Top Epoxy Problem #8 – Embedded Objects are Floating
Is your meticulously arranged bottlecap collection floating aimlessly and upside down in your table top epoxy pour, captured for posterity? What you lay down won’t stay down unless you glue it to the surface before you do the first pour.
How to Avoid Floating Objects in Table Top Epoxy:
- Use an all-purpose white glue (such as Elmer’s) to attach the embedded objects to the surface. Besides gluing the objects to the surface, be sure to coat them with a thin seal coat of epoxy to prevent air bubbles.

Table Top Epoxy Problem #9 – Embedded Paper or Photos are Ruined
Been saving those concert ticket stubs and preserved them in epoxy only to discover they’re darkened and discolored and preserved that way forever?
People like to cover paper in epoxy to get that cool, high-gloss finish. Collage, montage, decoupage – they can all include different types of paper. Problem is, porous paper will soak up epoxy. For this reason, paper types such as drawing paper, origami paper, card stock, watercolor paper, and book pages should be coated first to create a barrier that seals and protects.
How to Preserve Paper, Printed Images or Photos Before Embedding in Epoxy Resin:
- Coat papers with a few coats of spray sealer (such as Envirotex Clear High Gloss fast-drying sealer), as directed, or a few coats of brush-on sealer
- Do a test on a similar type of paper before applying the sealer to your actual project.
Ready to create your own epoxy table tops or bar tops, but not sure how much epoxy you’ll need? Our epoxy calculator can help you with that! Now that you know common problems that occur when it comes to using table top epoxy, check out our step-by-step guide on how to epoxy a table top! If you have any questions about how to use epoxy for tabletops, or how to fix epoxy problems, please call our Tech Support Team at (800) 497-0010.
Clear Epoxy Bar Top & Table Top Project Kits


Halcyon Water-Based Marine Varnish


11 comments
Hola.
Una consulta. Porque en la resina el reflejo de los objetos se ve distorsionados. Hice una pequeña mesa de resina, apliqué una capa y al curar observé que el reflejo del foco de luz era irregular, no refleja bordes definidos. Apliqué una segunda capa, mientras está líquida la resina se aprecia un buen reflejo del foco pero a me duda que cura se va distorsionando. Al pasar el dedo en la mesa se siente un poco ciertas ondulaciones, es casi imperseptible.
Podrías decirme como solucionar? Estoy pensando en lijar toda la mesa y aplicar una capa de resina de revestimiento. Porque se formaron esas pequeñas ondas? El proveedor me dijo que la resina se debió poner en capas de 3 cm como mínimo y no de un cm como yo puse. Crees que ese es el fallo? Aunque en la región donde vivo hace mucho calor de 37°C, pero la resina que apliqué es lenta de curar.
Mil gracias anticipadas
Hello …I just epoxy resined my dining table and there are waves/ripples in it.. how to remove by sanding and what grits do I use?? Please help
I had the same problem as Victoria above but couldn’t find where you answered her as to how to fix?
@RIchard Rennie – sand the epoxy as much as possible and wipe with acetone. Make sure that layer of epoxy is cured and ok before you add another coat. Add another flood coat of the epoxy on top of this one when you are sure it’s ok and make sure to add ENOUGH epoxy – it sounds like maybe you needed to add more and that is why it was cratering. Please click the bottom blue widget for more help. Hope this helps.
When epoxy doesn’t stick to an area it’s often because of contamination. This can happen with oily woods or with previously finished areas or just with a clean slab. Your best bet is to always clean with ACETONE and let it flash off entirely before applying epoxy. Acetone is the best solvent to use and it will remove oils and contaminants left behind.
Fish eyes or circles, areas where the epoxy is not bonding to itself or to the substrate is all because of something on the wood that is not allowing the epoxy to bond or flood or level out.
Be sure to mix thoroughly for at least 5 minutes until your epoxy is clear and not cloudy before pouring. TO be safe pour from another cup that was not your mixing cup to prevent any unmixed epoxy from being on the top of your project when you dump out your cup.
Click the blue Comment widget on the bottom right for more help!