How to Epoxy a Table Top
Step-by-Step Guide for Stunning, Durable Results
Ready to create a smooth epoxy resin table top that turns heads? You’re in the right place to learn how to prep, mix, pour, and properly cure for gorgeous results. Whether it’s your first pour or the 50th, we have pro-level tips on how to avoid sticky spots, bubbles, and uneven surfaces. By the end, you’ll have the confidence and knowledge to create a professional epoxy table top finish that’s as durable as it is beautiful.
Materials & Tools to Make a Resin Table Top
Gathering all your supplies before you begin is key to a smooth process. Here’s what you'll typically need:
Epoxy Resin + Hardener
Mixing cups and stir sticks
Disposable gloves
Level
Clear packing tape or painters tape (for edges)
Drop cloth or plastic sheeting (to protect your work area)
Heat gun or torch
Spreader or notched trowel
Sandpaper: 120-grit for initial sanding and between seal coat and flood coat; 80-120 grit for porous surfaces
Clean rags, acetone, or denatured alcohol (for cleaning and surface prep)
Prep & Plan Before You Pour Epoxy
Choosing the Right Epoxy & Coverage
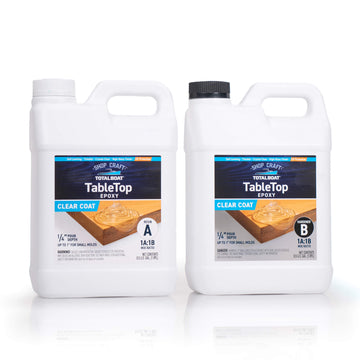
You’ll want to use epoxy that is made for coating table tops. This kind of epoxy is a clear, self-leveling resin designed for flat surfaces like tables, countertops, and bar tops. Unlike deep-pour casting resins, which are meant for thick river pours or molds, Table Top epoxy is formulated for thinner coatings that cure hard, glossy, and smooth.
For most tables, a gallon of table top epoxy resin covers approximately 12 sq. ft. at 1/8" thickness. You’ll want to do a seal coat plus one or two flood coats for best results. For help figuring out how much you’ll need for your project, use this epoxy calculator.
Surface Prep Before Applying Epoxy
Ensure your table is perfectly level, since epoxy is self-leveling and will follow any tilt. Before applying your table top epoxy, make sure your surface is clean and free of wax, grease, or dust. Wipe with acetone on a clean, lint-free rag and let it fully evaporate. For step-by-step prep details, check out our Surface Preparation Guide.
Environmental Conditions
Epoxy cures best between 70–80°F, with low humidity and minimal dust. Avoid pouring in cold or damp spaces, which can lead to cloudy or soft finishes.
Coating and Masking Edges
Use painter’s tape or packing tape to protect your table’s edges and catch any drips during the pour. If you’d prefer the sides to have that same glossy epoxy resin finish, tape the underside of the edges instead. This lets the resin flow naturally over the sides while still keeping cleanup easy.

A Step-by-Step Guide to Applying Table Top Epoxy Resin
1. Measure & Mix Epoxy Correctly
Now that your surface has been prepped, let’s start with measuring your epoxy resin components. Combine resin and hardener at a 1:1 ratio by volume, or 1.2A:1B ratio by weight. Mix for a minimum of 3-5 minutes while scraping the sides and bottom of the container until there are no streaks or striations, transfer to a second container, and mix 2-3 more minutes until fully blended.
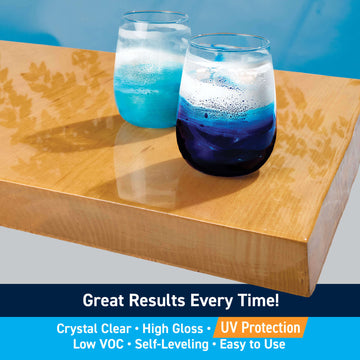
While epoxy resin is formulated clear, it's easy to personalize with color using pigments. Once the components are fully mixed, add small amounts of resin dye for vibrant color without impacting the cure.
Tip: For easier mixing, place the bottles in a warm water bath (80-90°F max)

2. Apply a Seal Coat
If your table top is made with wood, cement, or another permeable material, you'll need to apply a thin seal coat. This first layer creates an airtight barrier between the porous wood and your flood coats. It helps stop trapped air from escaping during curing, preventing bubbles, pinholes, and surface defects for a smooth, glass-like finish.
To seal coat, pour a 1/16” layer of mixed epoxy over the surface, spreading it evenly with an epoxy spreader or heat gun. Be sure to cover all cracks and voids for a complete seal. Once the base coat cures to a solid, hard finish, sand it lightly with 80–120 grit sandpaper to smooth out any bubbles or imperfections. Wipe the surface clean with denatured alcohol and a lint-free cotton rag before applying your next layer.
For nonporous surfaces, you're ready to flood coat!

3. Pour the Flood Coat
Pour the mixed epoxy onto your tabletop in an S-shaped pattern, then spread evenly using a notched or flexible spreader. Allow the epoxy to self-level naturally.
For edges, use a gloved finger to smooth the epoxy down evenly.
At 70°F you can expect your pour to be -
Tack-free: ~6 hours
Sandable: ~24 hours
Light use: ~48 hours
Full cure: 5–7 days


4. Remove Bubbles
After pouring, let the epoxy rest for about 10 minutes so bubbles can rise to the surface. Then gently pass a heat gun or torch 6–8 in. above the surface, moving steadily back and forth. Avoid lingering too long in one spot to prevent yellowing or scorch marks. Repeat as needed during the first 30 minutes of curing to remove new bubble.

5. Second & Subsequent Coats
Additional coats should be poured within 3–6 hours of the previous layer for a chemical bond. If more than 8 hours have passed, lightly sand with 120-grit before recoating.
Each flood coat should be no thicker than ¼ inch to prevent overheating or distortion during curing.
Tip: Embedding objects like bottle caps, sea shells, or coins in your table top? Pour in layers to prevent items shifting or floating in the epoxy resin.
6. Manage Drips & Edges
Once cured, remove the packing tape to take off any drips that formed underneath. If needed, sand off remaining drips with 80–120 grit paper.
7. Finishing Touches
After full cure, you can wet sand and polish for an ultra-smooth, glass-like finish. If the surface develops scratches or minor imperfections over time, sand lightly and apply a thin refresh coat to restore the gloss.

Above: Black walnut coffee table coated in TableTop epoxy by Pine Barren Pallet Works
Adding Color & Creative Effects
As mentioned earlier, it's easy to get creative by adding color to your epoxy resin. After mixing the resin and hardener thoroughly, incorporate epoxy-compatible colorants such as mica powder, alcohol inks, or pigment dispersions. You can create stunning designs like galaxies, geodes, marble, or ocean waves. Always perform a small test first with your chosen colorants and epoxy to ensure the desired results.

Want to create a black marble effect on your table or bar top? Check out this DIY kit that has everything you need!
Aftercare & Maintenance
Wait time before use: Avoid placing objects on your new surface for at least 72 hours.
Maintenance: Use coasters to protect from heat and scratches. Clean with mild soap and water, and avoid harsh chemicals.
UV Protection: If your table will be exposed to extreme UV exposure, a clear urethane or
varnish should be applied to the surface to prevent the epoxy
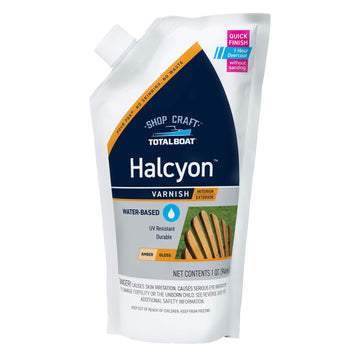
from yellowing over time. We recommend TotalBoat Halcyon Varnish in clear gloss as a UV stable topcoat.
Scratch repair: Light scratches can be buffed or polished; deeper ones may require a new topcoat.
Re-coating: If wear develops over time, sand lightly and apply a fresh coat.
Troubleshooting & FAQs
Do I need to seal wood before epoxy?
Yes, a seal coat prevents bubbles from forming.
How much will 1 gallon cover?
Approximately 12 sq. ft. at 1/8" thickness.
Why is my epoxy sticky?
Sticky spots usually mean improper mixing or curing in cold conditions.
Do I need to sand between coats?
Not if recoating within 3-6 hours. If the epoxy is no longer tacky, scuff-sand before recoating.
Can I tint epoxy or embed objects?
Yes! TableTop epoxy works with pigments, alcohol inks, mica powders, and embedments. You can also create fun, faux marble countertops with table top epoxy.
For more tips, product details, and project inspiration, check out our full line of TotalBoat epoxy resins. If you’re troubleshooting, our blog on Common Table Top Epoxy Problems and our Epoxy FAQ and troubleshooting center covers the most frequent issues and how to fix them. For real-world results, see how makers like Sailing Zephyr used TotalBoat epoxy to bring their restoration projects to life.
Ready to Create Your Masterpiece?
Epoxying a table top is an incredibly rewarding DIY project, if you do it right. With the right prep, proper mixing, and patience, you can achieve a flawless, glass-like surface.
Whether you're a seasoned DIY enthusiast or tackling a project like this for the first time, these detailed instructions and expert tips will help you achieve professional-quality results.
Get started with our TableTop epoxy resin or one of our ready-to-make kits.
For more inspiration, check out the video below where Lucas from Lighthouse Woodworks takes you through the process of pouring TableTop Epoxy over a bartop to achieve a glossy transformation!
