














How to Repair Fiberglass Damage
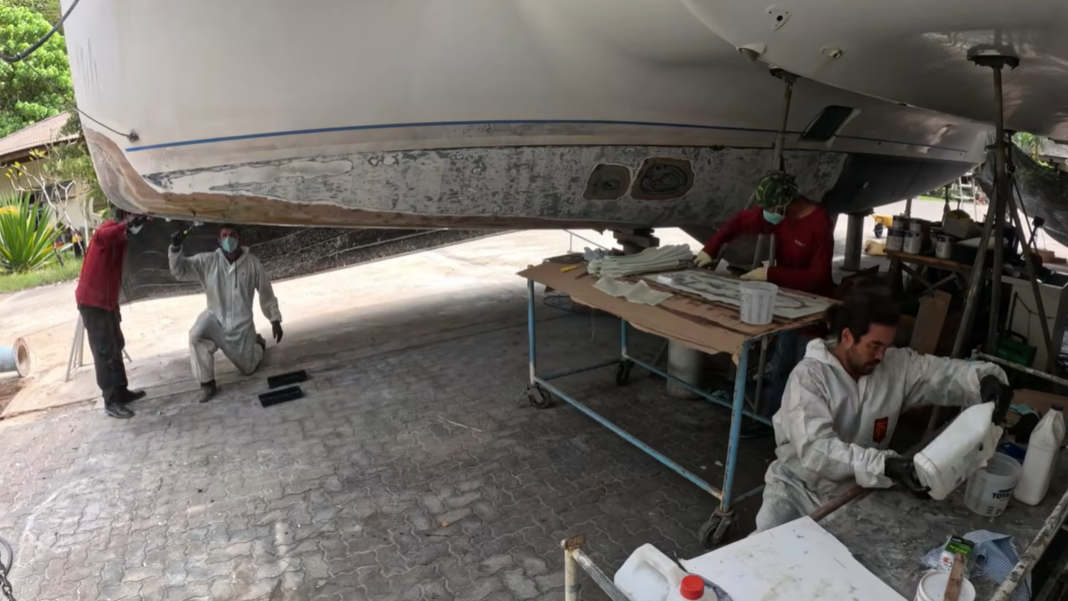
Fiberglass damage on a boat comes in all shapes and sizes, and figuring out how to do fiberglass repair the right way starts with sizing up how deep the damage actually goes. Shallow voids, dents, and crazing usually just need a fairing compound skimmed over the surface. Deeper gouges and holes call for a full repair using mixed epoxy, fillers, and reinforcement fabric to rebuild the structure before you fair and finish it.
Make sure you choose a structural, marine grade epoxy, made to form high-strength bonds with fiberglass, wood, reinforcement fabrics, and metals. When combined with the right filler, marine epoxy becomes an excellent thickened adhesive, fairing compound, or filleting material, so the same epoxy system carries you from structural rebuild through to a smooth, paint-ready surface.

Tools and Materials
Tyvek Paint Suit (no hood) - Half mask respirator rated for paint
- Nitrile gloves
- Protective eyewear
- Fiberglass Cloth – 6 oz. Weight
- Fiberglass Cutting Shears
Peel ply - Acetone
- Masking tape
- 50 mL plastic beakers
- Mixing cups
- Acid, epoxy, & Glue Brushes
- Marine epoxy
- Silica thickener
- Microballoons
- Cleaning and wiping rags
Personal Safety
The epoxy resin and hardener, fillers, solvents, and fiberglass reinforcement fabric used in this project contain hazardous fumes and fibers. It's important to wear the proper personal protective equipment (PPE), which will vary based on the job at hand and the products used.
Before you begin any project, we recommend the following:
- Carefully read the safety information on all product labels.
- Review each product's Safety Data Sheet (SDS)
- Gather the proper PPE as stated by the manufacturer, which can include a proper respirator for product application and for sanding cured material, along with suitable gloves and proper eye, face, skin, and clothing protection.

Step by Step Guide on How to Repair Fiberglass Damage
1. Surface Preparation
Protect the surrounding area: Use poly sheeting and masking tape to protect the areas adjacent to the area you're going to repair.
Clean the surface: Dampen a clean
Sand and grind: Use 36–80 grit sandpaper (depending on the severity of the damage) and an appropriate grinder to remove any loose gelcoat or fiberglass debris from the damaged area. For rounded edges, use an appropriate bit.
Sand a little beyond the border of the damaged area to provide maximum adhesion for the repair.
For damage that goes all the way through (where fabric repairs are necessary), grind out the area at 5:1 or greater width to the depth of the repair.
Clean the repair area thoroughly: vacuum the surface to remove sanding/grinding residue, then remove any remaining surface residue or contamination by wiping the repair area with a clean rag dampened with acetone. Allow the solvent to dry completely.
2. Prepare a Small Batch of Filler (Mixed, Thickened Epoxy)
To ensure the repair patch has maximum adhesion, you'll mix and brush on a thin layer of mixed, thickened epoxy.
To create this mixture, combine your epoxy resin and hardener in a clean, plastic mixing cup. Always use the correct ratio of epoxy resin to hardener by volume, and mix thoroughly.
Next, add a little silica thickener and stir until the mixture reaches a ketchup consistency.

3. Prepare a Small Batch of Mixed, Unthickened Epoxy
You'll use mixed, unthickened epoxy (no filler) to wet out small pieces of fiberglass cloth to patch the repair area.
Dispense the epoxy resin and hardener into a clean mixing cup, and stir thoroughly.
If desired, pour the mixed, unthickened epoxy into a small, clean, disposable plastic beaker or cup — this can make it easier to dip a small brush in to wet out the fiberglass patches.

4. Cut Pieces of Fiberglass Cloth to Create a Layered Patch
To repair the fiberglass, you'll fill the damaged area with successively smaller pieces of fiberglass cloth, one ply at a time, wetting out each one with the mixed, unthickened epoxy.
The idea is to go from larger to smaller plies in increments. The first ply should cover the repair area completely, the second ply should be a little smaller, and so on, until you have enough plies for a thick enough patch to complete the repair.
Start by making a template for the first piece of fiberglass, then use fiberglass shears to cut successively smaller pieces until you have enough for your patch.

5. Apply Mixed, Thickened Epoxy to the Repair Area
Use a small brush (such as an acid brush) to apply a thin layer of the mixed, thickened epoxy to the repair area. This epoxy layer fills cracks and voids and creates a bond for the fiberglass patch.
Why is it important to use a thin layer of mixed epoxy here? Extra epoxy becomes waste and doesn't add strength.
6. Apply the First Fiberglass Patch Layer and Wet It Out
There are two ways to build a fiberglass patch: layer it directly on the repair area, ply by ply, or build the entire patch on a separate work surface — wetting out the fiberglass between each layer — then transfer the patch to the repair area
If you are doing the repair on the surface, start by laying down the largest piece of fiberglass and press it gently into the thickened epoxy applied in the previous step. Use a small brush to wet out this first layer, applying only enough mixed epoxy to saturate the cloth.
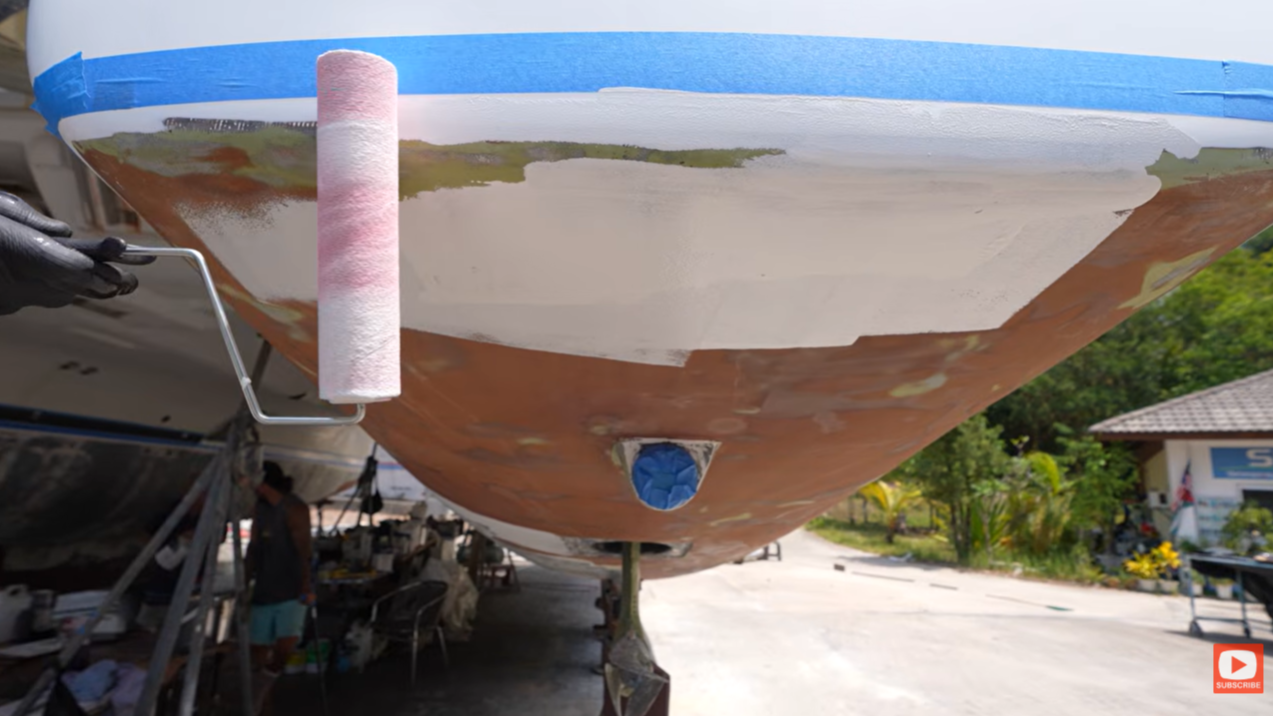
If you want to build out the patch on a seperate work surface, then wet out your fiberglass, place on the patched area, and roll out the excess epoxy as you smooth it on (this method is what is shown in the Sailing Parlay Revival video above).
Pro Tip: Extra resin won't add bulk or strength — it will create brittleness. Strength comes from the fiberglass fabric, not the resin.

7. Add and Wet Out Patch Layers Until You Build Sufficient Thickness
Apply each successive piece of fiberglass one at a time, wetting out each piece as you go.
Apply only enough mixed epoxy to saturate the cloth.

8. Apply Peel Ply and Let the Repair Cure
Peel ply, or 'release fabric,' is a synthetic cloth placed on an epoxied surface immediately after the final coat of epoxy is applied. After curing, the peel ply is removed, leaving no messy amine blush to wash off the surface. Blush is a waxy byproduct of cured epoxy and must be removed before reapplying a product or overcoating.
Cut and position peel ply: cut a piece large enough to cover the repair area, and lay it on top of the final coat of epoxy.
Optional: A small dry brush can help the peel ply stick to the epoxy completely.
Wet out peel ply: use a small brush to apply a coat of mixed, unthickened epoxy on top of the peel ply to prevent air bubbles. Don't overdo it here — too much epoxy makes the peel ply harder to remove.
9. Sand the Repair Area Smooth
Remove peel ply: once the repair area cures completely, remove the peel ply slowly and carefully. This also removes any amine blush and some of the excess epoxy.
Sand and/or grind to shape and smooth the repair.
Vacuum to remove sanding dust.
Overcoat the repair as desired. If the repair isn't cosmetic, paint it, or prime and paint.
For a cosmetic finish, fair the repair before overcoating. Apply a mixture of epoxy resin and hardener mixed with microballoons (to a peanut butter consistency), let it cure, sand, clean, and apply your desired finish according to the manufacturer's directions.
An easier fairing alternative is using a prethickened epoxy fairing compound, then prime and paint.
A note on overcoating with gelcoat: gelcoat generally isn't compatible with cured epoxy. If the repair is small, perfectly executed, and cosmetic in nature, you can overcoat it with gelcoat. Otherwise, use an epoxy tie-coat primer over the cured epoxy repair before applying gelcoat.
Frequently Asked Questions
How long does a fiberglass repair take to cure?
Cure time depends on the hardener you choose and the temperature you're working in. TotalBoat 5:1 Slow Hardener gives you a longer working time, which is helpful for a multi-layer patch like this one, while 5:1 Fast Hardener speeds things along in cooler conditions.
As a general rule, give the repair a full cure before you sand or fair it — sanding too early gums up your paper and can leave the surface uneven, since the epoxy may feel hard to the touch well before it's actually reached full strength.
Can I put gelcoat over an epoxy fiberglass repair?
Not usually, on its own — gelcoat doesn't bond well to cured epoxy without help. If the repair is small, perfectly executed, and purely cosmetic, you can sometimes overcoat directly with gelcoat. For anything bigger or more structural, apply an epoxy tie-coat primer over the cured repair first, then apply gelcoat on top of that.
How do I know if I need a full fiberglass repair or just a fairing compound?
It comes down to how deep the damage goes. Shallow voids, dents, surface scratches, and crazing that don't go through the laminate can usually be handled with a fairing compound alone. If the damage goes all the way through the laminate, or you're dealing with a structural gouge or hole, you'll need to rebuild the area with fiberglass cloth and epoxy before fairing and finishing it — fairing compound alone won't restore the strength of the original laminate.
Why does my epoxy patch still sand poorly even though it feels hard?
Epoxy can feel hard to the touch long before it's fully cured and reached its final strength and sandability. Sanding too early gums up your sandpaper and can tear up the finish you're working toward. Let the repair cure for the full time recommended for the hardener and temperature you're using before you pick up the sander.
What's the difference between epoxy and polyester resin for a fiberglass repair?
Epoxy generally bonds better to existing fiberglass laminate, wood, and metal, and it shrinks less as it cures, which makes it a strong choice for structural repairs like the one in this guide. Polyester resin is common in original fiberglass boat construction and can be more economical for large layups, but it doesn't bond as reliably to a cured epoxy repair or to wood. For most boat repair jobs — especially anything structural — an epoxy system like TotalBoat 5:1 Traditional Epoxy is the more dependable option.
Do I need peel ply for a small fiberglass repair?
It's not strictly required, but it makes finishing a lot easier. Peel ply gives you a smooth, even surface right off the repair and removes most of the amine blush along with it, which saves you a cleaning and sanding step before fairing or painting. For a small, simple patch you can skip it, but for anything you want to look clean without a lot of extra sanding, it's worth the extra few minutes.
Ready to Get Started?
Have questions about your specific fairing project? Our technical support team is here to help. Give us a call or reach out through our website, and we'll help you choose the right products and approach for your boat.