















How to Use Epoxy Fairing Compound to Level an Uneven Surface
The fairing process creates a even, continously surface by filling low spots and sanding down high spots. It's more than just making the surface smooth. Smoothness is about texture, while fairness is about shape. Boatbuilders often check fairness with a batten, a long, flexible strip that will bend into an even curve if the surface underneath it is truly level.
Reach for fairing compound to fill shallow voids, dents, gouges, and old hardware holes, or to smooth uneven fiberglass, wood, aluminum, and steel before priming and painting. If you're dealing with something deeper or structural, like a hole that goes all the way through the surface, that calls for a proper FRP repair with resin and fiberglass cloth rather than a fairing compound alone.
This guide focuses on epoxy fairing compound, the strongest and most water-resistant option for both above and below the waterline work.

Safety First
Fairing compound and the solvents used alongside it are hazardous to your health, so it's worth taking a minute to gear up properly before you start.
- Read the safety information on all product labels before you begin.
- Review each product's Safety Data Sheet (SDS)
- Wear a properly rated respirator, both when applying the compound and when sanding cured material.
- Protect your hands with suitable gloves.
- Protect your eyes, face, skin, and clothing throughout the project.
Good
Tools and Materials
For this guide, we’re using TotalBoat TotalFair, a two-part epoxy fairing compound with an easy 1:1 mix ratio. It spreads smoothly, cures quickly, and sands easily on properly prepared fiberglass, wood, aluminum, and steel.
Keep in mind that TotalFair won't stick to one-component paints or primers, so any existing coating needs to be epoxy, polyester, or a two-component urethane in good condition. And never apply gelcoat directly over cured TotalFair, since it won't cure properly. Overcoat first with an epoxy barrier coat or epoxy surfacing primer before gelcoating.
- Nitrile gloves
- Half-mask respirator rated for paint and sanding dust
- Epoxy spreaders or a putty knife
- Acetone or denatured alcohol
- Sanding discs, 80-grit or coarser
- Wooden stir sticks
- Clean rags
- Epoxy fairing compound
- Etch wash (for bare aluminum surfaces)

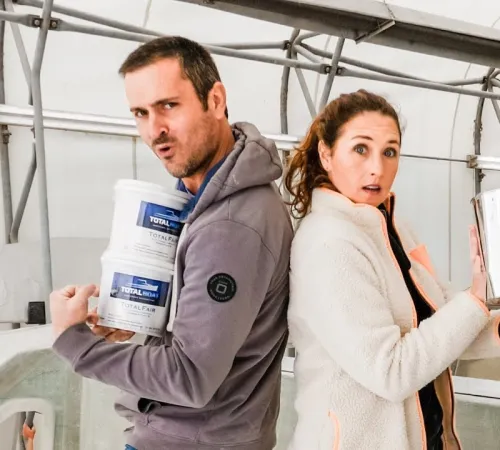
Sailing Sasa getting ready to tackle a boat repair with epoxy fairing compound
Complete Guide on How to Use Epoxy Fairing Compound
Surface Preparation
How you prep the surface depends on what you're fairing.
Fiberglass or wood: Wipe the surface with a clean rag dampened with acetone or denatured alcohol to remove contaminants. Sand with 80-grit or coarser sandpaper, then wipe again to remove residue. If you're working with an oily hardwood, give it an acetone wipe before applying fairing compound.
Steel: Clean the surface with acetone or denatured alcohol, then thoroughly grind or sandblast it. Remove all sanding or blasting residue by sweeping, brushing, or vacuuming, then finish with another acetone or alcohol wipe.
Aluminum: Sand or blast bare aluminum down to bright, shiny metal, then remove residue. Applying an aluminum etch wash to the bare surface is strongly recommended for adhesion. After rinsing, dry the surface completely and apply fairing compound within an hour to prevent oxidation from setting back in.
Previously primed or painted surfaces: Wipe with acetone or denatured alcohol. If any coating is peeling, a paint and varnish remover can help clear it first. Sand with 80-grit or coarser sandpaper, remove residue, then wipe clean again.
Sanding tip: If you're filling a dent or gouge, sand a little beyond its edges. You'll be feathering the fairing compound past the border of the void, and this gives it a clean, properly adhered edge to bond to.
Mixing the Compound
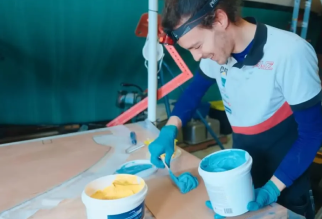
Start with clean tools and a clean mixing surface. Combine the resin and hardener at a 1:1 ratio by volume. Most epoxy fairing compounds use color-coded components, so you can see when the mix is complete by watching for a uniform color, with no streaks of the original colors remaining. Mix thoroughly for three to five minutes.
Adding extra hardener will not speed up the cure. It will only compromise the cure quality, so stick to the ratio.
Use separate sticks to dispense the resin and hardener to prevent cross-contamination, and mix only what you can apply within the working time. Working time depends heavily on temperature. At 90°F you're looking at roughly 15 - 20 minutes, at 70°F around 30 minutes, and at 50°F closer to 45 - 60 minutes. The compound also spreads much more easily once temperatures rise above 60°F.
While mixing, avoid overworking it. Mixing too vigorously can whip air into the compound, which leads to bubbles and voids that show up as a pinholes once you sand.


Applying the Fairing Compound
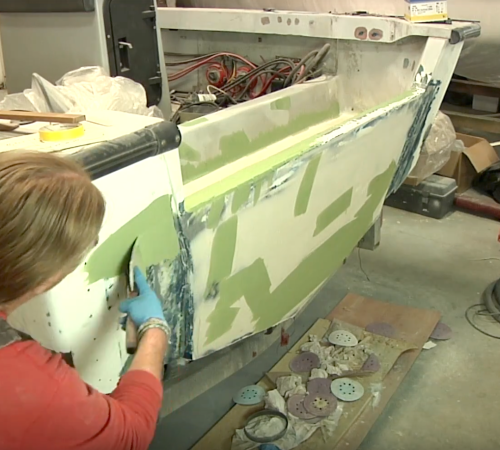
Make sure the surface is clean and dry, then apply the compound with a putty knife, trowel, or flexible spreader. Keep each application to a maximum depth of roughly ⅜ to ½ inch.
For larger gouges that need a full-depth fill, aim for a 6:1 width-to-depth ratio. If a void is narrower than that, bevel out the damaged area first to bring it closer to that ratio. For anything deeper and narrower that can't be beveled out, build the fill up in stages instead of trying to fill it all at once.
If you're repairing a ding or a gouge, spread the compound out to a thin, feathered edge that extends a little past the border of the damage. It's much easier to sand away a little excess than to go back and reapply because you didn't cover the area thoroughly the first time.
Voids deeper than about ¾ inch will likely need a second application once the first layer cures. If that's the case, let the first layer set for a couple of hours, then sand and clean the surface to remove any residue before mixing up a fresh batch and repeating the application process.

Sanding
Sand the compound as soon as it's cured enough to work with. If cured fairing compound sits for more than a couple of days, it gets noticeably harder to sand, so don't let it linger.
Sanding time depends on temperature. At 80°F, expect it to be ready in about 3 hours. At 70°F, plan on 6 to 8 hours. At 50°F, give it around 12 hours before sanding.
Even non-blushing epoxy fairing compounds can occasionally develop a light waxy film called amine blush during cure. Before sanding or overcoating, wash the cured surface with water and a mild soap, then let it dry completely just to be safe.

Overcoating
Once sanded, you can overcoat the fairing compound with paint, primer, epoxy primer, or barrier coat, following the manufacturer's directions for whichever product you're using.
One note worth repeating: never apply gelcoat directly over fairing compound. It won't cure properly against it. Overcoat first with an epoxy barrier coat or epoxy surfacing primer, then apply gelcoat over that.
Frequently Asked Questions
Why didn't my fairing compound cure properly?
A few things can cause this. An improper mix ratio is a common culprit, so double-check that you're using equal parts resin and hardener by volume. Incomplete mixing is another, since the components need several minutes of thorough combining to fully activate.
Cold working conditions, below 50°F, can also slow or interfere with the cure. And any contamination on the surface or in your mixing tools can throw things off too. If any of these occur, sand or scrape away the affected material, throughlyt prep the surface, and reapply.
Why isn't my cured fairing compound adhering properly?
This usually comes down to an incompatible substrate or inadequate surface prep. Make sure whatever you're bonding to is compatible with epoxy, and that the surface was thoroughly cleaned, sanded, and dewaxed before you applied the compound. If adhesion has failed, sand or scrape it off and reapply after correcting the prep.
How long does epoxy fairing compound need to cure before I can prime or paint it?
Under normal conditions, give it at least 48 hours to cure before priming or painting. Sand the cured surface and prep it according to your primer or paint's directions before overcoating.
Can I apply epoxy fairing compound over a one-part paint or primer?
No. Epoxy fairing compound needs a two-component coating to bond to properly, such as an existing epoxy, polyester, or two-part urethane finish in good condition. It won't adhere reliably to one-part paints or primers.
Can I use epoxy fairing compound below the waterline?
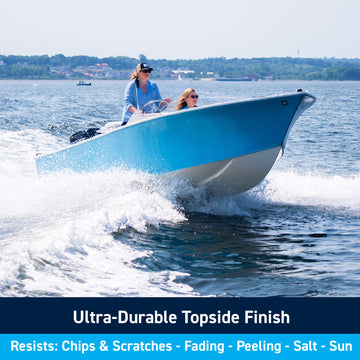
Yes. A quality epoxy fairing compound is fully waterproof and suitable for both above and below the waterline applications, once properly cured, sanded, and overcoated with an appropriate barrier coat or antifouling system.
Can I fair a lead keel with epoxy fairing compound?
Yes, with proper surface prep. Lead needs to be thoroughly cleaned and sanded to give the compound something to grip, since lead's smooth, dense surface doesn't offer much natural texture for adhesion.
Do I need to worry about amine blush?
Even with a non-blushing epoxy product, there's a small chance of encountering amine blush, a waxy byproduct of the curing process. If you notice it, wash the cured surface with water and mild soap, then let it dry fully before sanding or overcoating.
What's the difference between fairing and repairing a hole or crack?
Fairing is for cosmetic and shallow-depth work, like leveling dents, gouges, and uneven surfaces. If you're dealing with a hole that goes all the way through the surface or a structural crack, that calls for a proper fiberglass repair using resin and cloth rather than fairing compound alone.
Ready to Get Started?
Have questions about your specific fairing project? Our technical support team is here to help. Give us a call or reach out through our website, and we'll help you choose the right products and approach for your boat.