How to Make an Epoxy Resin Marble Effect
Transform any countertop, bar top, or table into a stunning faux marble surface — no stone mason required.
That tired kitchen countertop, home bar, or coffee table? It's about 48 hours away from looking like polished Italian marble. And the price tag? A fraction of the real thing.
In this guide, we'll walk you through everything you need to know — from choosing the right epoxy to pulling off realistic veining on your first try. We'll also cover the most common mistakes beginners make (and how to avoid them entirely).
Why Epoxy Resin for a Marble Effect?
Real marble is gorgeous. It's also heavy, expensive, porous, and notoriously difficult to work with. Epoxy resin gives you the look of Italian Carrara marble, or dramatic black Nero Marquina, with a surface that's actually more durable and easier to maintain than the stone it imitates.
Here's why so many DIYers and professionals choose epoxy:
Cost savings are significant. Natural marble countertops can run $60–$200 per square foot installed. A faux marble epoxy finish costs a fraction of that, even with premium materials.
Epoxy is tougher than stone. Once cured, a quality epoxy finish resists scratches, stains, moisture, and daily wear in ways that unsealed marble simply can't match. It won't need resealing every year.
It works on almost any surface. Wood, laminate, Formica, Corian, ceramic tile, butcher block, cultured marble, and even old granite – table top epoxy formulas bond well to all of them. You don't need to rip out and replace; you can pour right over a prepared existing surface.
You control the design. Real marble comes in what nature provides. With epoxy resin marble effect techniques, you choose the base color, the vein colors, the vein thickness, and the finish. Want white Carrara? Black and gold? Seafoam green with silver veins? All of it is possible.
Choosing the Right Epoxy for a Marble Effect
Not all epoxies behave the same way, and the marble effect relies on a resin that stays workable long enough for you to create the veining before it sets. It also needs to be crystal clear so your pigment colors come through true.
Table top epoxies or any coating epoxy with a thicker viscosity are the right products for this project. The formulas are often a simple 1:1 mix ratio, they self-level to a smooth, glassy finish, and have the clarity needed to make faux marble look convincing. It's also forgiving for first-timers — you have enough open time to work in your veining before the epoxy begins to gel.
Make things even easier with the ready-to-go kits for white marble effect countertops or black marble effect countertops. These kits from TotalBoat include the epoxy, pigments, mixing cups, stir sticks, and a heat gun. They're designed specifically for this technique and take the guesswork out of sourcing materials separately.
What You'll Need
Before you begin, gather everything and lay it out within arm's reach. Once the epoxy is mixed, the clock is ticking.
Epoxy & Pigments
- Epoxy (resin + hardener)
- Opaque liquid pigment (for the base)
- Mica powder pigments in your chosen vein colors (for veining)
- Optional: metallic or pearl mica powder for added depth and sparkle
Tools & Supplies
- Mixing cups (at least 4–6 disposable plastic cups)
- Wooden stir sticks
- Plastic spreader or notched squeegee
- Heat gun
- Chip brush or dry brush (for feathering veins)
- Nitrile gloves
- Painters tape
- Plastic drop cloths or sheeting
- Isopropyl alcohol or acetone (for surface prep)
- 80–220 grit sandpaper (for surface prep)
- 320–400 grit sandpaper (for between coats, if needed)
- Level

Surface Preparation
The best epoxy marble effect in the world won't save a poorly prepped surface. Epoxy bonds to what's underneath it, so take the time to do this right.
Level Your Surface
Use a level and adjust your workpiece as needed. Epoxy is self-leveling, which is a feature but only if the surface itself is level. A surface that's even slightly off will cause the epoxy to pool on one side and thin out on the other.
Clean Thoroughly
Remove all dust, grease, soap residue, and debris. Wipe down the entire surface with a clean rag dampened with isopropyl alcohol or acetone. Don't skip this as contaminants are the number one cause of adhesion failures and fisheyes.
If you're working over an existing countertop with latex caulk at the seams or backsplash, remove it. Latex repels epoxy. Replace it with acrylic caulk instead.
Sand the Surface
For bare or raw wood, start with 80 grit to open the grain, then follow up with 120 grit to smooth out the scratches left behind. Previously finished or painted wood only needs a single pass with 120 grit since you're scuffing the existing finish, not removing material. Always wipe away sanding dust with a tack cloth or an alcohol-dampened rag before moving on.
For laminate, Formica, Corian, or tile surfaces, 120–150 grit is all you need. It’s just enough to dull the gloss and give the epoxy something to grip. If you're working over an old epoxy, polyurethane, or other hard coating, step up to 180–220 grit to knock back the shine without cutting through to the substrate below.
Round Over Sharp Edges
Epoxy doesn't bond well to sharp 90° corners — it will pull away as it cures. If your countertop or bar top has square edges, run a 1/8" to 1/4" round-over bit along the front edge with a router. This also produces a cleaner, more professional-looking drip edge.
Mask and Protect
Apply painter's tape along the undersides of edges and any surfaces you want to protect. Lay plastic sheeting on the floor and over cabinets below — epoxy drips are nearly impossible to remove once cured.

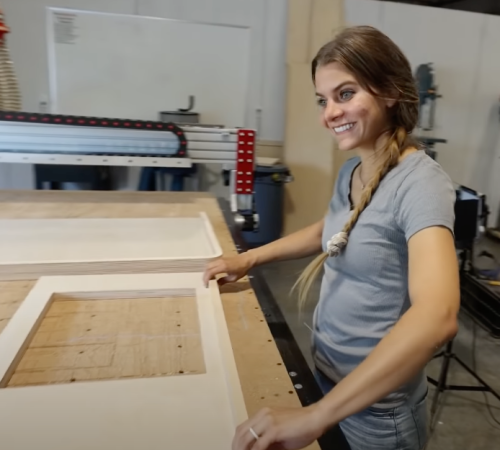
Epoxy marble side table made with Epoxy White Marble Effect Countertop Kit
Step-by-Step: How to Create the Epoxy Resin Marble Effect
Step 1: Apply a Seal Coat (Recommended for Porous Surfaces)
If your countertops have cracks and surface damage or if you're working over bare wood or any porous material, start with a thin seal coat. This helps prevent air trapped in the substrate from rising up through your flood coat and creating bubbles. This is especially important for surfaces with deep voids or significant surface damage.
Mix only the necessary amount of epoxy to cover the surface at a 1/16" layer and add your chosen opaque pigment, a few drops at a time, until the mixture reaches a solid, even color. Traditional marble bases are typically white or black, but this will depend on the style you're going for. Spread across the entire surface using a plastic spreader. Don't worry about total opacity in this step — any see-through will actually enhance the marbling effect.
Allow the seal coat to cure to a rock-hard solid, then sand with 80–120 grit sandpaper and wipe clean with a clean rag before moving on.
Step 2: Mix Your Epoxy Batches
This is where the real prep work happens. You'll need to mix and separate your epoxy into several cups before you start pouring. Here's how to set up:
- Large batch — color flood coat: Mix enough epoxy to cover your surface at approximately 1/8" depth. Add pigment dispersion until you reach a solid color. For a touch of sparkle, add a small amount of silver pearl mica at this stage.
- Small batch — light marbling: Mix a small amount of clear epoxy and stir in light mica powder until fully incorporated.
- Small batch — dark veins: Same as above with a darker mica powder.
- Small batch — clear buffer: Keep a small cup of clear, unpigmented mixed epoxy on hand. This is used to separate colors and prevent the light marbling and dark veinsfrom bleeding into each other uncontrollably.
Pro Tip: Use the two-cup method for thorough mixing. Stir each batch in one cup for 2–3 minutes, scraping sides and bottom, then transfer to a second cup and stir again. Incomplete mixing causes soft spots and tacky patches in your cured surface.
How much epoxy do you need? Use this epoxy calculator to determine volume. The formula is: Length × Width × Depth = volume in cubic inches. One quart of mixed epoxy covers approximately 57.75 cubic inches.

Step 3: Pour and Spread the Flood Coat
Pour the colored epoxy across the surface in a loose "S" pattern, then use your plastic spreader to distribute it evenly to approximately 1/8" thickness. Work from the center outward, pushing the epoxy to all edges. Move efficiently and be aware of your working time (depending on the type of epoxy you are using) before the epoxy begins to thicken.
Step 4: Add Light Marbling
While the flood coat is still wet, take your cup of light epoxy and drizzle thin, irregular lines across the surface. Keep the lines moving in a roughly diagonal direction — real marble veins don't run parallel or at 90-degree angles. Diagonal veining looks far more natural.
Use a clean wooden stir stick to guide and refine the lines as you pour. Then, using gloved fingertips or a dry chip brush, tap gently along the lines to create a soft, feathered edge. The goal is a gradual fade from one color to another, not a hard line.
Step 5: Add Dark Veins
Before applying dark colors, drizzle a thin line of your clear buffer epoxy exactly where you want the vein to run. This creates a barrier that keeps the vein defined and prevents it from bleeding too aggressively into the lighter marbling.
Apply the dark epoxy on top of the clear buffer using a stir stick. Aim for thinner lines than the lighter lines— in real marble, the darkest veins are typically the most defined and the narrowest.
Pro Tip: Have some examples of natural marble on hand to reference when drizzling your grey veins.

Step 6: Use the Heat Gun to Blend and Refine
This is the step that transforms your work into a more refined look. Hold your heat gun about 2–4”above the surface and move it in slow, sweeping passes over the veined areas. The heat does two things simultaneously: it pops any surface air bubbles, and it causes the pigments to shift and blend in organic ways that help create that authentic, natural look.
Pro Tip: Keep the heat gun moving at all times. Holding it in one spot will scorch the epoxy and discolor your surface permanently. The right technique is low-and-slow for sweeping passes.
You can also tilt the surface slightly to encourage the epoxy to flow in a particular direction, which creates elongated, natural-looking vein patterns.

Step 7: Fine-Tune the Design
Step back and evaluate. This is your window to add more light feathering, deepen a vein with an additional drizzle, or dab a little white over an area that feels too busy. You can also use a feather (yes, a real feather) or the pointed tip of a chip brush to draw hairline veins with a small amount of dark pigment.
Metallic accents: For a more luxurious finish, this is the moment to lightly dust or brush a small amount of gold, copper, or silver pearl mica powder into select vein areas. Wipe it on loosely with a dry brush — less is more.
Cover the surface with cardboard boxes or close the room to protect it from dust while it cures.
Step 8: Apply an Optional Clear Top Coat
Once the marbled layer is tack-free (typically 4–8 hours), you can apply a final clear coat of epoxy with no pigment added. This adds depth and makes the marble pattern appear to sit beneath a layer of glass — exactly the look that makes high-end marble countertops so distinctive. Opt for an epoxy that has UV stability for added protection, especially for any projects that will get UV exposure.
Lightly sand the cured marbled surface with 320–400 grit sandpaper if needed to flatten any imperfections, wipe clean, then mix and pour your clear coat at 1/8" depth. Spread it evenly, use the heat gun to pop bubbles, and protect from dust while it cures.
Step 9: Full Cure and Finishing
Allow 5–7 days for the epoxy to reach full hardness. At the 72-hour mark it will be hard to the touch, but the full chemical cure takes longer. During this window, avoid placing heavy or sharp objects on the surface. It’s also the best time to remove the painter’s tape carefully while the resin is slightly firm but still flexible. Pull at a low angle to maintain smooth edges and avoid damaging your new epoxy countertop.
Once fully cured:
- Sand and buff any drips from the underside or edges
- Remove the plastic sheeting and clean up
Safety note: Always wear nitrile gloves and work in a well-ventilated area when working with epoxy. Avoid skin contact and wear eye protection when sanding cured epoxy and use a proper respirator

Marble Style Variations to Try
Once you've got the basic technique down, the real fun begins. Here are some popular marble styles and the pigment combinations that achieve them:
Classic White Carrara — White base, light gray feathering, dark gray veins. The most popular and forgiving style for beginners.
Black Marble (Nero Marquina) — Black base with white and gold veining.
Green Marble (Verde Guatemala) — Deep forest green base with white and gold veining. Great for feature tables and looks striking on bar tops.
Gold Marble — Off-white or cream base with gold and bronze metallic veining. Elegant for dining tables and bathroom vanities.
Gray Marble — Cool mid-gray base with white and charcoal veins. Very on-trend for modern kitchens and minimalist interiors.
Pro Tip: Always practice on smaller scrap pieces before tackling your final project.

Black epoxy marble side table made with Epoxy Black Marble Effect Countertop Kits from TotalBoat
Common Mistakes (And How to Avoid Them)
Not leveling the surface first. Epoxy follows gravity. Even a slight tilt will cause uneven thickness and pooling. Always level before you pour.
Mixing epoxy incorrectly. An off-ratio mix or under-mixed batch will leave your surface tacky, soft, or permanently sticky. Measure precisely by volume, use the two-cup method, and stir for the full 2–3 minutes per cup.
Overworking the veins. It's tempting to keep blending, but the more you manipulate the epoxy, the muddier the colors become. Work quickly and decisively — less touching, more looking.
Skipping the seal coat on wood. Wood off-gasses air as epoxy begins to cure. Without a seal coat, those air bubbles rise straight up through your beautiful marble design.
Ignoring ambient temperature. Epoxy is temperature-sensitive. Cold temps slow curing and can cause cloudiness. Heat accelerates curing and shortens your working time. The ideal working temperature is between 70–80°F (21–27°C).
Removing tape too late. Pull your painter's tape before the epoxy fully cures — while it's still firm but slightly flexible — to avoid pulling up hardened resin and creating a jagged edge.
Commonly Asked Questions
How long does the epoxy marble effect last? A properly applied epoxy finish on a countertop or bar top will last 7+ years with normal use before needing any attention. Because it starts as a liquid and cures to a solid, there are no grout lines, seams, or porous surfaces to worry about.
Can I use this technique on a bar top? Absolutely — bar tops are one of the most popular applications for faux marble epoxy resin. The durable, waterproof, alcohol-resistant surface is a natural fit.
What if I get bubbles? Most surface bubbles can be eliminated with a heat gun pass after pouring. For persistent bubbles during the seal coat stage a gentle pass with a torch also works. Always make sure you’re working in proper temps and pre-warm your epoxy if it’s been stored in cooler temperatures to help minimize bubbles during the mixing process.
Can I make the marble effect on a vertical surface? Marble effect epoxy is primarily designed for horizontal surfaces. Epoxy will run on vertical applications, so it’s best to work horizontally and then attach your fully cured piece to a vertical surface.
Is the surface food-safe when cured? Always check your epoxies safety data. Some formulas once fully cured are food-contact safe for incidental contact, making it suitable for kitchen countertops, bar tops, and serving surfaces.