


It can seem a little tricky at first, but casting epoxy resin just means pouring it into a mold so it holds its shape while it cures. Whether you're casting a river table or a pair of earrings, the basic steps are the same:
- Measure the resin and hardener at the specified mix ratio.
- Stir to mix the components thoroughly.
- Add pigment, if desired.
- Pour it into a clean, dry mold and let it cure.
To make the process easier, the best thing you can do before you start measuring and pouring is to gather all your materials, including your resin components, resin casting molds, colorants, measuring cups and mixing tools. In this post, we'll explain some simple tips that'll make your next project a roaring, pouring success!
Select the Resin That's Suitable for Your Casting Project
 Beautiful tea light holder made of wood and TotalBoat Fathom epoxy, by @createdbyjenni
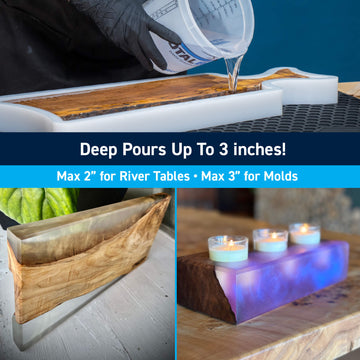
There are lots of different epoxies for casting. Some let you pour ¼" deep per layer, requiring that you pour multiple layers in order to reach the depth you want. Others let your pour 3" deep (or more) per layer. Choose the appropriate resin system for your application, and you'll get the best results.
For example, if you pour a single layer 3" deep using a clear casting resin that should only be poured ¼" deep per layer, you'll have a hot, smoking mess on your hands that can melt your mold and damage your work surface. On the other hand, if you pour a layer ¼" deep using a deep pour epoxy that has to be poured a minimum of 1" deep per layer, you'll have a sticky mess that takes an eternity to cure.
Here are a few things to consider when choosing an epoxy for your casting application:
- How deep do you want your finished piece to be?
- How clear do you want the finished piece to be?
- Do you want to cure your piece in a pressure pot?
- Do you need an epoxy system that's good for turning?
- Do you need a product that gives you more working time?
- Does the cure time between successive pours suit your time frame?
To help you choose the best resin for your application, manufacturers typically put the pour depth and other important application information on the product label.
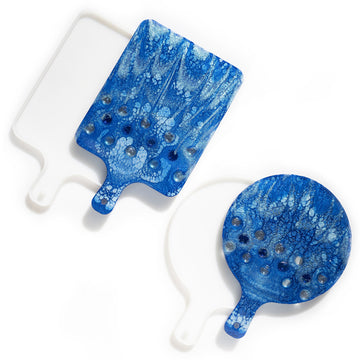
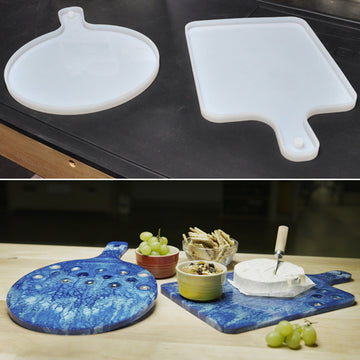
Select the Right Molds for Casting Epoxy Resin

Flexible silicone molds for epoxy are ideal because they make it easy to remove your cured piece from the mold. They're widely available in almost every imaginable shape for creating a dizzying array of decorative cast objects – coasters, charcuterie boards, duck calls, geodes, jewelry, phone cases, planters, serving boards, snowflakes, soap dishes, tea light holders, trinket trays – you name it, there's probably a mold for it!
If you want your finished piece to have a shiny surface when you remove it from the mold, choose a mold that has a shiny surface. If you want a matte finish, choose a mold with a dull surface.
Making Custom Resin Casting Molds
If there's no mold available that fits the shape and depth you want, you can build your own custom mold out of melamine or HDPE (High Density Polyethylene. To prevent leaks, be sure to seal the sides with silicone or use a hot glue gun.
 TotalBoat Fathom cast into a custom mold, by TotalBoat Ambasssador, John Malecki
To make it easier to remove your piece from the mold, use sheathing tape, packing tape, or mold release tape to line the inside of a custom-made mold to make de-molding easier.
Prepare Your Mold

Stevie Hull, of Resurgent Designs LLC, applies mold release spray to a custom mold before casting
Applying a thin coat of mold release agent to your clean, dry mold creates a barrier between the epoxy casting and the mold surface to make separation easier after the piece has cured. Not only does mold release make de-molding easier, it also tends to prolong the life of the mold – even silicone molds.
Mold release products come in different forms, such as aerosol spray and paste wax. The spray is best for molds that have a lot of fine detail because it can coat every nook and cranny; the wax is best for flat molds.
We mentioned earlier that a mold with a shiny surface creates a shiny finish on the cured piece, and a mold with a matte surface creates a matte finish. In other words, the casting will reflect the image and texture of the mold surface. If you apply a mold release agent, the casting will reflect the finish of the mold release product. So, for example, if you want a glossy surface, choose a release agent that will leave a glossy surface.

Applying mold release wax with a clean rag
Use Tints That are Compatible
Epoxy won't cure properly if it's combined with tints that are not suitable. Safe choices include mica powders, universal tints, pigment dispersions & alcohol inks. Be sure to follow the pigment manufacturer's recommended percentages – adding too much tint can cause the cure to fail. Remember that a little goes a long way!
Prevent & Pop Air Bubbles
Here are some helpful tips to prevent bubbles from making a mess of your masterpiece – before and after you pour.
 Tips for minimizing & removing air bubbles from your casting
Tip: Stir epoxy components slowly
You can't avoid bubbles when mixing resin and hardener, but you can help keep the bubbles to a minimum by stirring the components slowly. If you'll be adding colorants after mixing the components thoroughly, stir the pigments in slowly.

You can't avoid bubbles when mixing resin and hardener, but you can help keep the bubbles to a minimum by stirring the components slowly. If you'll be adding colorants after mixing the components thoroughly, stir the pigments in slowly.
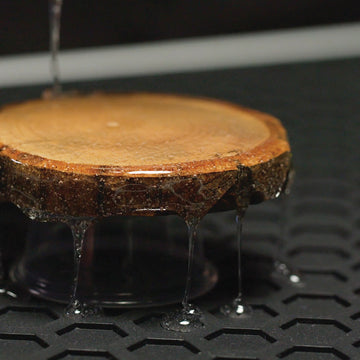
Tip: Seal porous objects or paper objects before embedding or encapsulating

In the examples above, porous wood and live edges are sealed with a thin coat of epoxy before being placed in the mold
Those unique, glossy table tops, bar tops countertops, serving trays and wall art that have interesting objects encased below the surface take a little care to create, but the results are so worth it!

Serving tray with encapsulated fall leaves, by @thomaswoodandlumber

Artistic embedded table top, by TotalBoat Ambassador @createdbyjenni
Why should you seal porous objects before encapsulating? If you put a porous object in epoxy without sealing it first, the air trapped in the object will form tiny air bubbles, which will escape in a continuous stream, becoming trapped. This release of air is known as outgassing or offgassing. Porous objects include such items as burl wood, live edge wood slabs, dried flowers, sea shells, and coral.
Here are a couple of ways to prevent outgassing from ruining your project:
- Seal any porous objects with a thin coat of mixed epoxy. Apply it with a brush and allow the seal coat to cure before applying a flood coat.
- Seal a porous object by dipping it in mixed epoxy.
- To stabilize a piece of wood that's spongy or punky, such as a tree burl, place it in a container, fill the container with a stabilizing resin, then place the container in a vacuum chamber. The vacuum pressure removes the air in the wood and replaces it with the stabilizing resin, sealing it.
If you plan to embed photos or paper mementos, such as wedding invitations, protect them by sealing with an appropriate clear sealer, such as ModPodge®, or a thin coat of mixed epoxy. It's a good idea to do a small test first, before trying this with the actual photos or paper objects you'll be encapsulating.

Sealing paper mementos before embedding
IMPORTANT! You don't want to use a deep pour epoxy for sealing or stabilizing because in a thin layer, it won't set up properly. A low-viscosity epoxy is ideal for sealing.
Tip: Pour mixed epoxy into the mold s-l-o-w-l-y

Pouring slowly minimizes the formation of bubbles. This goes for any size project – whether you're filling a small jewelry mold or a large river table mold. Pouring quickly will agitate the mixture, forming excessive bubbles that can remain trapped beneath the surface as the epoxy sets up.
Tip: Use a vacuum chamber to remove bubbles in your casting (optional)

If you have access to a vacuum chamber, you can use it to degas your mixed epoxy and remove bubbles before pouring the epoxy into your mold.
A vacuum chamber removes bubbles by removing air pressure. To force air bubbles to the surface where they'll pop, use a high vacuum pressure setting.
 Removing bubbles in a vacuum chamber (image by @outofthewoodwork_tommy)
You can also use a vacuum chamber to remove bubbles from your casting after it's been poured, and before curing. Keep in mind that a vacuum chamber is only used to remove air bubbles from resin – not to cure it.
Tip: Use a heat gun or small torch to pop bubbles
After pouring, small bubbles will rise to the surface and pop. To expedite the removal of air bubbles, wave a heat gun (on its lowest setting) or a small hand-held torch back and forth quickly, and for a short time, a couple of inches above the surface. It's important to keep it moving to avoid scorching the surface.
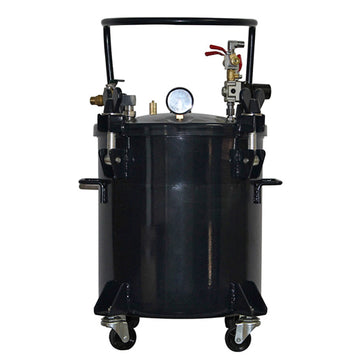
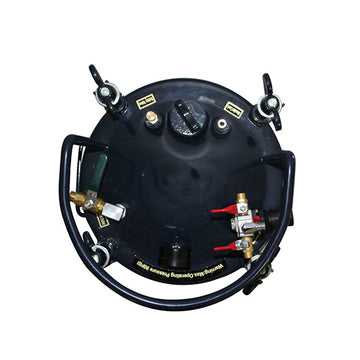
Curing Your Casting in a Pressure Pot (Optional)
Whoever said money can't buy happiness, didn't own a pressure pot. It'll practically ensure no visible bubbles in your castings. Just place your filled mold in it to cure. Under pressure, any air bubbles will be compressed so they're no longer visible to the naked eye.

For curing TotalBoat epoxies, we recommend slowly pressurizing to 45-50 psi. Once your casting has cured, release the pressure and remove it from the pressure pot.
Still have questions about when to use a vacuum chamber and when to use a pressure pot? Take a look at this video for more info.
Ensure the Best Possible Finish on Your Castings
Sometimes, no matter how careful you are, you might still see a bubble or some other imperfection on the surface of the cured piece. It could also be that the surface dried to a matte finish and you want it to be glossy. Here are a few tips for fixing these issues. Be sure to protect yourself and your work surface when you're working with, grinding, or sanding epoxy.
Tips for getting a beautiful, clear, smooth finish
Tip: Remove minor surface imperfections

Take the cured piece out of the mold, sand lightly, remove all sanding residue, then apply a flood coat of epoxy. This final coat will cure crystal clear and free of imperfections. To make it easier to remove dried drips, apply clean-release masking tape to the underside of the cured piece before applying the flood coat. This video shows how to remove the drips cleanly and easily.
Tip: Repair deeper surface imperfections

If the blemish goes deeper than the surface, such as a large bubble that popped and formed a small recess (crater!) in the cured surface, use a small rotary tool to grind it out, as shown here.

Grinding out a blemish
After grinding, remove the residue, then fill the indentation with mixed epoxy to level it. Once cured, sand the surface, remove sanding residue, and apply a flood coat of epoxy. The final coat will cure clear and smooth – with no signs of the imperfection.
 Stevie Hull's cool finished piece with astroturf and football cards encased in TotalBoat Table Top Epoxy
Tip: Buff and polish a dull surface to a high shine
After removing your cured piece from the mold, you can buff and polish for a high-gloss finish. It's easy to do with TotalBoat TotalBuff and TotalBoat TotalShine compounds.
For a start-to-finish look at how to embed objects in a casting and fix common problems in the cured finish, watch this in-depth video from TotalBoat Ambassador and maker extraordinaire, Stevie Hull.
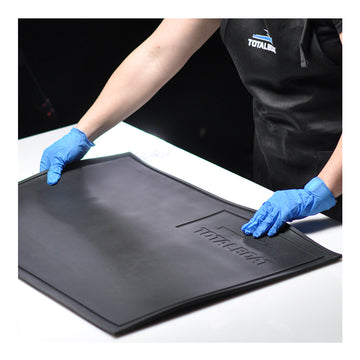
If you have any questions at all about casting epoxy or resin molding, call our top-notch TotalBoat Tech Support Team at 800-497-0010 for helpful answers or guidance. When working with epoxy, always protect yourself with proper personal protective equipment, and prevent damage to your work surface by laying down a protective silicone mat or plastic sheeting before you start measuring and mixing.
For related topics, here's more info on choosing the right epoxy for your project, using a vacuum chamber vs. using a pressure pot, figuring out how much epoxy you need, and recommended pour depths per layer for TotalBoat epoxy systems.
Please share your creative casting projects by tagging us on Instagram and Facebook using @totalboat, #totalboat and #totalboatepoxy – we can’t wait to see what you're making!


Clear High Performance Epoxy Kits
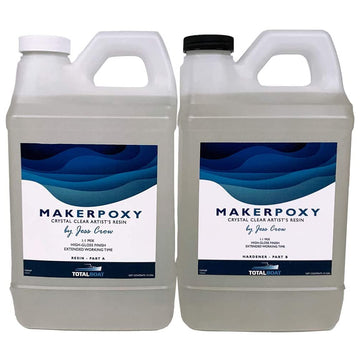

MakerPoxy Crystal Clear Artist’s Resin by Jess Crow
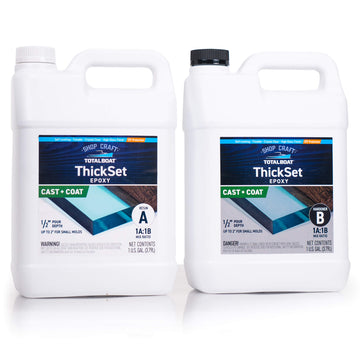

ThickSet Cast + Coat Deep Pour Epoxy Resin Kits
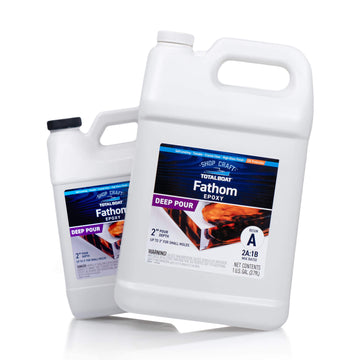
Fathom Deep Pour Epoxy Resin Kits


5 Gallon Steel Pressure Pot for Epoxy Resin Casting
Charcuterie Board Silicone Molds


1 comment
thank you very much for in depth tutorial I now have the confidence to proceed forward with my project.