How to Make an Epoxy Wave
A Beginners Guide for Creating Resin Wave Art
There's a meditative beauty to the ocean - the way a wave builds, curls, and crashes in one fluid motion, only to repeat the cycle. What if we told you you can capture that same meditative feeling in epoxy resin? Learning how to make epoxy ocean waves is one of the most rewarding projects in resin art, and once you understand the fundamentals, the results can be genuinely breathtaking.
This guide will walk you through the whole process, from picking the right resin and mixing your ocean colors, to pouring, sculpting, and finishing a wave you'll actually be proud of. You can be brand new to resin or have done a few pours, either way you’re in the right place if you want to level up your resin art skills.

What Exactly Is an Epoxy Wave?
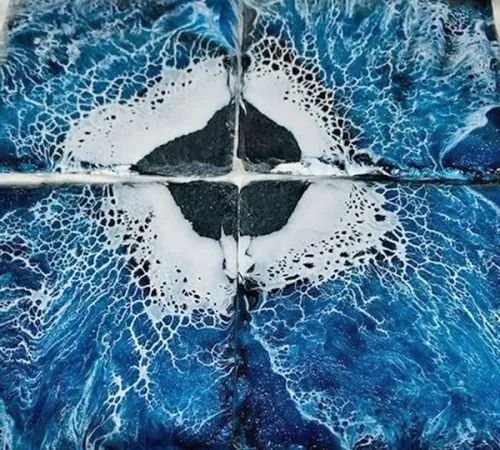
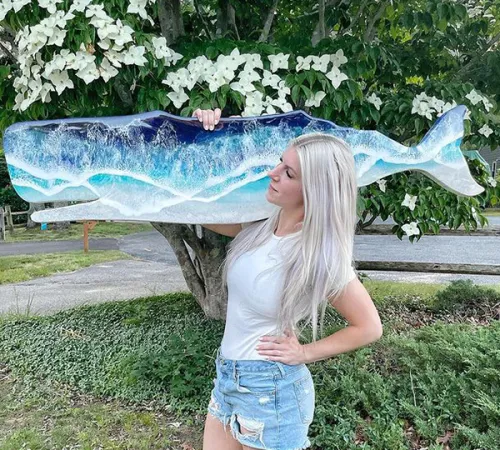
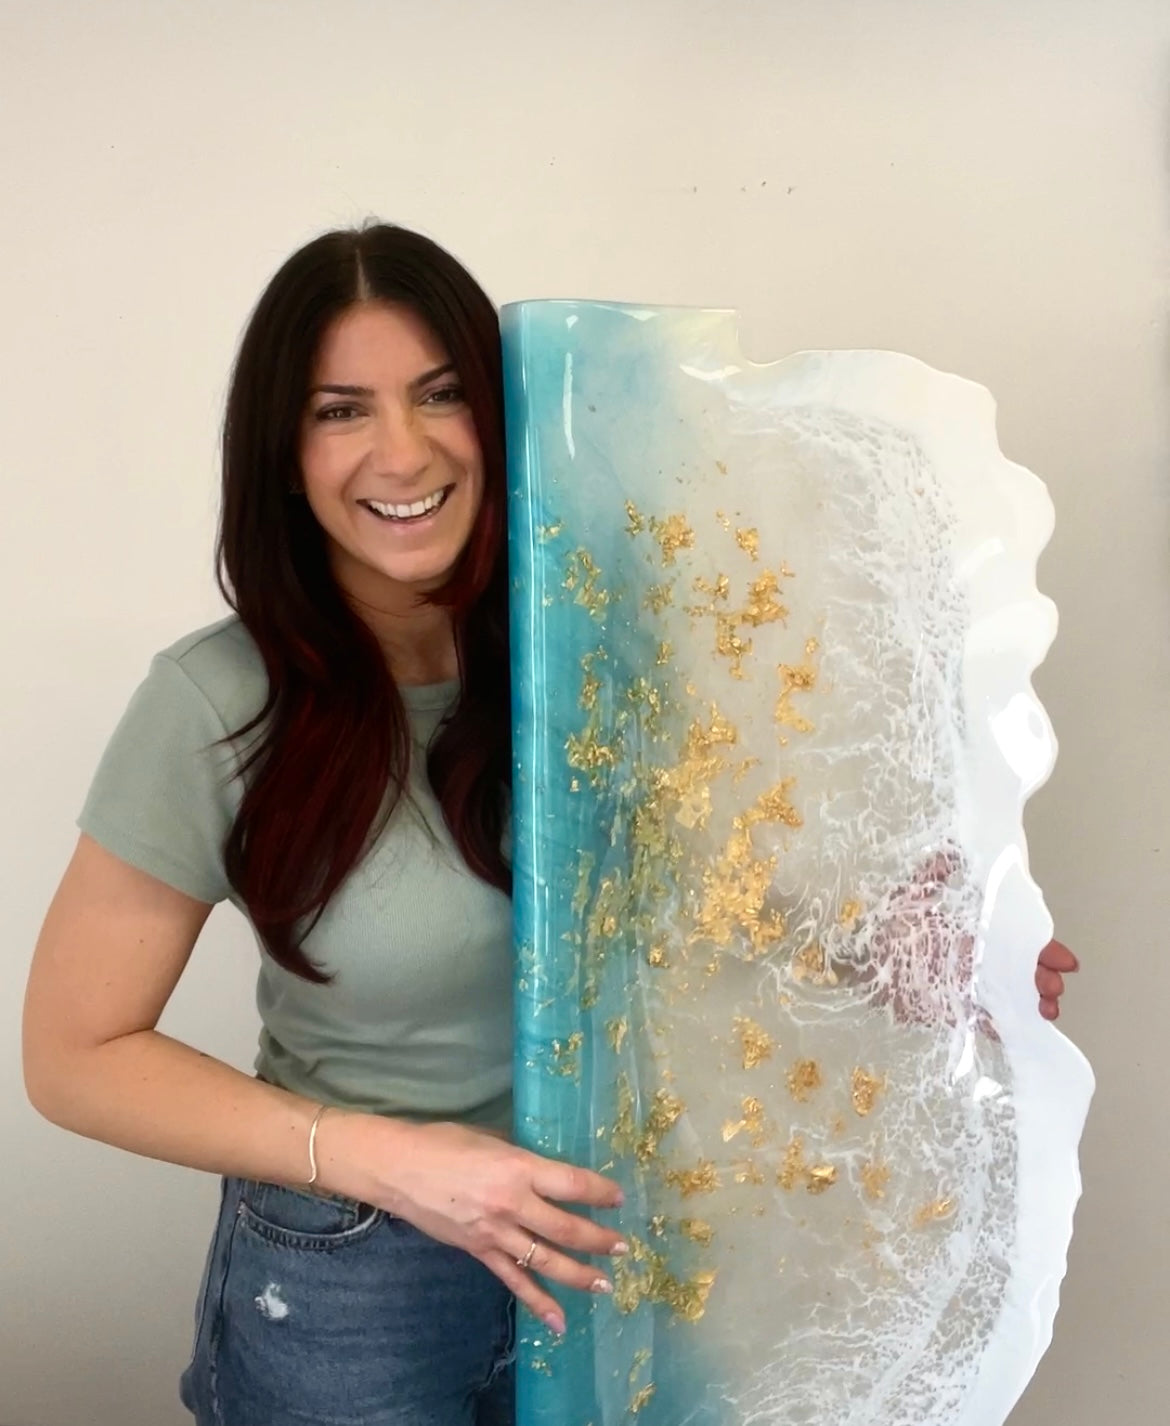
An epoxy wave is a type of resin art that mimics the look of an ocean wave — usually featuring deep translucent blues and greens, a layered depth effect, and a white, foamy crest that seems to curl and break in mid-motion. The finished piece can stand alone as wall art, be crafted onto a wood slab or board (a popular technique for charcuterie boards), or added on to any project for beachy vibes.
When you layer colors correctly, you can create the illusion of actual water, which is something that's hard to achieve in paint or other art mediums.
Knowing how to make waves in epoxy is a skill that comes together quickly with a little practice and understanding a few key principles: viscosity, working time, layering, and movement. We'll cover all of them.
Choosing the Right Resin: Why It Matters More Than You Think
This is the single most important decision you'll make for this project. Not every epoxy resin will behave the same way when you're trying to sculpt and shape a wave crest, and using the wrong one will make the process frustrating.
Look for a Thicker Viscosity
When you're learning how to make ocean waves with epoxy resin, viscosity — how thick or runny the resin is — matters enormously. Thin, low-viscosity resins (common in jewelry casting or thin coating applications) will have a harder time creating lacing in your waves. You want a resin with a medium-to-thick viscosity that has some body to it, so when you pull or build the wave crest, it stays put rather than blending out too much, looking cloudy or losing definition.
Artist resins and coating resins formulated for deeper or tabletop pours are generally good candidates. These are designed to hold up in thicker applications and often have a natural self-leveling quality that's helpful for the base layers, while still having enough body for shaping the wave peak.
Materials and Tools You'll Need
Before you start your pour, get everything laid out and ready. Once you mix your resin, the clock starts and you don't want to be hunting for your colors mid-project.
- Epoxy resin + hardener (thick viscosity)
- Silicone mat or plastic sheeting (to protect your surface)
- Three shades of blue pigment (or any color), focusing on dark, medium and light
White dispersion pigment (you want this one to be opaque)- Wood panel, canvas, or pre-coated board. Wood should be sanded and sealed if bare
- Leveling feet or shims
- Painter's tape for edges
- Mixing cups
- Wooden stir sticks or silicone spatulas
- Nitrile gloves
- Heat gun or torch (for bubbles and shaping)
- Dust cover (cardboard box or tupperware)
Safety First: Always work in a well-ventilated area when using epoxy resin. Wear nitrile gloves throughout the process, and consider a respirator rated for organic vapors if your workspace has limited airflow.
Picking Your Ocean Colors
Getting the colors right is arguably the most creative and enjoyable part of learning how to make ocean waves with epoxy. A realistic ocean wave typically uses three to five color zones — from deep inky water at the base, through mid-water blues and teals, to the brilliant white-green of breaking seafoam at the crest.
- Deep navy — base shadow water
- Ocean blue — main water body
- Teal-green — mid-wave, lit from above
- Opaque white — wave crest and foam
We recommend starting with three shades of blue: a dark, medium and light, plus your white. You can always experiment with more shades once you nail down the technique
Pigments Options
Play around with pigments and transparency; some artists like to make their blues more transparent for a lit-from-within ocean depth effect. To do this, it’s important to know how different pigments look in epoxy in order to get your desired effects.
Alcohol Inks: Alcohol ink will always provide a translucent result (think colored glass). It’s hard to get depth with alcohol inks alone, so consider only using alcohol ink for your top layers (mid-light blues).
Pigment Dispersions: This is the most common pigment choice for making resin wave art because you can create a lot of depth simply by varying how much pigment you use.
Pigment dispersions can offer a very opaque result (great for your dark base layer), or slightly transparent result.
Mica Powders: This is the second most common pigment used for making resin waves. Mica powders offer a touch of shimmer that mimics the way sunlight scatters through the face of a real wave. Some artists like to add just a touch of mica powder to a pigment dispersion base; this prevents waves from looking overly pearlescent.
Your white should always be opaque, which gives the wave crest its foamy appearance in contrast on top of your ocean layers.
Pro Tip: Test your colors and how much pigment will be needed on a small coated piece of scrap material before committing to your main substrate. Colors can shift during cure, and it's much better to learn that on a test piece than on your finished project.


Epoxy wave art on a side table by Grace Bell Art
How to Make Epoxy Ocean Waves: Step-by-Step
Step 1 — Prepare Your Surface
Level your substrate using a bubble level and shims if needed. An unlevel surface means uneven puddles and a lopsided wave. If you're working on bareor porous wood, seal it first with a thin seal coat of resin and let it fully cure before your main pour; this prevents air bubbles from escaping the wood and creating craters in your artwork.
Apply painter's tape around the edges of your substrate (unless you want drips down the sides, which some artists prefer). Lay down a plastic drop sheet around and beneath your board or work on a large silicone mat.

Step 2 — Mix Your Resin Batches
Mix your epoxy resin according to the exact mix ratio (this is critical — wrong ratios cause tacky, uncured resin). Mix slowly for the manufacturer's recommended time, scraping the sides and bottom of the cup and using the two-cup method. Once your epoxy is thoroughly mixed, separate it into five smaller cups. Three of the cups will be for your three shades of blues, one will be your white, and one will remain clear. You’ll want to have your deep blue, mid-ocean blue, light blue, and white ready before you start pouring. The clear, unpigmented epoxy will be key for creating the waves.


Step 3 — Pour the Base Water Layers
Start by pouring your deepest, darkest blue at the bottom of your composition. Then pour your medium-ocean blue across the main body of the water area. While both layers are still wet, pour your teal or light-blue across the upper-middle zone — the area that will represent the lit, translucent face of the wave just below the crest.
You can use the back of a spoon or a gloved finger to gently blend the transitions between colors. You're not trying to fully mix them, you just want soft gradients with some distinct color banding that creates the illusion of depth.


Step 4 — Remove Bubbles
Pass your heat gun or torch over the surface in a steady, sweeping motion about 6–8 inches above the resin to pop surface bubbles. Remember to never linger in one spot and always keep the heat gun moving. This also slightly thins the top of the resin, which can encourage some nice self-leveling movement in your color layers before the next steps.

Step 5 — Pour a Clear Barrier Layer
Before you place your white, pour a thin stripe of clear, unpigmented resin along the boundary between your teal layer and where your wave crest will sit. This clear band acts as a barrier that prevents the white from bleeding down into your blues and greens. The white sits on top of the water rather than dissolving into it, helping you get that crisp, defined layering with real visual depth.

Step 6 — Apply the White Wave Band and Use Your Heat Gun
Pour your opaque white resin in a thin band along the wave line, directly on top of the clear barrier layer. This is where the magic happens, and the only tool you need from here is your heat gun.
Hold the heat gun a few inches above the white band and work in deliberate passes, pushing and pulling the resin to create the flowing, lacy movement of a breaking wave. Directing heat from below the white upward pulls the resin into peaks and tendrils; avoid pushing from above as it will drive the white outward and flat. The direction, distance, and speed of your passes all change the result. Experiment freely but do not over work the waves, as too much heat can cause you to lose definition as the resin starts to cure.
Pro Tip: If your heat gun came with interchangeable nozzles or tips, this is the time to try them. The different tip shapes concentrate or diffuse the airflow and can produce dramatically different wave textures.
Once you've shaped the wave with heat, finish with a light spritz of 99% isopropyl alcohol over the white. The alcohol breaks the surface tension of the resin and creates additional lacing, webbing, and fine detail in the foam — effects that are difficult to achieve with heat alone. Use a small spray bottle and apply from about 12” away; a little goes a long way.


Step 7 — Cover and Cure
Once you're happy with the composition, tent a clean cardboard box or plastic cover over the piece (without touching the surface) to keep dust and debris off during the cure cycle. Leave it completely undisturbed on a level surface.
Your resin will typically be tack-free within 12–24 hours, but full cure generally takes 24–72 hours depending on the product, your ambient temperature, and the thickness of your pour. Always check your resin's specifications and err on the side of patience. Moving or handling a piece too early can cause dents, smears, or delamination.
Step 8 — Optional: Apply a Final Clear Topcoat
Once your piece is fully cured, you can pour or brush on a thin final clear coat of resin to add a uniform gloss over the entire surface. This gives the whole piece a consistent "wet look" sheen and evens out any texture differences between your color layers. It's optional, but it's a finishing touch that really makes the final piece pop.

Wave art by Ellafuldeco
Pro Tips for Better Epoxy Ocean Waves
Temperature Is Your Friend (and Enemy)
Warmer room temperatures generally shorten your working time and the resin cures faster when it's warm. If you're working in summer or a warm studio, you may have less time to manipulate your wave before it starts to thicken. Conversely, cold conditions can slow the cure and sometimes cause cloudiness or a waxy surface. Aim for a workshop temperature between 70–80°F (21–27°C) for best results.
Don't Overwork the Pour
One of the most common mistakes when learning how to make waves with epoxy is touching and adjusting the resin too much. Every time you pass your heat gun or drag a tool through the resin, you're introducing potential disturbance to the layers you've already built. Do your major layering and shaping early, make targeted adjustments, then step away and let the resin do its thing. Over-manipulated pours often end up muddy and indistinct.
Reference Real Wave Photography
Before you pour, take a look at close-up photos of ocean waves as well as other epoxy resin waves. Notice where the darkest water sits, where the color transitions from navy to teal, how the white foam behaves, and how light moves through the wave face. The more clearly you can visualize the finished piece before you start, the more intentional and confident your pours will be.
Practice the Wave Crest on a Small Test Board First
Building and shaping a wave crest is a tactile skill and it gets significantly easier the second and third time you do it. Mix a small batch of white resin and practice the pulling and sculpting motion on a scrap piece of coated cardboard before you commit to your real substrate.
Embrace the Unpredictability
Resin has a way of surprising you — a color you didn't expect to move does, a layer creates a pattern you didn't plan. Some of the best ocean wave resin art happens when the artist lets the material have some say in the outcome. Set a clear intention, but hold it loosely.
Ready to Make Some Waves?
Making an epoxy ocean wave is one of those projects that rewards patience, practice, and a willingness to let the material surprise you. Once you've got your first wave under your belt, you'll find each new pour comes more naturally — the colors, the layering, the heat gun work all start to click.
We'd love to see what you create: share your finished pieces and tag @TotalBoat so we can celebrate your work. And if you're looking for more inspiration before you dive in, check out our talented ambassador community — there are some incredible ocean wave artists in the TotalBoat family whose work will have you reaching for your resin before you've even finished scrolling.