














How to Make an Epoxy River Table
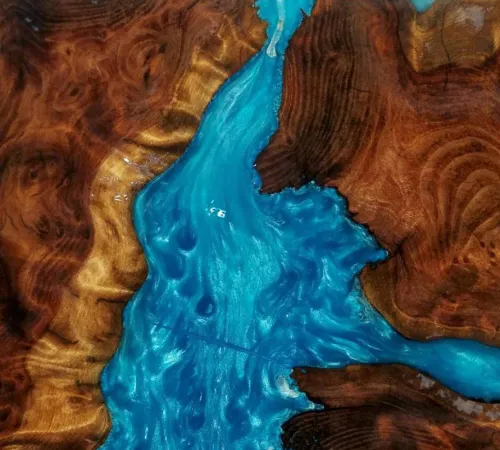
For many woodworkers, building an epoxy river table is a bucket-list project that's as rewarding as the finished piece. It is created by pouring a ‘river’ of epoxy into a prepared wooden frame so the epoxy runs between two pieces of wood. It can be clear or tinted, or you can add interest by encasing small objects in the epoxy, such as rocks and shells.
If you've been searching for how to make a river table, this guide walks you through the entire process from initial prep to the final polish.

Safety First
Before you mix a single batch of epoxy, take a few minutes to set yourself up safely.
- Wear nitrile gloves at all times when handling resin or hardener.
- Wear safety glasses to protect against splashes, especially when stirring or pouring.
- Work in a well-ventilated area. Open windows, use fans, or work in a garage or shop with good airflow.
- Wear a respirator rated for organic vapors if you're working in an enclosed space or for extended periods, particularly during sanding, when epoxy dust becomes airborne.
- Keep skin covered with long sleeves, and avoid touching your face, phone, or other surfaces with gloved hands.
- Have acetone or a dedicated epoxy cleanser on hand for cleanup — never use water to try to remove wet epoxy from skin.
Taking these precautions from the very first step (not just during pouring) will keep your build safe from start to finish.
What You'll Need
- A slab (or two matched slabs) of wood, such as live-edge lumber
- Epoxy resin and hardener
- Mold-building materials (melamine board or similar,
packing tape , hot glue gun, silicone sealant) - 120-grit through 3000-grit sandpaper
- Acetone or denatured alcohol
- Mixing cups and stir sticks
- Heat gun or torch (for popping bubbles)
- Epoxy-safe pigments, mica powders, or alcohol inks (optional, for tinting)
- TotalBoat TotalShine and Premium Boat Wax (for final polish)
- Table legs or base hardware
A note on epoxy: River tables are typically poured with a deep pour epoxy, but the wood needs to be sealed before the main pour — and not every deep pour epoxy is suited for sealing. If you're using TotalBoat products: pair Fathom (for a single deep pour) with High Performance Epoxy as your seal coat. If you're building your pour in layers with ThickSet, you can use ThickSet itself for both the seal coat and the layered pours.
If you are unsure which epoxy is right for your river table pour, figure out your dimensions and then use this chart to pick the one that is right for your project.

Table by @forrestdesignco made with TotalBoat Fathom Deep Pour Epoxy
Step by Step How to Make a River Table
1. Sand and Prep the Wood
Start with 120-grit sandpaper to smooth the surface of your slab and remove any mill marks or rough spots. Vacuum thoroughly, then wipe the wood down with acetone or denatured alcohol to remove dust and oils that could interfere with epoxy adhesion.
2. Seal the Wood
Mix a small batch of epoxy and hardener and apply a thin seal coat over the entire slab. This step keeps air bubbles trapped in the wood grain from rising up into your clear river pour later. Let it cure, then lightly sand again to prep for the next step.
Make sure your seal coat is fully cured before your deep pour goes down.

3. Build Your Mold
Construct a mold around your wood slab using melamine board or similar material. Line the interior with packing tape so the epoxy won't bond to it, and seal every seam with hot glue to prevent leaks — even a pinhole gap can drain your entire pour.
4. Measure Your Epoxy and Hardener
Measure resin and hardener precisely according to the kit's mix ratio. Use an epoxy calculator to determine how much epoxy you'll need so you don't waste any by mixing more than needed.
5. Mix Thoroughly
Stir slowly and deliberately for several minutes, scraping the sides and bottom of your mixing container. Mixing too fast introduces air bubbles; mixing too little leaves you with soft, uncured epoxy. The "two-cup method" — mixing in one container, then transferring to a second and mixing again — helps ensure a fully homogenous batch.
6. Add Pigment (Optional)
If you want a colored river rather than a clear one, stir in your pigment, mica powder, or alcohol ink at this stage. Start with a small amount and add gradually — a little goes a long way.
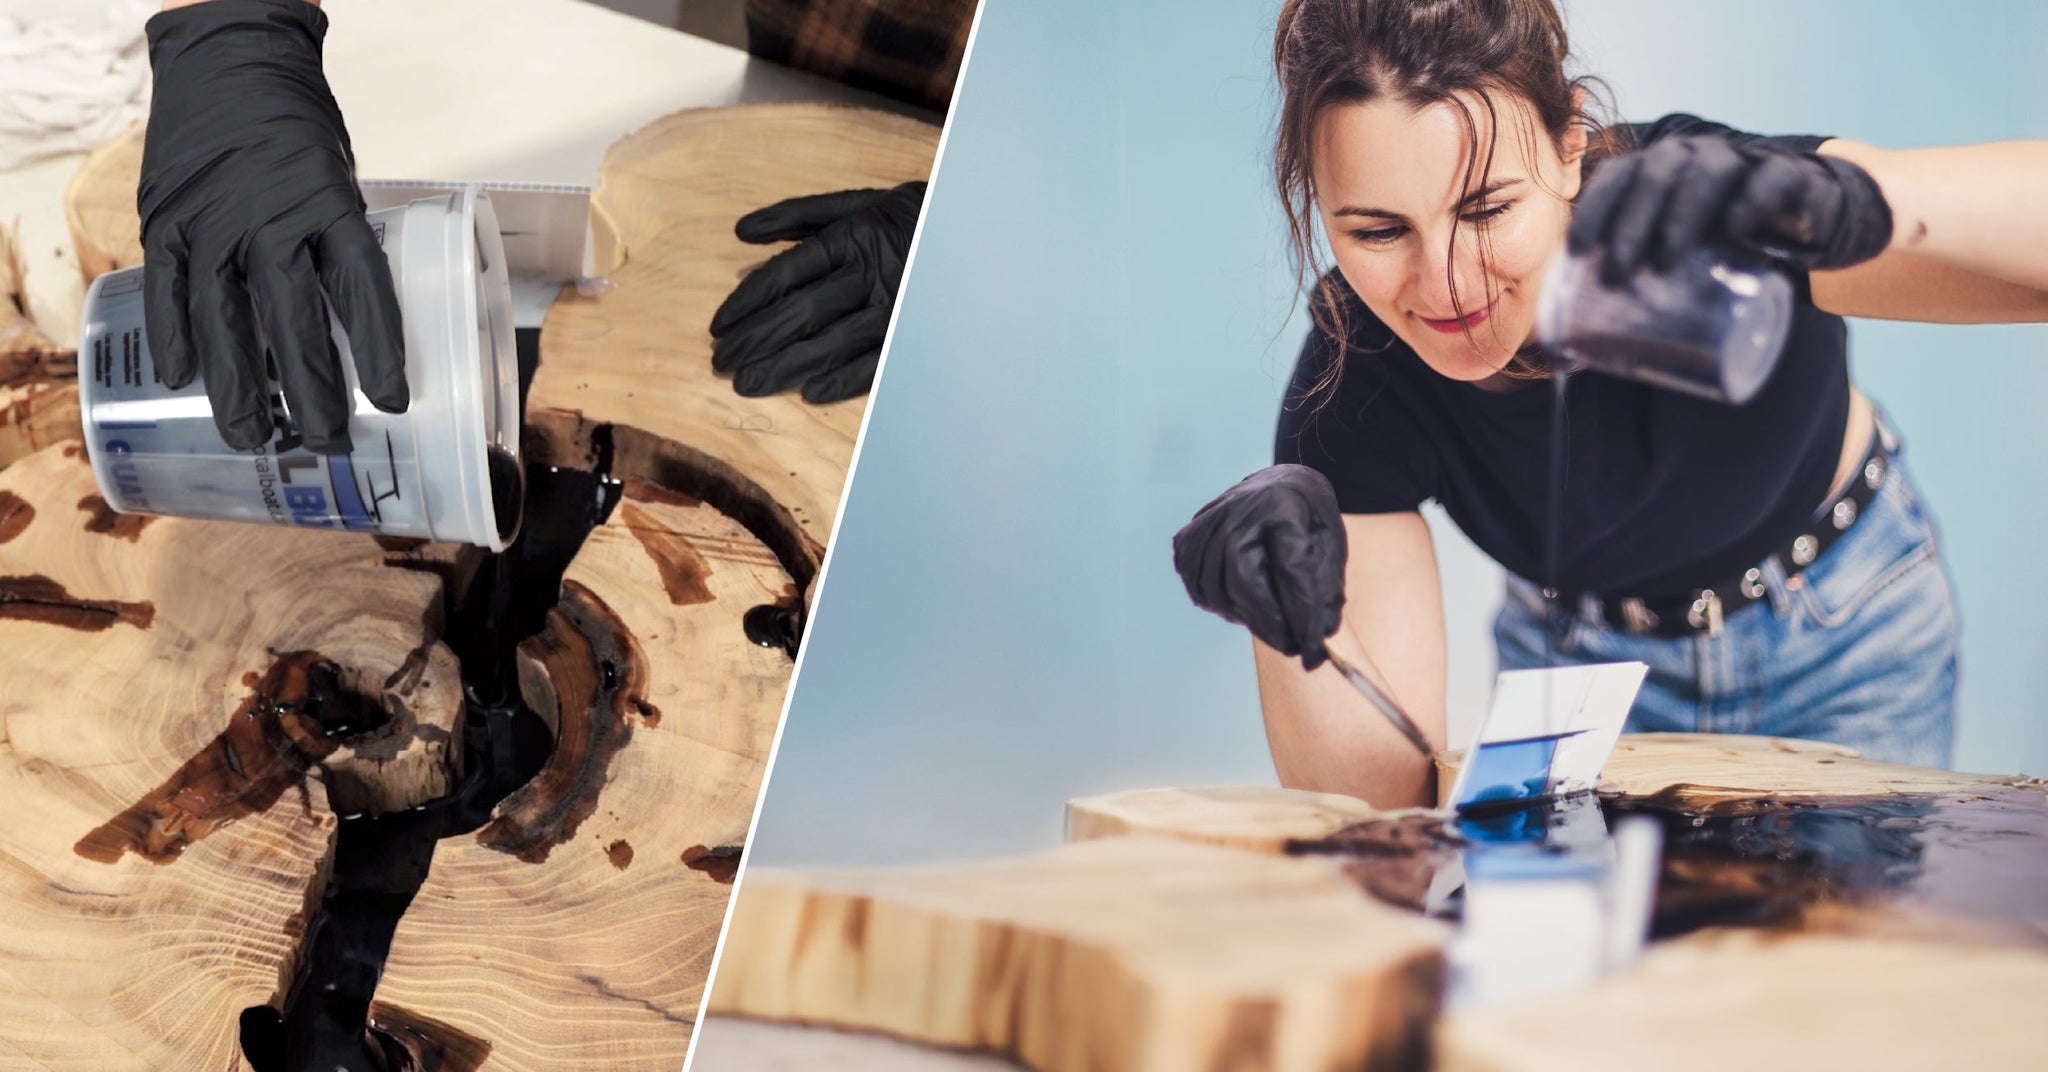
7. Pour Your First Layer
Pour your tinted or clear epoxy into the river channel. Pass a heat gun lightly over the surface to pop any bubbles that rise.

8. Repeat Pours to Build Depth
For deeper rivers that require more than one pour, make sure the previous layer is tack-free (no longer sticky to the touch) before pouring the next.
Depending on the product and ambient temperature, this can range from 4 to 36 hours, so check the epoxy's technical data sheet to confirm the proper waiting period.
9. Cure and Demold
Let the epoxy reach at least its minimum demold time before removing the piece from the mold — this varies by product, but can range anywhere from about 24 hours to 72 hours or more. Check your epoxy's technical data sheet for its specific demold time.
Note that reaching demold time doesn't always mean the epoxy has reached a full cure (which can take significantly longer, especially with deep pour epoxies) — so handle the piece gently until it's fully hardened.
10. Sand
Once removed from the mold, sand the piece progressively, starting at 120-grit and working through the grits up to 3000-grit. Dry sand through 320-grit, then switch to wet sanding from 400-grit up through 3000-grit for a glass-smooth finish.
11. Choose Your Finish
There are two common ways to bring your river table to a high-gloss shine:
Wet sand and polish: Progress through wet/dry sandpaper from 400-grit up to 3000-grit, then buff with a polishing compound using a machine polisher for large, flat surfaces like a tabletop. For the full sanding and polishing process, see TotalBoat's guide to polishing and smoothing epoxy resin.
Flood coat: Lightly sand the surface (220–320 grit) to create tooth, then pour a fresh, self-leveling layer of tabletop epoxy over the surface. This skips the polishing step entirely and fills in any minor scratches or sanding marks for a glass-clear finish.
If you'd prefer a satin or more matte look instead of high gloss, apply a satin finish or topcoat after the epoxy has fully cured, rather than polishing to a shine.
While some epoxy formulas have UV resistance, consider a UV-resistant varnish or urethane topcoat if the table will see regular direct sunlight — this helps protect against yellowing and UV damage over time.

12. Attach the Legs
Mount your table legs or base of choice, and your river table is ready to use!

Frequently Asked Questions
Are river tables durable?
Yes — when built correctly with a proper deep-pour epoxy, river tables are extremely durable. Cured epoxy is harder and more scratch-resistant than most finished woods, and it's fully waterproof, so it won't warp, stain, or absorb spills the way bare wood can. That said, epoxy isn't indestructible: it can scratch under abrasive contact and will yellow over time with prolonged, direct UV exposure, so keeping a river table out of intense direct sunlight and using coasters for hot items will keep it looking new for years
What are the best kinds of wood to use for river tables?
Live-edge slabs from hardwoods with strong grain character work best, since the goal is usually to contrast the wood's natural texture against the smooth, glass-like epoxy. Popular choices include walnut, maple, oak, cedar, and mesquite. The most important factor isn't necessarily species — it's moisture content. Wood needs to be properly dried (ideally below 10-12% moisture content) before sealing it in epoxy, or trapped moisture can cause bubbling, cracking, or separation down the line.
How do you properly maintain a river table?
Epoxy river tables are low-maintenance compared to solid wood furniture, but a few habits will keep them looking their best. Clean with a soft cloth and mild soap and water — avoid harsh chemical cleaners or abrasive scrubbers, which can dull the epoxy's shine over time. Use coasters and trivets for hot or sweating items, since sustained heat can soften epoxy. Keep the table out of direct, prolonged sunlight to prevent UV yellowing, and periodically reapply a UV-stable finish maintain the gloss and add a layer of scratch protection.
What is the best epoxy for a river table?
A deep-pour epoxy formulated specifically for thick castings is the best choice. Standard tabletop or coating epoxies are designed for thin coats and will overheat, crack, or cloud if poured at river-table depths. A dedicated deep-pour formula is engineered to cure slowly and evenly, allowing for thicker single pours with minimal risk of cracking or heat distortion.
Ready to Get Started?
With the right epoxy, a little patience, and careful attention to safety, you can build a river table that will be the centerpiece of any room for decades to come. Browse TotalBoat's full lineup of river table and deep-pour epoxy supplies to get started on your build today.