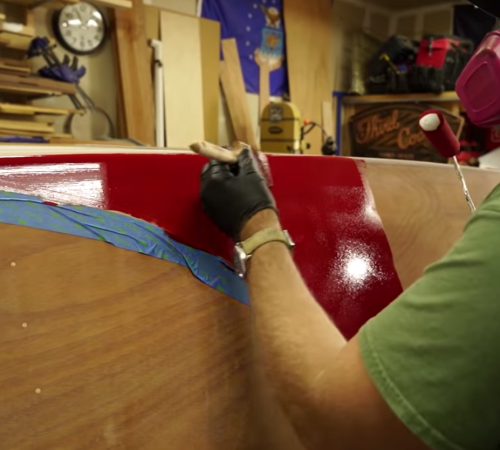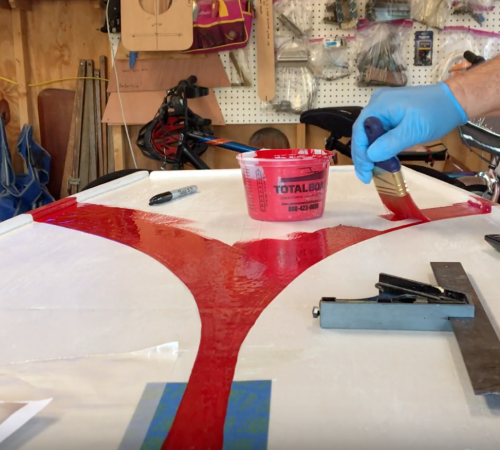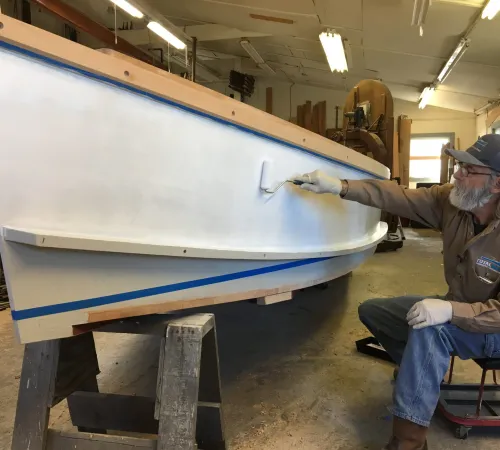
















How to Apply Topside Paint
Learn How to Paint Your Boat Like a Pro
A fresh coat of topside paint can protect your boat from sun, spray, and everyday wear while giving it a clean, finished look. The painting itself is fairly straightforward, but the quality of the result depends on what happens before the first coat goes on.
Careful cleaning, sanding, repairing, and priming help the paint bond properly and create a smoother, longer-lasting finish. Skipping those steps can leave you with peeling paint, visible surface defects, or a finish that wears out sooner than expected.
This guide walks you through the full process, from choosing the right type of coating and preparing the surface to applying the paint and allowing it to cure. Whether you are refreshing an older finish or painting a repaired surface, the same basic approach applies: prepare carefully, work methodically, and follow the manufacturer’s instructions for application conditions and recoat times.
Choosing the Right Topside Paint
The best topside paint for your project depends on where you’re painting, what coating is already on the surface, how you plan to apply, and how much durability you need.
Topside paint is generally used on surfaces above the waterline, including hull sides, cabins, decks, and some interior areas. Different parts of the boat may require different coatings. Hull sides typically need a smooth, durable topside finish, while decks and steps need a coating that provides traction. Bilges, lockers, and other damp interior spaces often benefit from specialty coatings designed to resist moisture, oil, fuel, and chemicals.

Most marine topside paints fall into three main categories:
- One-part polyurethane
- Two-part polyurethane
- Alkyd marine enamel
Each type offers a different balance of appearance, durability, cost, application difficulty, and maintenance.
Start with Checking the Existing Paint Before Recoating
In some cases, like in boatbuilding and restoration, hulls are bare material ready to be painted. But for those working with a previously-painted boat or looking to switch to a new formula, the existing coating can limit which paint you apply next.
In general, a one-part paint can often be applied over a one-part or properly prepared two-part finish in good condition. A two-part polyurethane should not normally be applied over a one-part coating because its stronger solvents may soften, wrinkle, or completely lift the underlying paint.
Use these general guidelines:
- One-part coating > Good Condition: Clean it, scuff-sand it, and recoat with a compatible one-part paint.
- One-part coating > Poor Condition: Remove loose or damaged paint, prepare the surface, prime as needed, and apply a compatible finish.
- Two-part coating > Good Condition: Clean and sand it thoroughly before applying a compatible one-part or two-part coating.
- Two-part coating > Poor Condition: Remove the damaged coating, then rebuild the primer and finish system
- Unknown coating: Soak a cloth in solvent from the brand you want to use and tape over a hidden area of the hull. After 30-60 minutes, the test finish will either soften, meaning it's a one-part formula, or it will remain unaffected and is safe to apply a two-part paint over.
What Topside Paints Have in Common
Marine topside paints are formulated to handle conditions that ordinary household paints are not designed for. In general, they:
- Resist moisture, abrasion, and regular wear
- Remain flexible as the hull expands and contracts
- Help protect surfaces from direct and reflected UV exposure
- Maintain bright, vivid color in a marine environment
The differences become more noticeable when you compare gloss, hardness, scratch resistance, flexibility, cost, and ease of application.
Specialty topside coatings may also include additives for a specific purpose. Non-skid deck paints, for example, contain texture or traction additives and are intended for walking surfaces rather than smooth hull sides.
One-Part Polyurethane
One-part polyurethane is a popular choice for do-it-yourself projects because it offers a good combination of durability, gloss, affordability, and ease of application.
Unlike two-part coatings, it does not require a converter, precise mixing ratios, or an induction period. In most cases, you simply stir the paint thoroughly and apply it by brush, roller, rolling and tipping, or spray, depending on the manufacturer’s instructions.

One-part polyurethane is a good choice when:
- You want a smooth, glossy finish without a complicated application process
- You plan to apply the paint with a brush and roller
- The existing coating is a compatible paint you can overcoat
- You are working on a DIY budget
Although one-part polyurethane is not as hard or scratch-resistant as a two-part coating, it is generally easier to apply and repair. For many recreational boats, that tradeoff makes it the most practical option.
TotalBoat Wet Edge is one example of a one-part polyurethane topside paint. It is suitable for interior and exterior surfaces above the waterline and can be brushed, rolled and tipped, or sprayed.
Important: Standard topside paints are not intended for long-term underwater use. They may be used on areas that are only briefly submerged, such as the bottom of a trailered boat, but boats left in the water for extended periods should use an appropriate antifouling bottom paint below the waterline. Always check the topside paint's immersion limits before applying to a boat bottom.
Two-Part Polyurethane
Two-part polyurethane produces a harder, more durable finish than most one-part paints. It generally offers better scratch resistance, gloss retention, color retention, UV resistance, and distinctness of image—the sharp, mirror-like quality of the finished surface.
That additional performance comes with a more demanding application process. Two-part polyurethane is best suited for projects where:
- Maximum hardness and long-term gloss retention are priorities
- The surface can be prepared to a high standard and any existing coating is compatible
- The applicator can follow precise mixing, timing, and environmental requirements
- Proper ventilation and protective equipment are available
These coatings typically require exact mix ratios, compatible primers, multiple thin coats, and close attention to temperature and humidity. Some formulas can be brushed or rolled, while others produce the best results when sprayed.
Safety requirements are also more stringent. Many two-part coatings contain hazardous components, especially when sprayed. Use the protective equipment specified by the manufacturer, provide excellent ventilation, and do not assume that a basic dust mask provides adequate protection.
Alkyd Marine Enamel
Alkyd marine enamel is a traditional one-part coating known for being affordable, brush-friendly, and relatively easy to use. Because of these qualities, it’s also commonly chosen for smaller, detail-oriented projects like boat lettering, accent striping, and brightwork touch-ups—especially when only a small area is being refinished rather than the entire boat.
It flows well, builds quickly, and remains flexible, which can make it a practical choice for wooden boats and other surfaces that move with changes in temperature and moisture. It may also tolerate the natural oils found in some woods better than harder polyurethane finishes.

Marine enamel is a good option when:
- Ease of brushing is more important than maximum hardness
- You are painting a traditional wooden hull
- You are doing lettering, trim, brightwork, or partial refinishing rather than a full topside repaint
- You want an economical, easy-to-maintain finish
- Regular maintenance coats are acceptable
The main tradeoff is durability. Alkyd enamels generally do not retain gloss or resist abrasion as well as polyurethane coatings, so they may require more frequent maintenance.
Use A Compatible Primer
No matter which option you go with, start with a marine-grade primer to keep your topside paint looking great season after season. As part of proper prep, applying a compatible primer creates a uniform surface, improves adhesion, helps seal porous substrates, and can make imperfections easier to identify before the finish coats go on.
Choose a primer that is compatible with:
- The substrate
- Any existing coating
- The topside paint
- How you plan to apply

Do not assume that every topside primer can be used under every finish. Some primers are intended only for one-part paints, while others are compatible with both one-part and two-part systems. Follow the manufacturer’s complete system recommendations whenever possible.
Estimate How Much Paint You Need
Coverage depends on the size and shape of the boat, the height of the topsides, the surface condition, the application method, the number of coats, and the paint’s recommended wet-film thickness.
The estimates below provide a general starting point for two finish coats. For a more accurate estimate, use our topside paint calculator page.
Boat Type | Polyurethane | Marine Enamel |
|---|---|---|
10 ft. Dinghy | 1 Quart | 1 Quart |
14 ft. Outboard | 1 Quart | 1 Quart |
18 ft. Runabout | 1 Quart | 2 Quarts |
20 ft. Sailboat | 2 Quarts | 2 Quarts |
24 ft. Runaboat | 2 Quarts | 2 Quarts |
30 ft. Sailboat | 3 Quarts | 1 Gallon |
32 ft. Cruiser | 3 Quarts | 1 Gallon |
36 ft. Auxiliary Sailboat | 1.25 Gallons | 2 Gallons |
40 ft. Sailboat | 1.5 Gallons | 2.5 Gallons |
45 ft. Sailboat | 2 Gallons | 3 Gallons |
50 ft. Sportfisher | 2 Gallons | 3 Gallons |
These quantities are only general estimates. Wide beams, tall topsides, complex shapes, porous surfaces, overspray, and application losses can increase the amount required.
For the most accurate estimate, calculate the surface area, compare it with the paint’s stated coverage rate, and account for the recommended number of coats. Always follow the manufacturer’s guidance for coverage and film thickness rather than stretching the paint too thin.
Tools and Supplies
Before you begin, gather all of your materials so you can complete each stage—cleaning, surface preparation, priming, and painting—without interruption. The exact tools you'll need depend on whether you're brushing, rolling and tipping, or spraying, but most projects use the same basic equipment.
Personal Protective Equipment (PPE)
Always use the safety equipment recommended by the paint manufacturer. At a minimum, you'll typically need:
- Safety glasses or goggles
- Chemical-resistant gloves
- A NIOSH-approved respirator with cartridges appropriate for paint vapors (not a dust mask)
- Disposable paint suit or protective clothing, especially when sanding or spraying
If you're spraying paint, work in a well-ventilated area and follow all manufacturer safety recommendations. Many two-part polyurethane paints contain hazardous chemicals that require additional respiratory protection and application controls.

Surface Preparation Tools
Proper preparation has a greater impact on the finished results than the painting tools themselves. Common supplies include:
- Pressure washer, scraper, or stiff brush for removing loose paint and contaminants
- Random-orbit sander or right-angle sander
- Sandpaper in the grits recommended for your project from the paint's Technical Data Sheet (TDS)
- Abrasive pads for scuff sanding between coats
- High-quality masking tape, including flexible tape for curves
- Lint-free rags
- Wax and grease remover or a similar surface prep solvent
- Vacuum for cleaning sanding dust
If the existing coating is badly cracked, peeling, or failing, you may also need a chemical paint stripper before sanding.
Boat Painting Supplies
Most topside painting projects also require:
- Paint strainers
- The thinner recommended by the paint manufacturer and for your application method
- Compatible primer (if needed)
- Fairing compound for repairing dents or surface imperfections before priming
Tools for Rolling & Tipping
Rolling and tipping is one of the most popular application methods because it produces a smooth, high-gloss finish without spray equipment.
For best results, you'll typically need:
- High-density, solvent-resistant foam roller covers
- Roller frame
- A high-quality natural-bristle or badger-hair brush for tipping
- Small brush or foam brush for cutting in around hardware and corners
- Paint tray and liners
Avoid standard household rollers and trays when using solvent-based marine coatings. Marine paint solvents can soften or damage tools that aren't designed for solvent exposure.
Spray Equipment Basics
Spraying can produce an excellent finish, but it requires more equipment, experience, and attention to safety than brushing or rolling.
If you're spraying a one-part polyurethane, make sure you have:
- Proper ventilation
- Full PPE, including a respirator rated for organic vapors
- The correct spray tip for your coating
- A spray gun that is compatible with the paint you're using
Spraying two-part polyurethane paints is generally best left to experienced applicators. These coatings often contain isocyanates, which present significant health hazards when atomized and require specialized respiratory protection and spray environments.
Common Spray Gun Types
Type | Best For | Keep in Mind |
|---|---|---|
Conventional | Lowest equipment cost | Excellent atomization, but creates the most overspray and wastes the most paint. |
HVLP (High Volume, Low Pressure) | Most DIY users | Produces a high-quality finish with much better transfer efficiency and less overspray than conventional guns. |
Air-Assisted Airless (AAA) | Large projects and professional use | Fast application with excellent finish quality, but requires more expensive and more complex equipment. |
Choosing the Right Spray Tip
The spray tip controls how much paint is delivered and how the spray pattern is formed.
In general:
- Smaller tip sizes work best for thinner coatings.
- Larger tip sizes are needed for high-build primers and heavier paints.
- Always verify that your spray gun can accommodate the recommended tip size.
If provided in the TDS, follow the paint manufacturer's recommendations for spray tip sizes.
Prepare the Surface for Topside Paint
A quality topside paint job depends more on surface preparation than on the final coat of paint. Even the best marine paint cannot hide contamination, loose coatings, deep scratches, or poorly repaired damage.
The goal is to create a surface that is clean, dry, smooth, stable, and compatible with the paint system you plan to use. Taking the time to prepare the surface properly improves adhesion, helps the paint level more evenly, and reduces the risk of peeling, blistering, or premature failure.
Follow the paint and primer manufacturer’s instructions throughout the process. Sanding recommendations, cleaning solvents, recoat windows, and primer requirements can vary between products.
Inspect the Surface
Before sanding or applying primer, inspect the entire area you plan to paint. Look for:
- Cracks, chips, and gouges
- Blisters or raised areas
- Loose, flaking, or peeling paint
- Deep scratches
- Failed attempts at color matching
- Rot or moisture damage in wood
- Areas contaminated by oil, wax, fuel, or silicone
Pay close attention to edges, corners, seams, fittings, and areas around hardware. These locations often collect moisture and contaminants, and they are common starting points for coating failure.
If possible, remove hardware, trim, vents, cleats, and other fittings rather than painting around them. Removing hardware makes it easier to clean, sand, and coat the surrounding surface properly. It also produces a cleaner-looking finish and reduces the chance of paint bridging over seams or collecting around fasteners.
Check the condition of any existing paint before deciding whether to coat over it. Firmly adhered paint may only need cleaning and sanding. Loose or incompatible coatings should be removed before repainting.
Clean and Remove Contaminants
Clean the surface before sanding. Sanding a dirty or waxed surface can grind contaminants into the coating, making them harder to remove later. Wash with fresh water and a suitable marine detergent. Remove any salt, dirt, chalking, mildew, and other visible residue. Rinse thoroughly and allow the surface to dry.
Next, remove wax, grease, oil, silicone, and other contaminants with a cleaner recommended for the substrate and coating system. Fiberglass and gelcoat surfaces often retain mold-release waxes or polishing compounds, even when they appear clean.
A two-rag cleaning method works well:
- Wet one clean, lint-free rag with the approved cleaner.
- Wipe a small area to loosen contaminants.
- Immediately wipe the area dry with a second clean rag.
Do not allow the cleaner to evaporate on the surface. If it dries before being wiped away, it may leave the dissolved contamination behind.
Change rags frequently. A dirty rag can spread wax and grease instead of removing them.
Avoid using unapproved household cleaners or solvents. Some can leave residue, soften existing coatings, or interfere with primer and paint adhesion.
After repairs and sanding are complete, clean the surface again to remove dust and handling residue.
Repair Surface Imperfections
Topside paint does not hide surface defects. Glossy finishes often make dents, sanding scratches, pinholes, and uneven repairs more noticeable.
Repair cracks, chips, gouges, voids, and other damage before priming. Use a filler or fairing compound that is compatible with the substrate, primer, and finish paint.

Small defects may only require spot filling. Larger or deeper damage may need structural repair before cosmetic fairing begins.
Apply filler slightly proud of the surrounding surface when appropriate, then sand it fair after it cures. Feather the repair gradually into the surrounding area so the transition cannot be felt by hand.
Use a straightedge, flexible batten, or low-angle light to check the surface. Looking across the hull instead of directly at it makes highs and lows easier to see.
For larger repairs, several thin applications are usually easier to control than one heavy application. Thick filler can shrink, crack, or cure unevenly.
Do not apply paint over damaged laminate, active corrosion, wet wood, or unstable repairs. Correct the underlying problem first.
Sand the Surface
Sanding creates a uniform surface profile that helps primer and paint adhere. It also removes gloss, smooths repairs, and levels minor imperfections.
Use the grit recommended by the coating manufacturer. Sandpaper that is too coarse can leave scratches that show through the finish. Sandpaper that is too fine may not provide enough mechanical adhesion.

A random-orbit sander can save time on large areas, but keep it moving and use light pressure. Holding the sander in one place can create depressions that become obvious after painting.
Hand-sand edges, corners, molded details, and areas near hardware. These areas are easy to damage with a power sander.
Fiberglass and Gelcoat
Clean fiberglass and gelcoat thoroughly before sanding to remove wax and polishing residue. Sand until the surface loses its gloss and has a uniform, dull appearance. Avoid sanding aggressively into the gelcoat or exposing fiberglass laminate unless the damaged area requires repair.
Fill chips, cracks, pinholes, and other defects with a compatible repair material. Sand the repairs fair with the surrounding surface before applying primer.
New fiberglass may contain mold-release agents that interfere with adhesion, so cleaning is especially important even if the surface looks clean.
Wood
Wood must be clean, dry, and structurally sound before painting. Sand with the grain when working by hand. Round sharp edges slightly because paint tends to pull away from knife-like corners, leaving a thinner and less durable coating.
Repair damaged or decayed wood before coating. Fill minor defects with a compatible filler, but do not use cosmetic filler to conceal active rot or moisture problems.
Bare wood usually requires a suitable primer or sealer before applying topside paint. Remove sanding dust from pores and grain before priming. Keep in mind that end grain may absorb more coating than surrounding areas and can require additional attention.
Metal
Remove rust, oxidation, corrosion, and loose coatings before painting metal. Bare metal should be cleaned and primed promptly because freshly prepared surfaces can begin oxidizing quickly. Follow the coating manufacturer’s instructions for surface preparation, cleaning, and the maximum time allowed before primer application.
Use a primer designed for the specific material, as not all metals have the same properties. For example, aluminum rapidly forms an oxide layer that can interfere with adhesion, while steel is pront to rust and typically requires stronger corrision-inhibiting primers.
Previously Painted Surfaces
If the existing paint is firmly adhered and compatible with the new coating, sand it evenly to remove the gloss and provide a mechanical tooth. Feather the edges of chips and scratches so there is no sharp transition between bare substrate and sound paint.
Remove loose, peeling, blistered, or cracked coatings completely. Painting over an unstable layer will only cause adhesion issues and keep your boat from looking its best.
Before applying over an existing coating that is unknown, remember to do the solvent test to confirm compatibility and prevent future issues with lifting or wrinkling.
Mask Adjacent Areas
Once you're done prepping the surface, use masking tape to block off hardware, trim, windows, rubrails, nonskid surfaces, and any area that should not receive paint.
Use a quality masking tape suitable for the coating and expected exposure time. Low-quality tape may allow paint to bleed underneath, tear during removal, or leave adhesive residue behind.

Plan your masking lines before painting. Long, smooth lines are easier to achieve when tape is applied in manageable sections rather than stretched too tightly. Press the tape edge down firmly, especially around curves and textured areas.
Do not leave masking tape in place longer than necessary. Paint can form a hard bridge over the tape edge, making removal difficult and increasing the chance of tearing the fresh coating.
Prime the Surface
Primer creates a stable foundation between the substrate and the finish paint. Depending on the system, it may improve adhesion, seal porous surfaces, cover repairs, reduce color variation, and help identify remaining defects.
Not every repaint requires a full coat of primer. A compatible, previously painted surface in good condition may only need cleaning and sanding. Primer is generally recommended when working over:
- Bare fiberglass or exposed laminate
- Bare wood
- Bare metal
- Fairing compound or filler
- Large repaired areas
- Mixed substrates
- Heavily sanded or uneven surfaces
- Unknown or questionable existing coatings
Use a primer that is compatible with the substrate and the topside paint. One-part and two-part finish paints may require different primers, and some primers are not suitable over certain existing coatings.
Apply primer in thin, even coats. Heavy coats can trap solvent, sag, or take longer to sand and cure.
Primer can also act as a guide coat. After it dries, inspect the surface under low-angle lighting. Remaining pinholes, scratches, sanding marks, and unfair areas often become easier to see. Repair visible defects and spot-prime those areas as needed before moving on.
Sand the Primer
Once the primer has cured for the recommended time, sand it smooth according to the manufacturer’s instructions. A common final sanding range is approximately 220 to 320 grit, but the correct grit depends on the primer and finish paint.
Use light, even pressure. The goal is to smooth the primer and create a uniform surface, not remove it completely. Pay attention to:
- Dust nibs
- Roller texture and brush marks
- Small runs
- Repair edges
- Pinholes
- Any remaining low spots
Avoid sanding through the primer, especially on edges and corners. If bare substrate or filler becomes exposed, spot-prime the area and allow it to cure before sanding again.
After sanding, vacuum the surface thoroughly. Remove remaining dust with clean, lint-free rags or a tack cloth approved for the paint system. Complete any final solvent wipe only if the manufacturer recommends it. Use the approved cleaner and allow the surface to dry completely before painting.
At this point, the surface should feel smooth, look uniformly dull, and be free of dust, moisture, grease, wax, and loose material. Careful preparation here gives the finish coat the best chance to flow evenly, adhere properly, and hold up in marine conditions.
Make the Conditions Work for You
Topside paint flows, levels, and cures best within a specific range of temperature, humidity, airflow, and sunlight. Even a well-prepared surface can produce a poor finish if the paint is applied under unfavorable conditions.
Before beginning, check the product instructions for the recommended application temperature, humidity limits, recoat window, and expected cure time. These requirements vary between one-part enamels, one-part polyurethanes, and two-part polyurethane systems.
Remember that the temperature of the surface matters just as much as the air temperature. A hull exposed to direct sunlight may be much hotter than the surrounding air, while a shaded surface may remain cool enough for condensation to form.
Plan the job around the conditions rather than forcing the paint onto the boat because the surface is ready.
Temperature
Paint becomes more difficult to apply when conditions are too hot or too cold.
In high temperatures, solvents evaporate quickly. The paint may become sticky before it has time to flow and level, increasing the likelihood of:
- Roller texture and brush marks
- Dry spray
- Poor overlap between sections and visible lap marks
- Reduced gloss
Heat can also shorten the working time during roll-and-tip application. The roller may begin pulling at paint that has already started to set, and the brush may drag instead of smoothing the surface.
In low temperatures, paint may thicken and flow poorly. Drying and curing can also take longer, increasing the chance of:
- Sags and runs
- Dust or insects becoming trapped in the finish
- Extended recoat times
- Solvent remaining in the coating
- A soft or easily damaged surface
Do not assume that adding extra thinner will correct paint that is too cold. Excessive thinning can reduce film thickness, cause runs, and affect gloss or durability. Bring the paint and surface into the recommended temperature range instead, or use a thinner that can handle colder temperatures.
Whenever possible, store the paint at a moderate room temperature before use. Do not leave the container sitting in direct sun, on hot pavement, or in a cold vehicle.

Humidity and Dew
High humidity slows solvent evaporation and can interfere with curing. It may also increase the risk of condensation, especially in the evening, early morning, or after a rapid temperature change.
Some coatings are more sensitive to moisture than others. Two-part polyurethane systems, in particular, may react poorly to excessive humidity or surface moisture. Always follow the product-specific humidity limits.
Avoid painting when:
- Rain, fog, or heavy dew is expected
- The surface feels damp
- Condensation is likely before the coating becomes tack-free
- Humidity exceeds the manufacturer’s recommended range
- Temperatures are expected to fall sharply during application or early cure
Do not rely only on the daytime forecast. Review the overnight low, expected dew point, and the time when humidity is likely to rise.
A coat applied late in the day may still be vulnerable when evening moisture settles. Give the paint enough time to become tack-free before dew forms.
Direct Sunlight
Avoid painting a surface in direct, intense sunlight whenever possible.
Sunlight heats the substrate, shortens the wet edge, and makes the paint cure unevenly. It can also make the finish appear acceptable during application while creating brush marks, roller texture, or poor flow as the coating sets.
Follow the shade around the boat. Begin on the side that is protected from direct sun and move as the shaded area changes.
This approach is more reliable than choosing a fixed direction for every project because the best starting point depends on the season, location, boat orientation, and time of day.
Do not paint a cold surface immediately before direct sunlight reaches it. The rapid rise in temperature can cause air or moisture within porous materials, repairs, or seams to expand. This may create bubbles or pinholes in the fresh coating.
Wind and Airflow
Some airflow is useful because it helps carry solvent vapor away from the work area. Too much wind, however, creates its own problems. Strong or gusty wind can:
- Blow dust, pollen, leaves, and debris into wet paint
- Cause solvents to evaporate too quickly
- Make it difficult to maintain a wet edge
- Carry overspray beyond the work area
- Create uneven drying from one section to another
Outdoor spraying requires especially careful control of wind and overspray. Do not spray where coating material can drift onto nearby boats, vehicles, buildings, people, or the water.
If indoors, make sure to have adequate ventilation without directing a strong fan across the wet surface. Fast-moving air can cause uneven drying and may carry dust into the finish.
Dust, Pollen, and Insects
Apply in the cleanest work area available, as a glossy topside finish makes dust, fibers, pollen, and insects easy to see. These defects may require sanding and recoating after the paint cures.
Before painting:
- Sweep or vacuum the work area
- Remove sanding dust from the boat and nearby surfaces
- Wet the floor lightly when appropriate to help control dust
- Allow airborne dust to settle
- Turn off equipment and reposition fans that could blow dust toward the work
- Check overhead structures for loose debris
Do not perform heavy sanding near an area where fresh paint is curing.
Outdoor conditions can change throughout the day. Pollen may be heavier in the morning, while insects may become more active in the evening. Choose an application window that minimizes both.
Plan the Painting Schedule
A successful paint job requires enough uninterrupted time to apply each coat and allow it to cure properly.
Before opening the paint, estimate how long it will take to complete the entire section. Include time for:
- Mixing and induction time, if required
- Application
- Moving staging or ladders
- Inspecting for imperfections or missed spots
- Cleaning tools
- Removing masking tape when needed
Do not begin a large section when rain, falling temperatures, dew, or darkness may interrupt the job.
For roll-and-tip application, divide the surface into sections small enough to keep a wet edge. Larger boats may require two people: one to roll on the paint and another to tip it immediately.
When painting alone, work in narrow vertical or horizontal sections based on the hull shape and product instructions. Complete each section before the previous edge begins to set.
Keep an Eye on Recoat and Cure Times
Dry time, recoat time, and full cure time are not the same. A coating may feel dry to the touch but still be too soft to sand, overcoat, or launch. Follow the manufacturer’s stated times for each stage.
Temperature and humidity can change these intervals. Cooler or more humid conditions usually extend drying and curing time. Applying the next coat too soon can trap solvent or disturb the coating underneath.
Waiting too long can create its own problems. Some products have a maximum recoat window. If that window passes, the surface may need to be sanded before the next coat is applied, adding more time and labor to your project.
Writing down details as you work can be especially helpful during multi-day projects. Keep track of:
- When each coat was applied
- Air and surface temperatures
- Weather conditions
- The minimum / maximum recoat time
- The time required before sanding, overcoating, or launching
Set Up the Work Area for Success
Once paint application begins, stopping to find a tool or move equipment can allow the wet edge to dry. Before mixing the paint:
- Position ladders, staging, and platforms for easy reach
- Arrange brushes, rollers, trays, spray equipment, masking tape, and clean rags
- Prepare the correct thinner or cleaner
- Set up adequate lighting
- Confirm ventilation and remove ignition sources
Make sure staging is stable and allows you to work at a comfortable height. Reaching too far or repeatedly climbing down can interrupt your pace and increase the risk of uneven application.
Good lighting is important even during daylight. Low-angle light helps reveal missed areas, dry spots, runs, and differences in film thickness.
If In Doubt, Wait It Out
Postponing the job is often easier than correcting a failed finish. Do not paint simply because the boat has been sanded, masked, and moved into position. If the surface is too hot, moisture is forming, the wind is carrying debris, or rain is approaching, wait for a better application window.
Protect the prepared surface from contamination while you wait. Before painting resumes, inspect it for dust, moisture, fingerprints, insects, and other residue. Clean it again as required by the coating manufacturer.
Waiting for the right conditions gives the paint enough time to flow, level, release solvent, and form a durable film. It also makes the application easier, whether you are brushing, rolling, using the roll-and-tip method, or spraying.
Application Techniques and Tips
Good technique helps topside paint flow into a smooth, consistent film. The goal is not to force the paint flat with repeated brush or roller passes. Apply the correct amount, spread it evenly, and allow the coating to level on its own.
Work methodically and maintain a consistent pace. Topside paint begins changing as soon as it is exposed to air, so unnecessary reworking often creates more texture rather than removing it.
Follow the paint’s instructions for the recommended applicator, thinning limits, film thickness, and working time. A technique that works well with one coating may not produce the same result with another.
Careful application cannot replace proper preparation or suitable painting conditions, but it allows the coating to perform as intended. Work in manageable sections, maintain a wet edge, apply thin and even coats, and stop reworking the paint once it begins to set. These habits produce a smoother finish and make defects easier to correct between coats.
Stir the Paint Without Introducing Air
Pigments and flattening agents can settle during storage and application. Be sure to stir the paint thoroughly before use, scraping the bottom and sides of the container. Continue mixing until the color and consistency are uniform.
Use slow, controlled movements. Vigorous stirring can introduce air that later appears as bubbles in the finish.
Some paints may require occasional stirring during application, especially satin, semi-gloss, or flattening formulations. Stir according to the manufacturer’s instructions to maintain consistent sheen and color.
For two-part coatings, mix the components in the specified ratio. Scrape the sides and bottom of the mixing container, and observe any required induction time before application.
Do not estimate mix ratios by eye. Incorrect proportions can prevent proper curing or reduce coating performance.
Thin Only When Necessary
Use only the thinner specified by the manufacturer. Different reducers may be intended for brushing, rolling, spraying, or particular temperature ranges.
Thinner can help the paint flow in certain conditions, but more thinner does not automatically produce a smoother finish. Excessive thinning can cause:
- Runs and sags
- Slower film build
- Insufficient film thickness
- Lower gloss
- Reduced durability
Measure thinner rather than adding an unrecorded amount directly to the paint. Begin with little or no thinner unless the instructions recommend otherwise. Add only the amount needed to improve application within the permitted range.
Do not use thinner to compensate for painting outside the recommended temperature or humidity range.
Strain the Paint
Straining helps remove dried paint, debris, or dust that could become trapped in the finish. Use a clean paint strainer when transferring paint into a working container, especially when the can has been opened previously.
Keep the main container covered as much as possible. Pour out only the amount you expect to use during the immediate application period.
Wipe the pouring edge of the original can before replacing the lid. Dried paint around the rim can fall into the product the next time it is opened.
Do not return used paint from a roller tray or application container to the original can. It may contain dust, cured particles, or contaminants that can spoil the remaining product.
Keep the working container out of direct sunlight. Cover it when not actively applying.
For two-part paint, mix smaller batches that can be applied within the stated pot life.
Keep Track of Pot Life and Working Time
Two-part coatings have a limited pot life after the components are mixed. The paint may begin reacting before it appears visibly thick or unusable.
Do not continue applying paint beyond the manufacturer’s stated pot life. Material that has exceeded its working time may not flow, level, or cure properly.
Warm conditions can shorten pot life. A large volume of mixed paint may also generate heat and react faster than the same material spread in a roller tray.
Record the time when the components are combined. Do not rely on memory, especially when several batches are mixed during the same job.
Never add fresh paint or thinner to material that has begun curing in an attempt to extend its pot life.
Maintain a Wet Edge
A wet edge is the boundary where freshly applied paint meets the previous section while that section is still fluid enough to blend. Maintaining this edge helps prevent:
- Lap marks
- Visible overlaps
- Uneven gloss
- Heavy or thin bands
- Roller texture and brush marks
Work from the unpainted surface back toward the wet paint. Overlap the previous section slightly, then continue forward.
Do not stop in the middle of a large, highly visible panel unless the hull shape provide a natural break. Whenever possible, stop at an edge, corner, seam, chine, fitting, or masking line.
Keep each working section small enough to complete before the previous edge begins to set. The correct section size depends on the paint, temperature, airflow, hull shape, and number of people applying it.
In warm, dry, or breezy conditions, reduce the size of each section. The paint may lose its wet edge much faster than expected.
Apply Thin, Even Coats
Several thin coats usually produce a smoother and more durable finish than one heavy coat. While it may seem efficient to apply heavy, it actually increases the likelihood of:
- Runs and sags
- Slow or uneven curing
- Solvent entrapment
- Wrinkling and uneven texture
- Soft paint
- Uneven or reduced gloss
Use enough paint to create a continuous, uniform film without flooding the surface. But be careful not to stretch the paint excessively. A coat that is too thin may not flow properly, provide adequate coverage, or build the film thickness needed for durability.
Watch the surface as you work. If the applicator begins dragging, skipping, or leaving dry areas, reload it rather than pressing harder.
The final film should appear even and continuous, without obvious ridges, holidays, puddles, or transparent areas.
Load the Applicator Consistently
Whether using a brush, roller, or sprayer, load the applicator with a uniform, repeatable amount of paint for each section. Avoid beginning with a heavily saturated applicator and continuing until it becomes nearly dry.
For rollers, distribute the paint evenly across the cover before placing it on the boat. A tray or roller grid can help remove excess paint and prevent heavy deposits at the beginning of each pass.
For brushes, dip only enough of the bristles to load the working portion of the brush. Lightly remove excess paint against the inside of the container rather than scraping the brush completely dry.
For spray application, maintain a consistent gun setup and technique. Keep fluid pressure, air pressure, and fan width within the manufacturer’s recommended range, and avoid frequent adjustments during a single coat. Hold the spray gun at a consistent distance from the surface and move it at a steady speed to prevent heavy bands or dry spray. Each pass should overlap the previous one by roughly one-third to one-half of the fan pattern to ensure even coverage. Begin and end each stroke off the surface where possible to avoid buildup at edges.
Reload or adjust the spray pattern before output becomes inconsistent. A partially blocked nozzle, fluctuating pressure, or running cup can quickly create uneven film thickness, striping, or dry spray texture.
Reload before the applicator begins to drag. Applying excessive pressure to squeeze out the last remaining paint can leave thin areas, ridges, and uneven texture.
Use Light, Controlled Pressure
Let the applicator do the work. Excessive pressure can remove paint from the surface instead of spreading it evenly. It may also create ridges, roller tracks, brush marks, bubbles, or areas with inadequate film thickness.
With a roller, use enough pressure to keep the cover in contact with the surface. Pressing harder does not necessarily spread the paint more smoothly.
With a brush, use light strokes and allow the tips of the bristles to smooth the coating. Bending the brush heavily against the surface can leave deep marks and pull paint away from edges.
Reduce pressure during the final pass. The last stroke should smooth the paint without moving a large amount of material.
Avoid Overworking the Paint
Sanding creates a uniform surface profile that helps primer and paint adhere. It also removes gloss, smooths repairs, and levels minor imperfections.
Signs that the paint is becoming too tacky to work include:
- The brush begins to drag
- The roller pulls or lifts the coating
- New strokes do not blend into the wet edge of the previously applied paint
- The paint forms strings or ridges
- Previously smooth areas become dull or textured

Once this happens, stop working that section. Continuing to brush or roll usually makes the defect more noticeable.
Resist the urge to correct every small imperfection while the paint is wet. Some light brush or roller texture may level as the coating cures. Once cured, then sand and recoat according to the manufacturer’s instructions.
Brushing Technique
Use a high-quality brush recommended for the coating. Poor-quality brushes may shed bristles, leave deep marks, or fail to hold and release paint evenly.
Apply the paint with controlled strokes, then smooth it with lighter finishing strokes. Keep the brush clean and properly loaded. If paint begins curing in the bristles, the brush may drag or leave particles in the finish.
For large surfaces, work in manageable sections and blend each new area into the wet edge.
On vertical surfaces, begin near the upper portion of the section and spread the paint downward and across. This makes it easier to see and correct heavy areas before they become runs.
Brush away from corners, seams, and fittings after coating them. Paint tends to collect in these areas, so redistribute the excess onto the surrounding surface.
Avoid repeatedly brushing over an area to improve its appearance. If the coating has started to level, leave it alone.
Rolling Technique
Use a roller cover that is compatible with the paint and capable of producing the desired finish. High-density foam and short-nap rollers are commonly used for smooth topside surfaces, but the correct choice depends on the coating's chemistry.
Roll in small, controlled sections. Spread the paint in more than one direction if needed, then finish with light passes to create a uniform film.
Do not roll too quickly. Fast rolling can introduce bubbles, throw paint from the roller, and create uneven texture.
Do not continue rolling after the paint begins to tack. A roller can lift partially cured paint and leave a rough, stippled surface.
Pro Tip: Replace the roller cover if it begins to soften, shed material, develop flat spots, or leave particles in the coating. Have a few extra at the ready so you don't mess with the flow of your project.
Roll-and-Tip Method
Roll-and-tip application combines the speed of a roller with the smoothing action of a brush. One person applies a thin, even coat with a roller. A second person follows immediately with a clean brush, using light strokes to remove roller texture and release bubbles.
This method works best when both people maintain a steady pace and stay close together. The person tipping should work on freshly rolled paint before it begins to set.
If working alone, use smaller sections so you can roll and tip each area without losing the wet edge.
Apply the paint with the roller in a controlled pattern. Spread a thin, even film using light, consistent passes—do not overwork the roller or keep rolling once the paint has begun to set or the surface starts to dull, as this can create heavy buildup, uneven thickness, and unwanted texture.
Tip the paint with light, overlapping strokes. Hold the brush at a low angle and use only the ends of the bristles. The goal is to smooth the film, not brush the paint out more thinly.
Complete the final tipping strokes in a consistent direction. On hull sides, many painters finish with vertical strokes, but the best direction may depend on the shape of the surface and the product instructions.
Cutting In Around Edges and Hardware
Cut in around masking lines, fittings, corners, and detailed areas before coating the adjacent open surface.
Keep the cut-in area narrow. A wide brushed border may begin setting before the rolled section reaches it, leaving a visible difference in texture or gloss. Use smaller brushes where necessary rather than trying to force a large brush into tight spaces.
Work in short sections so the open area can be blended into the cut-in paint while both remain wet.
Avoid allowing paint to collect along tape edges, seams, fasteners, or the underside of fittings. Heavy deposits cure slowly and may tear when masking tape is removed.
Watch for Runs and Sags
Runs and sags usually result from excessive film thickness, over-thinning, slow drying conditions, or paint collecting around an edge or detail.
Inspect the surface frequently from different angles. Low-angle light makes heavy areas easier to see. Pay particular attention to:
- Corners and edges
- Chines
- Fasteners and hardware
- Drips beneath rails or overhangs
- The lower edge of vertical panels
- Areas where sections overlap
Correct a run only while the paint is still fluid enough to level. Use a lightly loaded brush to lift and redistribute the excess paint. Feather the surrounding area gently, then leave it alone.
If the paint has already begun to set, do not continue brushing it. Allow the coating to cure fully, sand the defect smooth, and recoat the area.
Sand Between Coats When Required
Sanding between coats can remove dust nibs, small runs, brush marks, and other imperfections. It also creates a mechanical profile when required for adhesion.
Do not sand until the coating has cured enough to produce fine sanding dust. Paint that is still soft may clog the abrasive, tear, or become permanently marked.
Use the grit recommended by the manufacturer. Sand lightly and evenly, taking care not to cut through edges or high spots. After sanding:
- Vacuum the surface thoroughly.
- Remove dust from seams, corners, and fittings.
- Wipe the surface only with products approved for the coating system.
- Allow any cleaner or solvent to evaporate fully.
- Inspect for contamination before recoating.
Do not automatically sand between coats if the next coat will be applied within an approved chemical recoat window. Follow the product instructions.
Do Not Judge the Finish Too Soon
Fresh topside paint changes as solvents evaporate and the coating levels. Immediately after application, the surface may show light brush marks, roller texture, or minor variations in gloss. Some of these may disappear as the paint flows.
Avoid touching or reworking the coating simply because it does not look finished during the first few minutes.

Evaluate the result after the coating has cured for the recommended time and under even lighting. A small dust nib or minor defect may be less noticeable after the entire boat is finished than it appears while inspecting the wet paint from a few inches away.
Focus on producing a consistent film. Correct significant defects between coats rather than repeatedly disturbing paint that is already leveling.
Protect the Coating While It Cures
Keep people, tools, hoses, cords, ladders, tarps, and staging away from the freshly painted surface.
Prevent dust-producing work nearby. Avoid opening doors, moving equipment, or turning on fans that may blow debris into the coating.
Do not cover fresh paint with plastic or fabric unless the manufacturer specifically recommends it. Contact with a cover can mark the surface, trap solvent, or affect gloss.
Protect outdoor work from rain, dew, overspray, leaves, and insects without restricting the ventilation needed for curing.
Common Questions Asked
Why does my topside paint have brush marks or roller texture?
Brush marks and roller texture usually occur when the paint does not have enough time to flow and level. Common causes include applying paint in direct sunlight, working on a hot surface, using too much pressure, applying the coating too thinly, or continuing to work it after it begins to set.
To reduce visible texture:
- Work in smaller sections and maintain a wet edge.
- Apply a thin, continuous film without stretching it excessively.
- Use light pressure during the final brush or roller pass.
- Avoid repeatedly brushing or rolling an area as it begins to tack.
- Use only the manufacturer-approved thinner and remain within the stated thinning limit.
During roll-and-tip application, tip the freshly rolled paint immediately with light, consistent strokes. The brush should smooth the roller texture without removing a significant amount of paint.
Do not try to repair hardened brush marks by applying more pressure or thinner to the partially cured coating. Allow the paint to cure, sand the surface smooth using the recommended abrasive, clean it thoroughly, and apply another coat under more favorable conditions.
What causes runs and sags, and how should I fix them?
Runs and sags occur when wet paint moves downward before it develops enough body to remain in place. They are commonly caused by applying too much paint, over-thinning, working in cool conditions, or allowing material to collect around edges, corners, hardware, and overlaps.
Inspect vertical surfaces frequently using low-angle light. Runs are easier to correct while the paint remains fluid.
If the paint is still wet, use a lightly loaded brush to lift and redistribute the excess material. Feather the surrounding area gently, then stop working it so the coating can level.
If the paint has already become tacky, leave it alone. Brushing a partially cured run usually creates a larger rough area. Allow the coating to cure fully, sand the defect level without cutting through the surrounding finish, and recoat the area.
Why are bubbles or pinholes appearing in the finish?
Bubbles may be introduced by the applicator or may rise from the substrate beneath the paint. Common causes include:
- Shaking or aggressively mixing the paint
- Applying excessive pressure
- Using an incompatible roller cover
- Rolling too quickly or repeatedly over the same area
- Painting in excessive heat
- Working the paint after it begins to set
Pinholes or recurring bubbles may also indicate air escaping from porous fiberglass, wood, filler, seams, or repairs. This is especially common when a cool surface heats rapidly after painting.
Stir the paint slowly, use compatible tools, and apply it at a controlled pace. During roll-and-tip application, light tipping can release small surface bubbles while the coating remains wet.
If bubbles continue rising from the same areas, stop painting and investigate the substrate. The surface may need additional sealing, priming, drying, or repair before another finish coat is applied.
Allow cured bubbles or pinholes to harden before sanding them smooth. Clean the surface carefully and recoat only after correcting the underlying cause.
Why does the finish look dull, patchy, or uneven in gloss?
Uneven gloss often results from inconsistent film thickness, dry overlaps, variable surface porosity, improper mixing, or differences in application conditions across the surface. Common causes include:
- Losing the wet edge
- Applying some sections more heavily than others
- Excessive thinning
- Painting over unevenly primed or porous areas
- Applying paint in changing temperature, wind, or sunlight
- Failing to mix settled pigments or flattening agents thoroughly
- Reworking sections after they begin to tack
- Moisture or condensation affecting the coating
Stir the paint thoroughly before use and periodically during application when directed, especially with satin or semi-gloss coatings. Load the applicator consistently and complete each section while the previous edge remains wet.
If the finish remains uneven after the recommended cure period, sand it uniformly and apply another full coat. Spot-coating isolated dull areas may create additional differences in texture, color, or gloss.
Why is the paint peeling, wrinkling, lifting, or staying soft?
These defects usually indicate a problem with surface preparation, compatibility, application thickness, recoat timing, mixing, or curing conditions.
Peeling or lifting may result from:
- Painting over wax, oil, dust, moisture, or sanding residue
- Applying paint over an incompatible existing coating
- Failing to sand or prime as required
- Applying the next coat outside the approved recoat window
- Using a non-recommended solvent or cleaner
Wrinkling and prolonged softness may result from:
- Applying the paint too heavily
- Recoating before the previous layer has released enough solvent
- Using an incorrect mix ratio with two-part paint or applying beyond its pot life
- Adding too much thinner
- Using a non-recommended solvent or cleaner
Do not cover a soft, wrinkled, or poorly bonded coating with another coat. Additional paint may trap more solvent and make the failure more difficult to correct.
Allow the surface to cure as much as possible, then determine whether the defective material can be sanded or must be removed. Confirm coating compatibility, preparation requirements, mix ratios, and recoat intervals before continuing. When the cause is uncertain, test the complete system on a small prepared area before repainting the entire surface.
Final Pro Tips
A successful topside paint job depends on careful preparation, favorable weather conditions, quality materials, and patient application. Every step—from cleaning and sanding to maintaining a wet edge and allowing adequate cure time—contributes to the final appearance and long-term durability of the finish.
Whether you're refreshing a small repair or repainting an entire hull, taking the time to follow the coating manufacturer's instructions and using proven marine products will help you achieve a finish that looks better, lasts longer, and stands up to years of use on the water.
Ready to get started? Explore the full line of TotalBoat topside paints to find the right finish for your boat and application method. For help choosing products, planning surface preparation, or troubleshooting your project, reach out to our technical support team for practical answers to your questions.