















How to Apply Bottom Paint
Learn How to Paint Your Boat Like a Pro
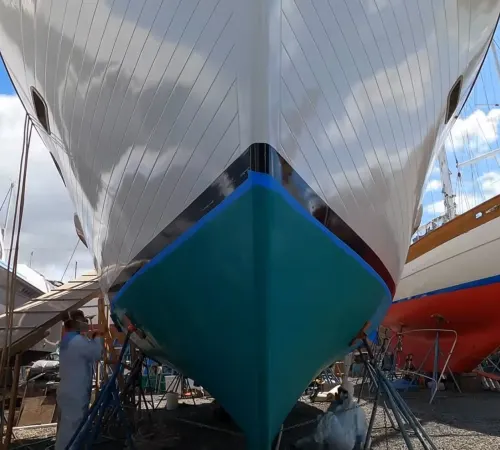
Not every boat needs antifouling paint, such as small watercraft and aluminum boats that don't stay in the water. But for larger vessels that spend extended time in fouling waters, bottom paint is essential to keeping barnacles, weeds, slime, algae, mussels, and other marine growth off your hull. Antifouling coatings release active ingredients at the surface to discourage organisms from attaching and multiplying.
Marine growth affects more than appearance. A fouled hull creates drag, reduces speed, increases fuel consumption, and can affect handling and maneuverability. The right antifouling bottom paint helps the boat perform at its best.
Bottom painting is a manageable DIY project when you approach it systematically. The most important factors are selecting a coating that matches your hull and local conditions, preparing the surface thoroughly, applying the correct amount of paint, and following the manufacturer's recoat and launch instructions.
This guide covers the complete process, from choosing a bottom paint and estimating the quantity you need to preparing the hull, establishing a waterline, applying multiple coats, and launching the boat safely for a beautiful day out on the water.
Choosing the Right Bottom Paint
Antifouling paints differ in how they wear, how they release biocide, how they respond to hauling and relaunching, and which hull materials they can be applied to. There is no single bottom paint that is ideal for every boat, location, and use pattern.
Your choice should account for where you boat, whether the water is fresh or salt, how severe the fouling is, how often the boat moves, whether it remains in the water or is trailered, what the hull is made of, and what coating is already on the bottom. Compatibility with the existing paint is particularly important because applying an incompatible coating can lead to poor adhesion, premature failure, or extensive additional preparation.

Start with Your Location
Bottom-paint performance is strongly influenced by local water conditions. Water temperature, salinity, current, pollution, silt, sunlight, and the species of marine organisms in the area all affect how quickly fouling develops.
Warm, nutrient-rich, slow-moving water generally produces heavier fouling than cool water or areas with stronger currents. A boat that moves frequently may also accumulate less growth than one that remains stationary at a dock or mooring for long periods.
Local experience is valuable when selecting a product. Ask boat owners in your marina, a reputable boatyard, or a marine-paint professional which coatings perform well in your area and how many coats are typically applied. A paint that works well in a cool freshwater lake may not provide adequate protection in a warm saltwater harbor.
Types of Antifouling Bottom Paint
Most antifouling bottom paints fall into two broad categories: ablative and hard. Within those categories, products vary in their biocide content, durability, polishing rate, and suitability for different boating conditions.
Read the product label and technical data sheet before making a final selection. The terms used to describe a paint can vary by manufacturer, and the application, recoat, and launch requirements are product-specific.
Ablative Bottom Paint
Ablative bottom paint gradually wears away as water moves across the hull. As the outer surface erodes, it exposes fresh antifouling ingredients, helping maintain protection throughout the coating's service life.
Because the coating wears instead of remaining as a permanent film, ablative paint generally reduces the heavy buildup associated with repeated applications of hard paint. This can simplify future maintenance, although the hull still needs to be inspected and properly prepared before recoating.

Ablative paints are often a good choice for:
- Sailboats and powerboats
- Boats that are used regularly
- Boats that are hauled between seasons
- Boats that may be hauled and relaunched during the season
- Boaters who want to limit long-term paint buildup
Some ablative paints are formulated for one season, while others are designed to provide protection over multiple seasons. The actual service life depends on the product, the number of coats, boat speed, water conditions, and how much time the boat spends in the water.
Many ablative coatings can tolerate hauling and relaunching, but this is not true of every product. Check the manufacturer's instructions before assuming that a haul-out will not require repainting.
Hard Bottom Paint
Hard antifouling paint forms a durable coating that remains on the hull rather than gradually wearing away. Its biocides slowly migrate from the paint film while the boat is in the water.
Once the active ingredients have been depleted, the remaining paint film may still be present on the hull. Repeated applications can therefore create substantial buildup, especially if old layers are not periodically removed or reduced.
Hard paints are often selected for:
- Fast powerboats
- Racing boats
- Boats that remain in the water for extended periods
- Boats that are cleaned or scrubbed underwater
- Applications where a durable, non-ablating film is preferred
Some hard bottom paints, and even a few ablative formulas, can be sanded or burnished to create a very smooth surface. This may be useful for performance-oriented boats, but sanding antifouling paint creates hazardous dust and must be performed with appropriate containment and respiratory protection.
What's Actually Fighting the Fouling?
Most antifouling paints contain one or more biocides that discourage hard growth such as barnacles, mussels, and other shell-forming organisms. Some products also contain an algaecide to help control slime, grass, and algae.
Copper has traditionally been one of the most common antifouling ingredients. Products may use forms such as cuprous oxide or cuprous thiocyanate, often in combination with other active ingredients and paint technologies.

Copper-based coatings require special care around aluminum. Copper can contribute to galvanic corrosion when it is placed in direct or indirect contact with aluminum or other underwater metals. Do not apply a copper-based antifouling paint directly to an aluminum hull, pontoon, outdrive, trim tab, or other underwater aluminum component unless the complete coating system is specifically designed and approved for that application.
Some antifouling paints use copper-free alternatives such as Econea™ and may be appropriate for aluminum hulls and underwater metals. These products still require the correct primer and surface-preparation system, so confirm compatibility with the paint manufacturer.
If slime and algae are the primary problems in your area, choose a product formulated to address both soft and hard fouling. A paint designed mainly for barnacle control may not provide the same level of slime resistance as a product that includes an algaecide.
Which Bottom Paint Is Best for Your Boat?
Before choosing a product, evaluate the hull material, existing coating, boating habits, storage method, and local fouling conditions. These factors determine both the type of paint you need and the preparation required before application.
What's your hull made of?
Fiberglass, gelcoat, wood, properly primed steel, and properly primed iron can generally accept a range of antifouling paints when the surface is clean, sound, and correctly primed.

Aluminum requires additional caution. Do not apply a copper-based antifouling paint directly to aluminum hulls, pontoons, outdrives, trim tabs, or other underwater aluminum components. Use a copper-free antifouling coating and the primer system specified for aluminum by the manufacturer.
Wood hulls may require special attention to moisture content, fasteners, seams, and existing paint systems. Steel and iron must be properly prepared and protected with a compatible primer before antifouling paint is applied.
Is there existing paint on the bottom?
If you're switching brands or working with a previously-owned boat, the existing paint must be identified and evaluated before recoating. Most ablative bottom paints can be applied over many properly prepared hard antifouling paints, but hard paints generally should not be applied over ablative coatings because the softer underlying film may not provide a stable surface.
Vinyl, Teflon-based, silicone-based, and other specialty coatings can create additional compatibility problems. If you do not know what is on the hull, test a small area before committing to the entire bottom.
To test the existing coating, choose an inconspicuous section of the hull and clean it thoroughly. Lightly sand a small area, then apply the new bottom paint according to the manufacturer's instructions. Allow it to dry and cure for the recommended time, then inspect the test patch for wrinkling, lifting, bubbling, cracking, softening, or poor adhesion. Press masking tape firmly onto the cured test area and pull it off sharply. If the new paint comes away with the tape or the underlying coating shows signs of lifting or reacting, the coatings are incompatible and the existing paint should be removed before painting the entire hull.
If there's peeling, cracking, blistering, heavy build up, or failing over large areas, stripping it may be safer and more efficient than attempting to paint over it. Always consult the new paint manufacturer's compatibility chart and surface-preparation instructions.
How often do you use the boat?
A boat that moves regularly has different antifouling requirements from one that remains at a dock or mooring for weeks at a time. Water movement can help reduce some types of growth, while stationary boats may experience heavier accumulation.
Frequently used boats are often good candidates for ablative paints. Boats that remain stationary for long periods may require a product formulated for heavier fouling and extended immersion.
Is the boat trailered?
Trailering exposes the coating to repeated launching, hauling, road vibration, and contact with trailer bunks or rollers. If the boat spends significant time on a trailer, select a coating that is approved for that use and follow the manufacturer's instructions for areas covered by bunks and supports.
Some bottom paints are more tolerant of being out of the water than others. Confirm the product's launch-window requirements before scheduling the painting project.
How bad is the fouling?
Light freshwater slime generally requires less aggressive antifouling protection than heavy saltwater fouling. However, local conditions can vary considerably, even within the same region.
Choose the type and strength of antifouling protection based on the organisms present where the boat is kept, the length of the boating season, and the amount of time the hull remains immersed. Local boatyards and experienced boat owners can often provide useful information about which products have performed reliably.
Figuring Out How Much Bottom Paint You'll Need
The last thing you want is to run out of paint. Buy enough to apply the manufacturer's recommended number of coats at the specified film thickness -- we recommened adding 15% to the estimate to help account for mistakes and touchups. Applying too little paint can leave thin areas that wear through early, while buying only the minimum quantity can make it difficult to complete high-wear areas or finish missed sections.
A simple estimate for underwater surface area is:
Boat Length × Beam × 0.85 = Approximate Area
Use the boat's length, measured from bow to stern, and its beam, which is the boat's maximum width. Then compare the resulting area with the coverage rate listed on the paint can or technical data sheet. Coverage rates are usually expressed in square feet per gallon or square feet per quart. For stronger estimates, use a bottom paint calculator.
Plan for the recommended number of coats rather than assuming one coat will be sufficient. Many ablative antifouling paints call for two full coats, with an additional coat on high-wear areas such as the waterline, leading edge of the keel, rudder, bow, and other surfaces exposed to greater water flow.
Approximate quantities for two-coat applications:
Boat Type | Approximate Bottom Paint |
|---|---|
14 ft. Outboard | 1-2 Quarts |
18' Runabout | 2 Quarts |
20 ft. Sailboat | 3 Quarts |
24 ft. Runaboat | 3-4 Quarts |
30 ft. Sailboat | 1.5 Gallon |
32 ft. Cruiser | 1.5-2 Gallons |
36 ft. Auxiliary Sailboat | 2 Gallons |
40 ft. Sailboat | 2.5 Gallons |
45 ft. Sailboat | 3-3.5 Gallons |
50 ft. Sportfisher | 4 Gallons |
These figures are general estimates, not exact requirements. Hull shape, beam, keel configuration, draft, number of coats, application method, roller texture, and the product's coverage rate can all change the amount needed.
If the hull has a deep keel, multiple underwater appendages, or a large rudder, allow additional paint for those surfaces. Also account for paint used in trays, on rollers, and during brush application around hardware.
Always follow the coating manufacturer's stated coverage and wet-film or dry-film thickness recommendations. The correct amount of paint is determined by the required film thickness, not simply by whether the hull appears covered.
How to Strike and Tape a Waterline
If the existing waterline is accurate, clearly visible, and appropriate for the boat's current load and trim, you can usually follow it when masking for bottom paint. Clean the area first so the tape can adhere to a firm, uncontaminated surface.
If you are establishing a new waterline, do not measure the same distance down from the deck at every point around the hull. Hull shapes change from the bow to the stern, and a uniform measurement can produce a line that appears uneven when the boat is floating.
A properly established waterline should look level when the boat is in the water at its normal load and trim. Consider fuel, water, batteries, equipment, and other regularly carried weight before marking the line.
Use a long, flexible batten, laser level, water level, or another reliable method to establish a smooth reference line. Mark the line at several points, then connect the marks with flexible masking tape rather than forcing the tape into sharp changes of direction.
Use high-quality masking tape designed for marine coatings and the surface you are taping. Press the tape edge down firmly, especially around curves, chines, through-hulls, and transitions where paint could bleed underneath.
Take time to inspect the line from several angles before painting. A waterline that looks acceptable from one position may appear uneven from the dock or when the boat is floating.
If you plan to add a boot stripe, account for its width and location before applying the bottom-paint tape. Establishing the bottom-paint line and boot-stripe boundaries together helps prevent uneven spacing and unnecessary repainting.

Bottom Painting Equipment
Bottom paint can be applied with basic brush-and-roller equipment, but personal protection and job-site containment are essential. Antifouling coatings contain active ingredients intended to affect marine organisms, and sanding old bottom paint can release hazardous dust.
Work in an area where paint chips, sanding dust, and wash water can be collected. Follow local regulations for containing, transporting, and disposing of antifouling paint waste rather than allowing it to enter soil, storm drains, or surface water.
For most DIY bottom-painting jobs, you'll need:
- Protective paint suit with hood
- Chemical-resistant gloves
- Eye protection or a face shield
- Appropriate respirator and cartridges for sanding and coating exposure
- Pressure washer, scraper, or stiff brush for removing loose paint and contaminants
- Bottom-paint-compatible chemical stripper if old paint must be removed
- Random-orbit sander or other suitable sander
- Sandpaper in the grits recommended for your project from the paint's Technical Data Sheet (TDS)
- Vacuum with suitable dust filtration
- High-quality masking tape, including flexible tape for curves
- Lint-free rags
- Wax and grease remover or a similar surface prep solvent
- Paint stirrers
- Solvent-resistant paint trays and liners
- Solvent-resistant roller covers
- Drop cloths, plastic sheeting, or ground protection
- Compatible primer or epoxy barrier coat, if required
- Containers or bags for collecting paint chips and sanding debris
Use a respirator selected for the specific hazards of the products being used. A dust mask is not automatically adequate for solvent vapors or antifouling paint exposure. Read the safety data sheets and product labels before beginning work.
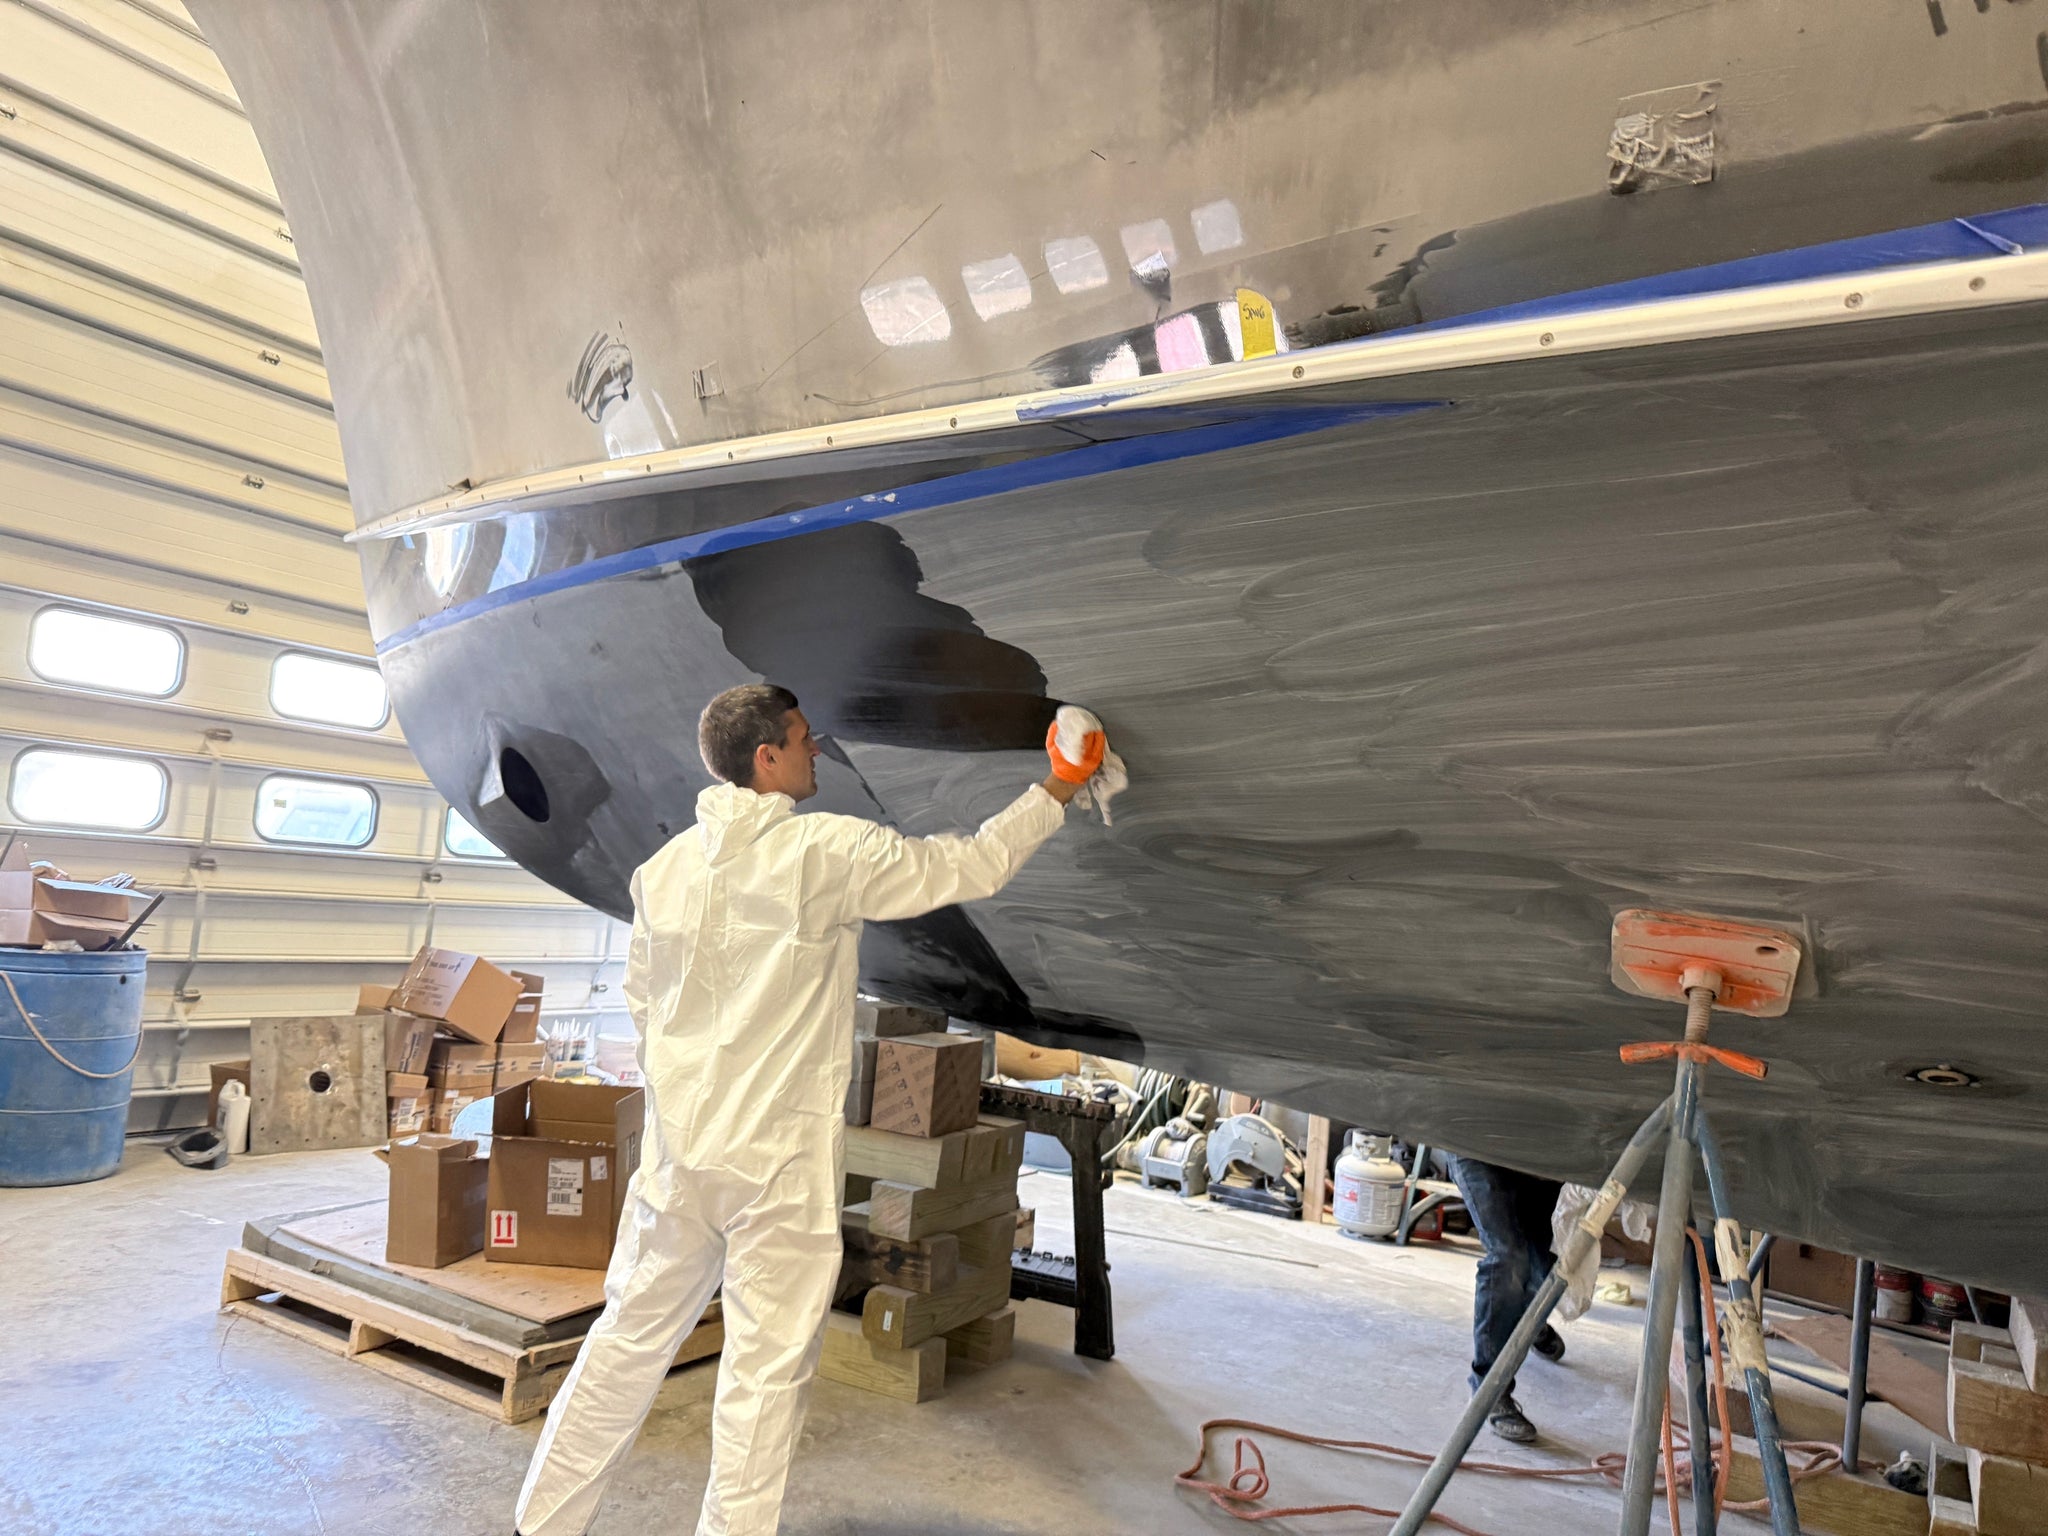
For DIY application, brushing and rolling are generally the safest and simplest methods. They provide good control, reduce airborne overspray, and make it easier to apply the correct amount of paint to individual sections.
Spraying antifouling paint creates substantially greater exposure to hazardous material and requires specialized equipment, ventilation, containment, and personal protective equipment. For most DIY boat owners, rolling is the more practical choice.
Pro Tip: If you're using solvent-based antifouling paint, use solvent-resistant rollers, brushes, trays, and liners. Strong solvents can soften or destroy ordinary household painting supplies, causing fibers or debris to become embedded in the coating.
Prepare the Surface for Bottom Painting
Good bottom paint cannot compensate for poor surface preparation. The coating must bond to a clean, sound, properly prepared surface, and any defects in the existing system should be corrected before new paint is applied.
The amount of preparation depends on the hull material, the condition and type of existing coating, and whether you are recoating over existing paint or starting with a bare substrate. Do not rush through inspection; problems hidden beneath new paint can become more difficult and expensive to correct later.
1. Inspect the Existing Bottom
Examine the entire underwater surface, including the keel, rudder, struts, trim tabs, through-hulls, chines, and areas around trailer bunks or jack stands. Look for cracking, peeling, flaking, blistering, loose paint, excessive buildup, damaged barrier coating, exposed substrate, corrosion, and areas where the previous coating has worn thin.
If the existing paint is firmly attached, reasonably smooth, and compatible with the new product, you may only need to clean, abrade, and recoat it. If the coating is failing over large areas or its identity is unknown, plan for more extensive removal or consult the paint manufacturer before proceeding.
2. Remove Marine Growth and Contaminants
If the boat has just been hauled, pressure wash the hull while barnacles, slime, and other growth are still wet. Removing growth promptly is usually easier than allowing it to dry and harden on the surface.
Scrape away remaining barnacles, shells, tubeworms, and other hard deposits with a suitable scraper. Avoid gouging the hull or damaging a sound barrier coat beneath the antifouling paint.
The surface must be clean before sanding. If marine growth, grease, or other contamination remains, sanding can press it into the old coating and interfere with adhesion.
3. Remove Loose or Incompatible Paint
Scrape or sand away all loose, peeling, and flaking paint. Feather the edges of remaining sound coating so there are no abrupt ridges that will show through the new application.
If the coating is heavily built up, failing across large areas, or incompatible with the new bottom paint, use a bottom-paint-compatible chemical stripper or another approved removal method. Follow the stripper manufacturer's instructions for dwell time, scraping, rinsing, and neutralization.
Do not use uncontrolled dry sanding or aggressive blasting methods that spread antifouling dust into the surrounding area. Follow local environmental requirements for collecting and disposing of paint chips, sludge, used abrasive, and contaminated wash water.
4. Make Repairs
Inspect the exposed hull for cracks, gouges, blisters, impact damage, corrosion, damaged fiberglass, fairing problems, and other defects. Repair these issues before applying primer or bottom paint because antifouling paint is not intended to fill structural damage or correct an uneven surface.
On fiberglass hulls, repair damaged laminate and fairing compound according to the repair system manufacturer's instructions. On metal hulls, remove corrosion and restore the specified primer system before applying antifouling paint.
If stripping reveals damage to an existing epoxy barrier coat, repair the barrier system before proceeding. Allow repair materials to cure fully, then sand and clean them according to the coating manufacturer's requirements.

5. Sand the Surface
Sand the existing coating or substrate using the grit recommended by the bottom-paint manufacturer. The correct abrasive creates enough profile for adhesion without unnecessarily removing sound material or damaging the hull.
The goal is not always to remove every layer of existing paint. On a sound, compatible coating, the objective is usually to create a clean, uniformly abraded surface with no glossy areas, loose edges, or contamination.
Use dust collection whenever possible and wear the respiratory protection specified for the work. Keep the sanding area contained, and do not allow antifouling dust to enter the water or accumulate on nearby surfaces.
7. Mask the Waterline and Hardware
Once the hull is clean, prepared, dry, and ready to paint, mask the waterline. Also protect areas that should not receive antifouling paint, including certain transducers, anodes, propeller shafts, seals, and other underwater hardware unless the product is specifically approved for those surfaces.
Confirm the compatibility of bottom paint with every underwater component before coating it. Some metals require a dedicated primer, while sacrificial anodes must remain exposed and functional.
Double-check the tape line from several angles before opening the paint. Correcting the tape now is much easier than repairing a crooked waterline or removing paint from protected hardware later.
8. Prime or Barrier Coat if Needed
Bare fiberglass, wood, steel, aluminum, and repaired areas may require a specific primer before bottom paint. The primer must be compatible with both the substrate and the antifouling coating.
If you're painting a new fiberglass boat for the first time, or if you have stripped the hull down to bare substrate, an epoxy barrier coat may provide additional protection against water intrusion and osmotic blistering. A barrier coat is a system of multiple coats, not simply a single coat of ordinary primer, so follow the product's complete application schedule.
For steel or aluminum, use a primer system specifically approved for the metal substrate and the antifouling paint. Aluminum typically requires a copper-free antifouling system and a primer that isolates the metal from the coating.
Timing is important when applying bottom paint over primers and epoxy barrier coats. Some products require antifouling paint to be applied within a specific overcoat window, while others must be sanded after curing. Follow the technical data sheet rather than relying on the surface's appearance.
Best Conditions for Bottom Painting
Even excellent surface preparation can be undermined by unsuitable weather or work-site conditions. Temperature, humidity, dew, condensation, wind, and direct sunlight can affect drying, adhesion, film thickness, and the final launch schedule.
Check the label and technical data sheet for your specific antifouling paint before starting. Product requirements vary, and the manufacturer's stated limits take precedence over general guidelines.
As a general guideline, bottom painting is often best when temperatures are approximately 50-85°F, with humidity within the range recommended by the manufacturer. The hull, paint, and surrounding air should all be within the specified temperature range for best results.
Choose a dry day with minimal wind and enough time to complete the required coats within the recoat window. Wind can carry dust and debris into wet paint, accelerate solvent evaporation, and make it difficult to maintain a consistent film thickness.
Avoid painting:
- In rain or when rain is likely before the coating has cured sufficiently
- In strong wind that can blow dust, leaves, or debris into wet paint
- On a wet or damp hull
- In direct, intense sunlight that heats the hull and causes paint to dry too quickly
- Outside the manufacturer's recommended temperature or humidity range
A shaded or covered work area can make conditions more consistent, but it must still have adequate ventilation. Do not paint in an enclosed space unless the ventilation system is appropriate for solvent vapors and the product's safety requirements.
Early morning can work well after dew has fully evaporated, while late afternoon may be suitable if the coating will remain above the minimum temperature as it dries. Monitor the hull surface rather than relying only on the weather forecast.
Before opening the can, plan the entire job. Know the minimum and maximum recoat times, the number of coats required, the drying time, the expected weather during the work period, and the allowable launch window.

Bottom Painting Like a Pro
The application process is straightforward, but consistency matters. Work methodically, maintain a wet edge where practical, and monitor the amount of paint used so you do not apply the coating too thinly or too heavily.
Divide the hull into manageable sections and establish a sequence that allows you to reach all areas safely. Keep the paint, tools, and safety equipment organized so you are not climbing over wet coating or leaving an open can exposed to unnecessary contamination.
Mix the Paint Thoroughly
Antifouling ingredients are often heavy and can settle firmly on the bottom of the can. If those ingredients are not redistributed, the first part of the application may contain too little biocide and the last part may be excessively concentrated.
If possible, have the paint professionally shaken before starting. Even after mechanical shaking, stir the paint thoroughly with a suitable stirrer, scraping the bottom and sides of the container as you work.
Continue stirring at regular intervals during application. High-solids and high-copper paints can begin settling while you are rolling, especially in warm conditions or when the paint sits in a tray for an extended period.
If you're using multiple cans of the same color and product, combine them in a larger container before application when practical. This process, sometimes called boxing the paint, helps reduce minor color differences between cans.
Follow the Manufacturer's Thinning Instructions
Do not automatically thin bottom paint. Many antifouling coatings are formulated to be applied as supplied, and adding thinner without approval can reduce film thickness and change the coating's performance.
Only thin when the manufacturer recommends it, using the specified thinner and amount. Measure the thinner rather than adding it by guesswork.
Over-thinning can reduce the amount of antifouling material deposited on the hull, increase runs or sagging, and make it difficult to achieve the required coverage. If the paint seems too thick to apply, confirm that it has been mixed properly and that the temperature is within the recommended range before adding thinner.
Cut In First
Use a brush to apply paint around:
- Thru-hulls
- Rudders
- Struts
- Keels
- Trim tabs
- Tight corners
- Areas around the waterline
- Trailer-bunk contact areas
- Other tight places that a roller cannot reach cleanly
Apply the same target film thickness in these areas rather than leaving a thin brush coat. Avoid creating heavy ridges where brushed areas overlap rolled sections.
Use only coatings that are compatible with the substrate, especially around underwater metals. Do not coat sacrificial anodes, transducers, seals, or other components unless the product and equipment manufacturer specifically approve it.
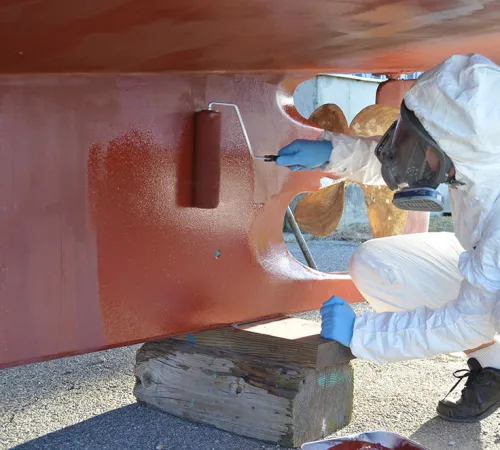
Roll on the First Coat
Use the roller type and nap recommended for your bottom paint. Solvent-resistant roller covers are essential for solvent-based products because ordinary foam or household rollers may soften, shed, or disintegrate.
Work in manageable sections and apply the paint evenly at the manufacturer's recommended film thickness. Roll in a consistent pattern, then lightly smooth the section if the product instructions recommend it.
Bottom paint is not topside paint, so you do not need to chase a high-gloss yacht finish. The objective is complete, uniform antifouling coverage at the correct thickness, with no exposed substrate, thin areas, skips, or excessive runs.
Watch for holidays, which are small missed areas that may be difficult to see once the coating dries. Inspect the surface from different angles and correct missed spots while the paint is still within the appropriate working window.
Keep Stirring
Stop regularly and stir the paint again, both in the original container and in the tray when necessary. Do not rely on a single thorough mixing at the beginning of the job.
This is especially important with high-solids and high-copper antifouling paints because the heavy ingredients can settle while you are working. If the paint in the tray becomes noticeably different in color or consistency, stop and remix the material before continuing.
Keep the container covered when possible to reduce solvent loss and contamination. Do not pour more paint into a dirty tray or return contaminated paint to the original can.
Apply the Required Number of Coats
Follow the product instructions for the number of coats, the minimum recoat time, and the maximum recoat time. Applying a second coat too soon can trap solvent or damage the first coat, while waiting too long may require sanding or other preparation.
Many ablative bottom paints call for two full coats. The required number may be different for hard paints, barrier-coat systems, specific hull materials, or products intended for severe fouling conditions.
If your paint requires two coats, using slightly different colors for successive coats or seasons can help show where the outer layer has worn away. This can make it easier to identify thin areas during future inspections, but only use colors and products that the manufacturer approves for the application.
Do not assume that a visible color change means the coating has reached the end of its service life. Inspect the hull and follow the product's maintenance recommendations.
Add Extra Paint to High-Wear Areas
Apply an additional coat where paint tends to wear fastest, especially:
- The waterline
- Leading edge of the keel
- Rudder
- Bow
- Forward edge of centerboards or daggerboards
- Trim tabs and other high-flow surfaces
- Areas exposed to repeated cleaning
- Other locations recommended by the paint manufacturer
These areas experience greater water movement, turbulence, abrasion, or cleaning activity. They typically lose ablative paint faster than flatter, lower-flow sections of the hull.
Apply extra paint only where appropriate and maintain smooth transitions into surrounding areas. Excessive buildup can create ridges, interfere with moving components, or make future maintenance more difficult.
Paint Under the Jack Stands
If your boat is supported by jack stands, the pads will cover portions of the hull that cannot be painted initially. Plan for these areas before beginning so they are not forgotten.
Do not move jack stands yourself unless you are trained and authorized to do so. A boatyard should reposition the stands safely while maintaining adequate support for the hull.
Once the stands are moved, clean and prepare the previously covered areas, then apply the same primer and bottom-paint system used on the rest of the hull. Allow the coating to dry according to the product instructions before the stands are returned or the boat is moved.
Remove the Tape
Remove masking tape at the stage recommended by the paint or tape manufacturer. Some tapes should be removed while the coating is still slightly soft, while others can remain until the paint has cured further.
Do not leave exterior masking tape on longer than necessary. Sunlight, temperature changes, and solvent exposure can make tape more difficult to remove and increase the chance of pulling cured paint away from the edge.

Pull the tape back over itself at a steady angle rather than lifting it straight upward. If the coating has bridged across the tape edge, carefully score the line with a sharp blade before removing the tape, taking care not to damage the underlying surface.
Before You Launch
Do not launch the boat simply because the paint feels dry to the touch. Antifouling coatings can remain soft or continue releasing solvent after the surface appears dry, and premature immersion can damage the film or reduce its performance.
Antifouling paints have specific launch windows. These requirements vary considerably by product, temperature, humidity, number of coats, and the type of coating system beneath the antifouling paint.
Some coatings must be launched within a defined period after the final coat. Other products, like TotalBoat ablative paints, allow the boat to remain out of the water with an unlimited launch window.
Before painting, check:
Minimum time before launch: How long must the final coat dry before the boat can safely enter the water? This time may increase in cool or humid conditions.
Maximum launch window: Is there a maximum amount of time the painted boat can remain out of the water before it must be launched? If so, schedule the painting project and boatyard work accordingly.
Temperature and humidity can change these times, so follow the instructions for the actual conditions during and after application. If weather delays the launch beyond the stated window, contact the paint manufacturer or a qualified marine professional before immersing the boat.
Launching too early can soften, wash away, or otherwise damage the coating. Waiting too long with a paint that has a limited launch window can reduce antifouling performance or require additional surface preparation.
Before launch, inspect the entire bottom for missed areas, runs, damaged paint, exposed substrate, and paint on hardware that should have remained uncoated. Confirm that the drain plug is installed, all supports can be removed safely, and the boat is ready for the launch procedure.
Once the required cure time has passed and the launch conditions are satisfied, return the boat to the water and monitor the coating during the first outing. Avoid unnecessary scrubbing or aggressive cleaning until the paint has fully developed its intended properties according to the manufacturer's instructions.

Common Questions Asked
How long does bottom paint last?
It depends on the type of bottom paint, how many coats are applied, local fouling conditions, and how the boat is used. Some antifouling paints are designed for a single season, while multi-season ablative paints can remain effective for more than one season if enough coating remains. Inspect the bottom regularly and recoat when the paint is wearing thin or no longer providing adequate antifouling protection.
How do I choose the right bottom paint for saltwater vs. freshwater?
Choose bottom paint based on both the type of water and the fouling conditions where your boat is kept. Saltwater generally supports heavier growth such as barnacles, mussels, slime, and algae, so boats in warm or high-fouling saltwater areas often need stronger antifouling protection. Freshwater typically has less hard growth, but slime and algae can still be significant. Look for a paint rated for your water type, hull material, and local fouling conditions, and ask nearby boaters or a trusted boatyard which products perform well in your area.
Do I need primer for bottom paint?
It depends on the surface and the condition of the existing coating. If you're applying compatible bottom paint over sound, properly prepared bottom paint, you typically don't need a primer. Bare fiberglass, wood, steel, aluminum, repaired areas, or surfaces that have been stripped may require a compatible primer or epoxy barrier coat before bottom paint. Always follow the bottom paint manufacturer's recommendations for your specific substrate and coating system.
How many coats of bottom paint do I need to apply?
The number of coats depends on the specific bottom paint. Many ablative antifouling paints call for two full coats, plus an additional coat on high-wear areas such as the waterline, bow, rudder, and leading edge of the keel. Hard bottom paints and other antifouling coatings may have different requirements. Always follow the product's technical data sheet for the recommended number of coats and film thickness.
Do I need to sand before applying antifouling paint?
Usually, but it depends on what's already on the bottom and the coating system you're using. Sound, compatible existing bottom paint typically needs to be cleaned and sanded or abraded to create a good surface for adhesion. Loose, peeling, or incompatible paint may need to be removed completely. If you're applying antifouling paint over a primer or epoxy barrier coat, you may be able to apply it within a specified overcoat window without sanding. Always follow the manufacturer's surface-preparation and overcoating instructions.
How long after painting can I launch?
Launch time varies by bottom paint and by temperature and humidity. Some paints can be launched within hours of the final coat, while others require a longer drying period. There may also be a maximum launch window—the amount of time the boat can remain out of the water after painting. Check the product label or technical data sheet for the minimum dry time before launch and any maximum launch-window requirements.
Final Pro Tips
Bottom painting does not have to be complicated, but it does require careful product selection and disciplined preparation. The coating can only perform as intended when it is compatible with the hull, existing paint, local fouling conditions, and the way the boat is used.
Choose a paint appropriate for the hull material and water conditions. Inspect and prepare the existing coating thoroughly, repair damaged areas, and use the required primer or barrier coat. Apply the recommended film thickness and number of coats, give high-wear areas additional protection, and maintain proper safety and environmental controls throughout the project.
When the job is done correctly, antifouling paint helps keep marine growth under control, reduces hull drag, and makes routine maintenance more manageable. The TotalBoat line of antifouling paints offers dependable protection for a range of boating projects, helping you spend more time on the water and less time cleaning and repairing the bottom. Contact our support team to discuss your project and find the right antifouling paint for your boat, water conditions, and application needs.