


The Epoxy Resin & Wood Basics is an 11 part video series created by Shawn from Crafted Elements to teach you everything you need to know about creating incredible wood and resin boards, furniture and functional art. While oriented towards woodworking novices, beginners and resin artists, this series also includes some helpful tips and tricks that even seasoned makers may find useful! Let’s get to it!
Part 1 is an introduction to the series that outlines the remaining ten modules that you will see below. Of course you’re best suited to follow along with a full complement of TotalBoat Epoxy resins and some Silicone molds and templates from Crafted Elements.
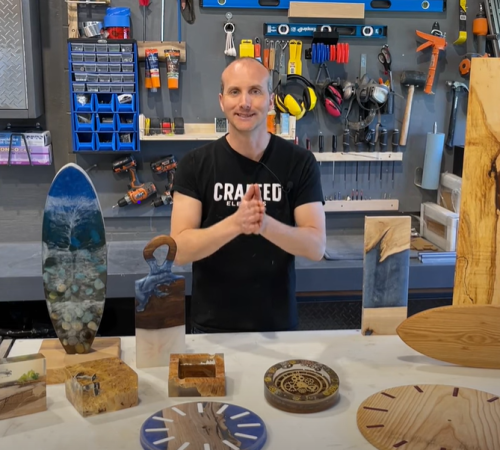
Part 2: Tools for Wood and Resin
This video is a great place to start when it comes to learning about some of the basic shop tools needed to create wood and resin projects. You don’t always need an elaborate large shop to do these types of projects. Shawn goes over some of the core tools he has in his shop including the different types of saws.. He uses his table saw and mitre saws the most for his charcuterie and small table top projects but goes over alternate options too! You’ll also learn about how to prep for your wood and resin projects and the tools you will need to complete your projects from start to finish, including shop safety and proper PPE, how to prep live edge wood, and obtaining all the consumable supplies including the resin and wood themselves. Some other tools Shawn talks about include dust collection, planers, CNC’s and routers.
Part 3: Wood
In this part of the series, Shawn talks all about wood. The different species of wood, where to find wood, what to look for when you’re searching for wood, how to prep wood and how to get it ready for your wood and resin projects. This video is perfect for resin artists and makers who are looking to get into using wood and resin in your projects. Learn how to go from a live edge wood slab with bark all the way to a finished resin and wood functional piece of art.
Part 4: Epoxy Resin
This is a core video of this series. Shawn looks at a brief overview of the different types of resins out there. But he really dives into the basics of Epoxy Resins for getting beginners and novices more comfortable with and teaching them how to use epoxy resin for epoxy art or epoxy resin and wood projects. He takes a look at some of the different types of epoxy resins we carry and explains which product you would use for each application. He explains exothermic reactions, the different viscosities, mix ratios, pour depths and what happens when you use the wrong product for the wrong applications. The three products he focuses on here are our ThickSet Fathom Epoxy, ThickSet Epoxy and our MakerPoxy Artist’s Resin. For art projects, ocean waves, thin pours and flood coats, you will want to go with a thicker 1:1 epoxy resin like our MakerPoxy or TableTop Epoxy. And for pours up to ½” deep like a lot of coasters and charcuterie boards, our ThickSet Epoxy is the ideal choice. And for larger castings, river tables and pours 1-3” deep, a thinner viscosity resin like ThickSet Fathom is the right choice for the job. The key takeaway in this video is selecting the correct resin (pour depth/viscosity) for your project.
Part 5: Molds
This part of the series talks about Shawn’s specialty – molds. The five different types of molds covered include the “OG” Wood and Tuck Tape Molds, Assembled HDPE Forms, Formed HDPE Molds, One Piece Formed HDPE Molds, and of course Crafted Elements specialty – Silicone Molds. Shawn discusses the five different types of molds for wood and resin projects along with their advantages and disadvantages.
Part 6: Mold Release
This video talks about the importance of using the correct mold release with silicone molds. While epoxy resin does not stick to silicone, the heat generated by the exothermic reaction and the chemicals in epoxy are very hard on all silicone molds. It is strongly recommended to use a non-silicone based mold release spray before each use to increase the life of the mold. Crafted Elements recommends the MG Chemicals 8329 Non-Silicone Epoxy Mold Release, Smooth-On Easy Release 200 or Mann Ease Release 200.
Part 7: Planing & Leveling Slabs and Tables
The next part of the series is more for makers who are specifically working with resin and wood combined projects. If you are a resin artist or working with just solid resin, you won’t need the machines discussed in this video. Shawn goes over how to use a planer, slab leveler (router sled) and a CNC machine to flatten live edge slabs, charcuterie boards and table tops.
Part 8: Router Templates
In this next module, Shawn discusses router templates. Router templates are incredibly useful whether you’re just using them with wood or using them with wood and resin. Crafted Elements carries a wide variety of these templates in various shapes and sizes for projects like charcuterie boards, charcuterie board handles, router templates to create things like clocks, wine caddies, and more. With over 80 templates in their growing line, Crafted Elements probably has a template for whatever you could possibly imagine!
Part 9: Sanding & Finishing
An important part of any wood and resin project is the sanding and finishing. It is crucial to wear proper PPE in this step of the process including a respirator, safety goggles and gloves when sanding. Shawn covers the different sanding grit stages to give you the finish you want and then gets into the many ways you can finish a piece. This includes varnishes, oils, waxes and different wood finishes including our food safe Wood Honey which is a great option for serving trays and cutting boards.
Part 10: Flood Coating
A satisfying part of the process is covered in this next module. Flood coating with epoxy resin for a glass-like finish. Flood coating can also take a matte finish project and make it glossy. Watch this video for a demonstration of a piece that has been demolded, planed and sanded to 120 grit and flood coated with our MakerPoxy Artist’s Resin.
Part 11: Four Complete Projects From Start to Finish
This is the FINAL video of the Epoxy Resin & Wood Basics series where Shawn recaps the previous videos and completes four different projects from start to finish. The projects include two different shaped charcuterie boards with wood and epoxy, a beach-themed resin flight serving paddle and a Star Wars-themed coffee table, covering all the steps outlined in the entire series.
Thank you for following along. We hope during the course of this series you have learned a lot. Be sure to follow Crafted Elements on YouTube for more epoxy and wood tips and tricks and other advanced techniques and tutorials!


