















Every October, TotalBoat ambassadors Evan and Katelyn carve a jack-o’-lantern and try to make it last forever, and after years of gourd-geous experiments, their 51-pound resin cube named Chunk has become the unofficial mascot of the series. In their latest video, the pair shrinks Chunk down to fit on a keyboard, casting a tiny pumpkin and his clear cube with TotalBoat ThickSet epoxy. Below, we recap the build, look back at the pumpkins that paved the way, and walk through how ThickSet helped them pull off their most precise project yet.
A Pumpkin Preservation Saga
Before Chunk could go mini, Evan and Katelyn spent years learning the hard way that pumpkins fight back against preservation. Each attempt taught them something new about moisture, heat, and patience.
Year One: Francis Rots From the Inside Out
The first attempt kept things simple. Evan and Katelyn carved two pumpkins, coated one named Francis in UV resin, and left his twin, Gronk, uncoated as the control. A quick test on a lime and a baby carrot looked promising, but the resin shell trapped all of Francis’s moisture inside. While Gronk shriveled and dried out, Francis molded, cracked, and finally ruptured in their garage after a two-day trip. The lesson stuck with them for every pumpkin that followed: a pumpkin holds a lot of water, and resin can’t stop rot that starts inside.
Year Two: Bean Takes a Salt Bath
For round two, the pair borrowed from ancient Egyptian mummification and packed a pumpkin named Bean in salt to draw out moisture before resin ever touched him. The salt pulled out cups of pumpkin juice, but Bean stayed soggy, so they added silica beads and eventually baked him in the oven before brushing on fast-cure resin. Bean outlasted Francis and still lives in their closet, though he needs a crust scraped off every six months. Perry, his salt-cured control, grew a coat of fuzz.
Year Three: Meatball Goes Deep
Next, Evan and Katelyn built a mold box from thick HDPE plastic and set out to embed a pumpkin named Meatball in a solid cube of resin. To keep the pour from overheating, they poured six layers over eight days. Along the way they battled a trapped air pocket with a bent coat hanger and chased a “juice tunnel” that the leaking pumpkin carved through the slow-curing resin. Meatball came out glowing with personality, along with visible layer lines and a ghostly white haze. His control, Yam, collapsed into a moldy puddle in just four days.
Year Four: Chunk Chills Out
Year four targeted one enemy: heat. Epoxy releases heat as it cures, and that heat speeds up the cure, so an overly deep pour can spiral into thermal runaway. After testing bleach and alcohol on squash and learning that an untreated surface molded the least, the pair moved the whole operation into a refrigerator. They weighed Chunk down with a two-part lead donut and poured more than four gallons of resin at nearly four times its rated depth. The fridge couldn’t keep up, and Chunk bubbled, warped, and pulled away from his cube.
Evan and Katelyn power-carved and recoated him, then built Chunk 2 with a precast resin core inside a fridge filled with chilled water. Chunk 2 stayed cool and clear but turned a frosty silver, while Chunk kept his orange glow and earned his spot as the star of the series.
Year Five: Sprout Gets Freeze-Dried
After thousands of fan comments, the pair bought a freeze dryer with a custom tray big enough for a small pumpkin named Sprout. Their sample tests taught them plenty:
- Liquid nitrogen froze the samples so fast they cracked.
- Microneedling left the skin looking like a basketball.
- A thin penetrating epoxy soaked so deep into a dried sample that it overheated and bubbled back out.
After several rounds in the dryer, Sprout soaked up coats of slow-cure resin and came out with vivid color and a glossy shell. That made him the most successful preserved pumpkin in the series so far.
From 51 Pounds to Fingertip Size: Building the Chunk Keycap
With years of pumpkin wisdom behind them, Evan and Katelyn set a new goal: shrink Chunk into a working keycap for a mechanical keyboard. Their plan called for two separate castings. First comes a solid orange pumpkin, and then a clear cube poured around him, mirroring the way the original Chunk sits in his resin block.
Step 1: Pick an Angle
The pair hired a 3D artist to model mini Chunk two ways, facing forward like the original and tilted to face upward. They 3D printed hollow prototypes and injected orange color into each one to compare. On the forward-facing version, the corner of the cube cut right across Chunk’s face. They chose the upward-facing design, which shows off his grin from almost any angle on the keyboard.
Step 2: Make the Molds
Using fresh prints of the final design, they built two silicone molds:
- One for the pumpkin.
- One for the cube, which includes the cross-shaped keycap stem and four sprues that channel resin into the cavity.
Katelyn brushed tin-cure silicone into the fine details of each mold while Evan degassed the rest in a vacuum chamber. Both molds then cured in a pressure pot to shrink any leftover bubbles.
Step 3: Cast Mini Chunk with ThickSet
With the molds ready, Evan mixed ThickSet and handed the color work to Katelyn. She blended opaque red and yellow pigments, started with twice as much yellow as red, added more yellow, and finished with a touch of white until the color matched Chunk’s skin.
Evan injected the orange epoxy into the pumpkin mold through a fill hole and let the extra pool on top as a reservoir. Then he moved both molds into the pressure pot so the pressure could push resin into every crevice. When they demolded, every carved detail on the face and stem came through crisp.
Step 4: Paint the Face
Katelyn hand-painted the carved eyes and mouth with black lacquer paint. The pair chose lacquer after their research showed that some acrylic paints can react with resin and leave a haze. Because every mini Chunk needs this hand-painting, each keycap ends up a small piece of art.
Step 5: Pour the Cube
Evan set the painted pumpkin into the second mold and injected clear ThickSet around him until resin rose through the vent holes. Then he sent the mold back into the pressure pot. During this round, a glove on the compressor line inflated to cow-udder proportions and popped, a fitting finale for a series full of surprises.
The cube came out free of voids but slightly frosty from the mold. They finished it with a glossy topcoat of TotalBoat High Performance Epoxy. Side by side, mini Chunk makes a pocket-sized portrait of his 51-pound big brother, and he clicks onto a keyboard like any other key.
Why ThickSet Fit the Job
Years of overheated pours taught Evan and Katelyn to respect pour depth and volume, and ThickSet’s specs line up with a project this small. Here’s what makes it a strong pick for tiny castings like the Chunk keycap:
- Sized for small castings: ThickSet casts up to 2" deep in a single pour when you use 10 fluid ounces or less of mixed epoxy. A keycap uses a fraction of that, so the cure stays well within safe heat levels.
- Time to work: You get roughly 10 minutes of pot life and 30 minutes of working time at 70°F, which leaves room to tint, inject, and adjust before the epoxy sets.
- Easy to tint: ThickSet accepts epoxy-compatible dyes, pigment dispersions, alcohol inks, and mica powders. Add colorants after you fully mix the resin and hardener, and test a small sample first, just as Evan and Katelyn did with their color cubes in year four.
- Built for pressure pots: The ThickSet TDS recommends curing castings in a pressure pot at 50 psi to shrink bubbles out of sight, the same trick that kept mini Chunk void-free.
- Clear and UV-resistant: ThickSet cures crystal clear with a high-gloss finish and resists yellowing, which matters when you want a bright orange pumpkin to stay bright.
- Simple ratio: ThickSet mixes at 1:1 by volume. Mix for 3 to 5 minutes while scraping the sides and bottom, then transfer to a second cup and mix 2 to 3 more minutes.
Let castings cure at least 24 hours before you demold them, and give the epoxy 5 to 7 days before you wet sand or buff. For larger pieces, pour in layers of ½" or less with at least 4 hours between layers, so you can enjoy the results without a Chunk-sized meltdown.
Cast Your Own Mini Masterpiece
Evan and Katelyn have already promised another pumpkin attempt this Halloween, so keep an eye on their channel to see what the series dishes up next. If you’re planning a small casting of your own, from keycaps and pendants to keepsakes embedded in clear resin, our tech support team can help you choose the right epoxy and dial in your process. Call TotalBoat at (888) 986-6623 to talk with an expert.
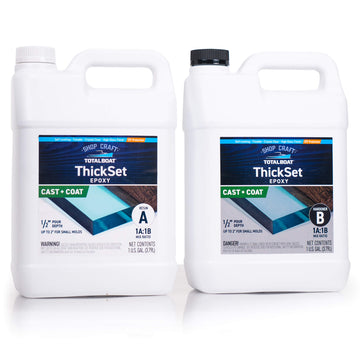

ThickSet Cast + Coat Deep Pour Epoxy Resin Kits



Fathom Deep Pour Epoxy Resin Kits


Clear High Performance Epoxy Kits