


VARNISHING
Before the wood on your boat was processed and placed there, it was insulated from the elements by a thick coat of bark. But what’s protecting it now? An old coat of varnish that’s past its prime? Unprotected wood’s natural oils can carry it for only so long before the ravages of people, pollution, and pounding weather cause dulling, dirtying, and delamination.
We all want good-looking wood on our boats. The choice of whether and what to use to preserve and protect it depends on the type, location, color, depth, and gloss you’re going for, and how much time and money you want to spend on the project.
Varnishing is the most common way to finish wood, but others include applying teak oils, teak sealers, and synthetic marine wood finishes. If you decide to use varnish, we’ll give you some great tips. And you’ll learn about our new varnish (TotalBoat Lust) that lets you DIY in just over a DAY (!) to get a super glossy brightwork shine that requires no between-coat sanding.
Choosing a Wood Finish
Teak Oils and Teak Sealers
The main reason woods like teak, mahogany, and white oak are so often used on boats is because they’re dense, strong, and decay-resistant. Which makes them durable enough to withstand the harsh conditions they’re exposed to at sea. But prolonged exposure to salt, sun, water, and pollution without protection can eventually break down even naturally oily woods like teak, turning them from golden and glowing to gray and weathered, and even causing structural damage.
Oils such as tung and linseed can be rubbed on clean teak to give it a richer appearance, restoring the protective oil and natural, subtle golden hue. Sealers are also easy to apply to clean teak, but last a little longer than oils. They seal the oils and resins in the wood, sealing out the moisture. Traditionally, sealers were applied to wood that retained some of its oil content, or that had some type of wood oil applied first.
TotalBoat Teak Oil is easy to apply with a brush, rag, or roller, and penetrates deeply into the grain to preserve healthy wood, or to begin to restore damaged, brittle wood. In cases where better penetration and protection is needed, apply ourTotalBoat Danish Teak Sealer instead to oil and seal the wood, and impart a light golden color. It’s as easy to apply as Teak Oil, and it’ll seal out moisture while sealing the beneficial oil in the wood.
We recommend using the Teak Oil for initial rejuvenation and maintenance coats. In cases where the wood needs better oil penetration initially and some degree of mildew protection, apply the Danish Teak Sealer first, then use it for maintenance coats. Both the Teak Oil and the Danish Teak Sealer will need maintenance coats every couple of months, depending on the amount of exposure to the sun’s UV radiation. It’s not necessary to apply Teak Oil and follow with an application of Danish Teak Sealer.
Pros and Cons of Using Teak Oils and Sealers
Commonly referred to as marine wood finishes, these are an easier, faster alternative to applying varnish, and yield similar UV protection. They can be used on all types of wood, not just teak and mahogany, to bring out the unique tones in each.
For interior and exterior use, these finishes are flexible and their synthetic pigments provide protection from harsh UV rays. They’re also breathable, which means moisture permeates freely, evaporates quickly, and doesn’t get trapped beneath the finish to do damage.
Keep in mind that synthetic finishes are more readily available in satin with limited gloss options, so using them meant sacrificing high gloss and depth for convenience.
For glossy brightwork that’s easier to maintain, just apply the gloss finish over the natural teak or satin finishes.
Pros and Cons of Using Synthetic Finishes for Marine Wood
Varnish
Varnish is the most popular finish because it puts the beauty of the wood grain front and center, producing the highest gloss and greatest depth. It’s also the most durable finish, shielding wood from all the things it’s exposed to on a boat–grease, dirt, oil, water, salt, sun, and pollution.
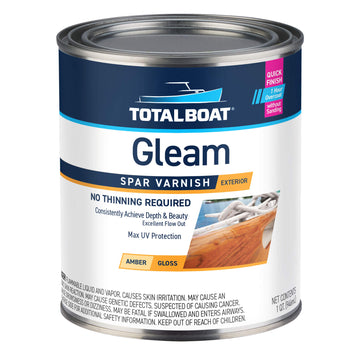
There are so many beautiful finishes available, too–from rubbed effect and matte to super high gloss. Though products and formulas have changed over the years, there are two main categories of varnish: traditional spar varnish and modern, hard-finish varnishes.Traditional varnishes, such as TotalBoat Gleam, are formulated to expand with the wood (think spars and brightwork) as it flexes with movement, or changes in temperature and humidity. Traditional spar varnish is applied in several coats, with sanding required between coats to form a mechanical bond for the next coat to grip onto.
In contrast, modern hard-finish varnishes are not as flexible, but they produce a hard coating that is better than spar varnish at resisting abrasion, chemicals, and UV light. There are modern one- and two-part formulas, with the two-part formulas offering the best UV and abrasion resistance.
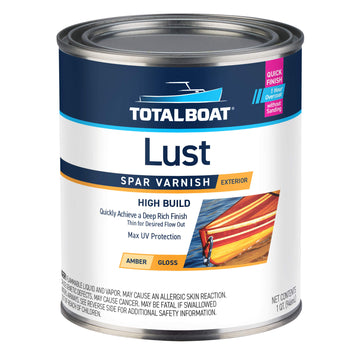
The best news is that, until now, getting a super high-gloss brightwork finish took a week or so of applying multiple coats of varnish, and sanding between each coat–whether you used a spar or a polyurethane varnish. But with TotalBoat Lust you can overcoat in as little as 1 hour, and apply up to five coats on the first day, let dry overnight, apply a final coat on the second day, and that’s it. No sanding between coats, either. It’s an easier, faster way to get a durable, super high-gloss finish with exceptional UV protection.
Pros and Cons of Using Varnish
Supplies for Varnishing
Tools for Applying Varnish
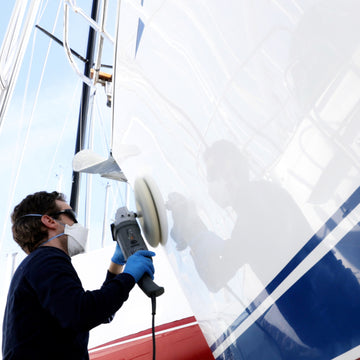
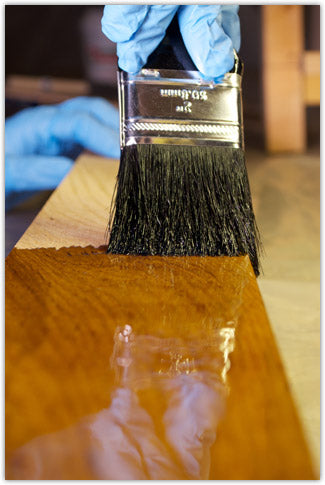
Most one- and two-part varnishes can be applied using a brush, a foam roller and brush (roll & tip method), or some type of sprayer (airless, HVLP, etc.). There’s even varnish that comes in an aerosol can! Setting up and adjusting spray equipment takes time, as does cleaning the equipment. But you don’t need professional spray equipment to get professional results.
A good, natural bristle brush yields excellent results. We recommend getting the best quality brush you can afford, using it just for varnishing, cleaning it properly, and it’ll last for years to help you maintain your beautifully varnished finishes. On large areas, consider the roll & tip method: Use a high-density, lint-free foam roller to apply the varnish, and have someone follow behind you with a wide-bristle brush to even out the finish, removing any small bubbles introduced by the roller.
What Type of Varnish Brush Should I Use?
Using the right brush is one of the most important ways to get a smooth, beautiful finish. The other is having the right technique. But all the technique in the world won’t help if you don’t have the right brush. Try painting your house with a push broom. You’ll get paint on the surface, but it won’t look good. The same holds true for applying finish coats of varnish with a foam brush, because even though foam brushes don’t leave brush marks, they tend to introduce more bubbles. Small bubbles can be sanded out of build coats, but not finish coats.
To keep costs down, it’s okay to use a foam brush for the sealer and build coats, but a soft-bristled badger hair brush is the best brush for finish coats because it lays the varnish down smoothly with no bubbles or brush marks. Badger hair brushes are also best for removing air bubbles when you’re rolling and tipping.
Other Equipment Needed for Varnishing
- Heat gun or chemical stripper for removing old varnish. Our TotalBoat TotalStrip paint and varnish remover is easy to apply, odor-free, biodegradable, can strip up to 25 layers in a single application, requires no acid wash neutralization, and cleans up easily with just plain water.
- Sandpaper – From 80 to 320 grit
- Sanding blocks – Choose from a variety of commercially available hard and soft sanding blocks for different purposes when sanding by hand. For example, a soft sanding block aids in sanding curves and contours; a hard sanding block is best for sanding straight surfaces.
- Scrapers for removing old varnish. Pull scrapers offer the best results with the least amount of effort and gouge potential.
- Masking tape – use a high-quality masking tape that removes cleanly to protect non-varnished surfaces. For taping curved surfaces, use a flexible tape that’s durable enough to snap a really nice line.
- Clean, lint-free wiping rags and denatured alcohol for cleaning wood surfaces and removing any dirt and oils.
- Tack cloth – tacky cloth for wiping down the wood before applying varnish. Removes any lingering dust.
- Synthetic mesh strainers for filtering contaminants when pouring varnish from the can into your paint pot.
- Optional items – Random-orbit sander to expedite sanding large areas, and a vacuum cleaner to help remove any sanding residue before wiping down with a tack cloth.
Surface Prep for Varnishing
Any blemishes that aren’t fixed before you apply varnish will be amplified by the new varnish after it cures. Ever paint a wall, thinking that the thickness of the coating would fill in and cover any small scratches and dents only to find that it actually made them more pronounced after painting? Same thing happens with varnish, so first, be sure to fix any little dings, nicks, discolored wood, and shore up any soft wood to prepare for varnishing.
Cleaning and sanding are also very important. Teak must be cleaned, sanded smooth, and wiped clean again before applying varnish to ensure the best bond, finish, and longevity. Sure this prep takes time, but skimp on this stage, and it’ll show. Take the extra time now to prepare the surface properly and you’ll spend a lot of time admiring it later.
Stripping
Varnish that’s old, dull, flaking, or blistering needs to be removed completely before new coats are applied. If you use a chemical varnish remover, position polyethylene sheeting so it covers adjacent areas that the varnish remover will damage. Use a quick-release masking tape to hold the cover in place. Also, follow the label directions carefully because some strippers are more toxic than others and require you to apply an acid neutralizer after you remove the chemical stripper.
For a chemical-free alternative, a heat gun is also very effective at stripping old varnish, especially on irregular or curved areas. Take care not to expose fiberglass to the excessive heat generated by the heat gun.
For the best result, it’s important to keep the varnish bubbling up consistently by holding the gun at the same distance from the surface while scraping. Keeping your blade sharp will also make the job easier and faster.
Cleaning
Teak and other woods must be (unavoidable cliche alert) "squeaky" clean before any type of wood finish is applied–especially varnish. Cleaning teak brings out the grain and creates the best mechanical bond for your first coat of varnish.
Teak and other woods must be (unavoidable cliche alert) "squeaky" clean before any type of wood finish is applied–especially varnish. Cleaning teak brings out the grain and creates the best mechanical bond for your first coat of varnish.
When using teak cleaners, it’s important to use a stiff bristle brush and scrub across the grain. Scrubbing with the grain can push dirt deeper into the grain, instead of removing it. After a thorough rinsing, allow the wood to dry completely before sanding.
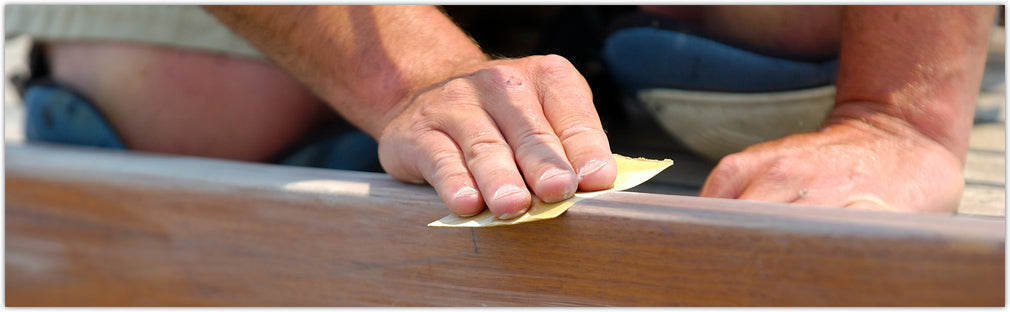
Sanding
Sanding is another must-do before varnishing. It can remove any residual old varnish, level out the surface to make it smooth, and even out the color of the wood. The most important thing to remember is to sand in the direction of the grain using the appropriate grit sandpaper for the task.
Very rough surfaces require the use of lower grit numbers like 80, 100, and 120 just long enough to even out the surface before moving on to less abrasive grits (which have the higher numbers 180, 220, and 320) to smooth the surface, removing any sanding scratches made by the previous grit. You’ll know when it’s time to move up to the next grit number when the surface no longer changes while you’re sanding. Before changing to the next higher grit, use a tack cloth or compressed air to remove the sanding dust.
Before you start sanding, take time to assess the condition of the surface to determine what grit types of sandpaper you’ll need, and whether you can accomplish the sanding by hand, or whether you may want to use a random-orbit sander. If you do use a random-orbit sander, don’t push too hard, and keep it moving to prevent gashes and uneven areas.
Masking
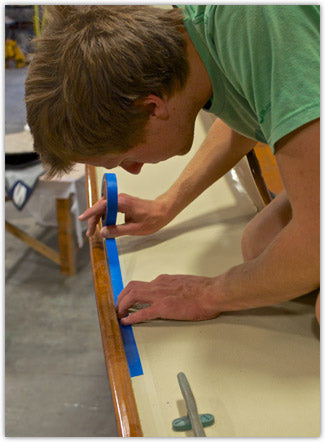
Use appropriate masking materials such as polyethylene sheeting and masking tape to protect any surface that abuts the surface to be varnished. This includes hardware (think oarlocks and cleats) which is sometimes not practical to remove.
There are various types of masking tape for different purposes. Some flex better for use on curves; others can stay on the surface longer and remove cleanly without leaving residue. After choosing the right tape, take your time to place it carefully without wrinkles or gaps.
Wiping
The final step before applying the varnish is to ensure the dry surface is completely free of any residual dust or contaminants, such as oil from fingerprints, dirt, or grease. Dampen a lint-free rag or cheesecloth with mineral spirits or denatured alcohol, wipe the surface, and let the solvent flash (dry).
Return to TopBest Conditions for Varnishing
Varnishing isn’t complicated, it just takes time and some effort to get it right. But the head-turning, high-gloss brightwork eye candy results will be worth it. After all the painstaking surface prep you just completed, resist the urge now to dive in and begin varnishing unless the conditions are just right.
Ideally, start varnishing on a dry, clear day, in the morning if possible. And stay out of the wind and direct sunlight, which can cause wrinkling and uneven drying. Better yet, apply varnish indoors, with adequate ventilation. And pay special attention to the varnish manufacturer’s recommendations for temperature and humidity.
Return to TopEasy Techniques and Expert Tips for Applying Varnish
Thinning Varnish
Varnish can be thinned by adding an amount of solvent to the varnish to reduce its viscosity and improve the brushing ability and flow quality. Be sure to use the solvent specified by the manufacturer. Certain solvents will be better for warm or colder conditions; others are used specifically for brushing or spray applications.
The first coat of varnish is typically a “sealer” coat, which is varnish that has been thinned substantially, so it sinks into the wood grain. Straight varnish is too thick to do that effectively. The amount of thinner recommended for the sealer coat depends on the varnish, so read directions carefully.
For example, a traditional varnish, such as TotalBoat Gleam, is typically thinned up to 50% for the first coat. In contrast, TotalBoat Lust, with its 1-hour overcoating capabilities is thinned 100% for the first coat only, to achieve maximum penetration into the wood grain.
The sealer coat is followed by a succession of “build” coats, before the final coats are applied. The build coats are thinned as needed to make the varnish lie down easily and level out smoothly. More thinning may be necessary in warmer, more humid conditions. Take care not to add too much thinner, as this will affect cure times and gloss levels. The final coats of varnish are usually applied at full strength, with no thinner added.
Return to TopApplying Varnish Like a Pro
- It’s important to keep as much dust as possible out of your work area while varnishing. Vacuum the work area first, then use a water-filled spray bottle to spray water on the floor or ground to keep the dust down.
- If varnishing indoors, be sure you have adequate lighting so you can see skips, or holidays. A flashlight beam aimed horizontally across the surface will make any skips stand out.
- If varnishing outdoors, avoid working in direct sunlight, or if temperatures exceed the manufacturer’s maximum recommendation. Also, time it so a fresh coat has adequate time to skin over before nightfall comes, and damaging dew sets in.
- Bubbles are bad–avoid them by not stirring aggressively or shaking the can of varnish.
- Filter the varnish by pouring it through a synthetic mesh strainer into a separate pot or container. Do not apply the varnish directly from the can. Pour only the amount of varnish you need at the time; it’s not recommended to pour extra varnish back into the can, to avoid contamination.
- If brushing, dip less than half the length of the bristles into the varnish, so you get more varnish at the tip, where it’s needed.
- If brushing or rolling & tipping, apply varnish in the direction of the grain.
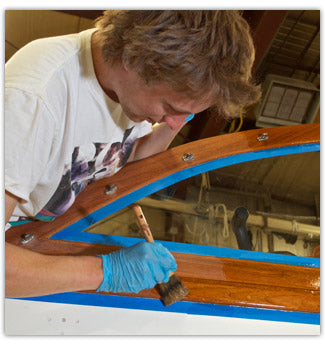
- Keep a wet edge to avoid brush marks by brushing from the new area into the area just varnished.
- If you’re seeing bubbles in the varnished surface while brushing or rolling & tipping, make a final pass with the brush very slowly over the area, using very light pressure. This action will remove the bubbles.
- Don’t apply the varnish thicker than the manufacturer recommends because it will skin over on the surface, trapping solvents underneath. The varnish will not cure properly, and can stay soft.
- Keep an eye out for drips on vertical surfaces.
- If a small bug or dust speck gets stuck in the varnish before it tacks over, diving in after it and digging it out with your fingers will only make it worse. Leave it where it lands and sand it out between coats.
- Sanding between coats: After a coat of varnish has dried, if the previous coat looks really good, use a ScotchBrite pad (instead of sandpaper) to scuff the surface lightly. If the previous coat has slight imperfections, sand lightly with 220-320 grit paper to even it out and allow the next coat of varnish to achieve a sound mechanical bond with the surface. Sand only as much as you need to. Use a gentle, even motion to remove any peaks or bugs, and most importantly, to avoid sanding through the previous coat. After sanding, and before applying the next coat, wipe with a lint-free rag coated in mineral spirits to remove dust, and allow the solvent to flash.
- Storing brushes between coats: Wrap varnish brushes in plastic wrap and place in the freezer so you don’t have to clean them as often. This solution is only good for a couple of hours or days, though, depending on the varnish.
Caring for Varnish Brushes
High-quality varnish brushes can be cleaned and reused for years, off-setting their initial high cost. After the brush is cleaned and spun dry, help to maintain the original shape of the bristles by storing the brush in its original package. Here’s a simple way to clean and maintain a varnish brush.
Maintaining the Varnished Surfaces On Your Boat
Regular maintenance is key in keeping a varnished finish looking fresh and flawless. The major causes of damage are the sun’s ultraviolet rays, water, and abrasion.
Even the UV-blocking agents in quality varnishes will eventually break down. As UV light penetrates to the base coats they start to deteriorate, causing gloss varnish to lose its brilliant, wet look.
Eventually, the varnish separates from the wood, growing ugly delamination blisters which can only be removed by stripping the finish and starting from bare wood.
Spare yourself this aggravation with a little annual maintenance that requires scuff-sanding back the top layer of varnish, wiping the surface clean, and applying a coat or two of varnish to add depth and maintain the UV protection.
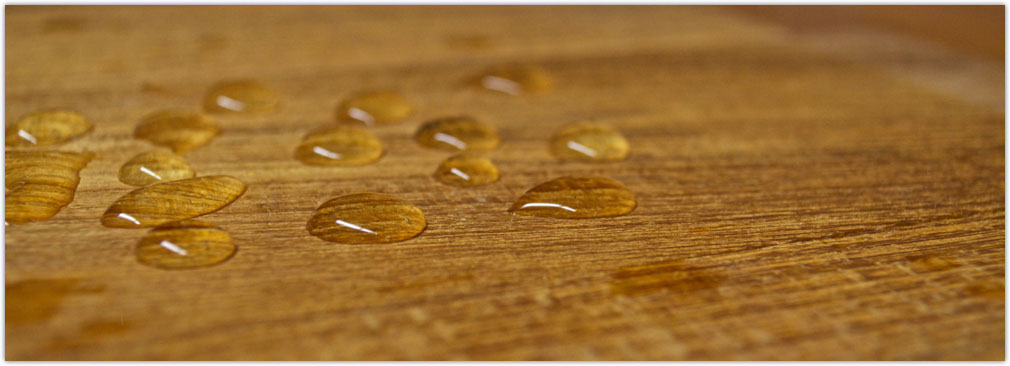
A greater potential for sun damage in certain geographic locations, such as the Caribbean, may make it necessary for this maintenance task to be done more than once a season. A good way to tell if you need to re-coat is when the surface begins to lose its water-beading ability.
And don’t forget your interior wood. Maintaining interior varnish will not only keep it looking sharp, but will make it easier to keep clean.