


This week’s blog is coming at ya from beautiful southern California! Whether you're a surf enthusiast or not, the woodworking involved in building a wooden surfboard is sure to amaze you. Lindsay Zuelich of Wood Brain along with her best friend/husband Eric, takes us through the mesmerizing process of building a unique Redwood surfboard in this week’s featured video.
Unboxing the Jarvis Board Kit and Constructing the Skeleton
The adventure begins as Lindsay unboxes the Jarvis Board kit for a custom 7’2” thruster, showcasing the sections and marking out the centerline for precise assembly. Fun fact: Eric helped design this new kit in partnership with Jarvis.
With the strong back/surfboard shaping table set up for the exciting journey ahead, the center spine is put in place. Lindsay and her husband proceed to add the rails, creating the skeleton of the board, and using hot glue and clamps, they meticulously attach each strip, creating a strong foundation for the wooden board.

Exterior Planking with Redwood
Choosing Redwood for the exterior (a lovely choice), Lindsay rips down 1-inch strips using a table saw. We love the ombre effect she went for, achieved with dark to light strips, creating a visually stunning design for their custom surfboard.

Gluing and Shaping
The time-consuming process of gluing the strips begins, each taking about an hour to dry. Heat bending, steam, and duct tape are employed to ensure a perfect fit. They begin with gluing the top planks and once those are dried and sanded, they cut the tabs connecting it to the table to set it free for working on the other side. After cutting the tabs flush and trimming all the excess wood from the planks, they proceed to glue the bottom planks.

A brief snafu occurs when they realize some loose parts were left inside after gluing the final planks on- but in true Lindsay fashion, she rallied and was able to remedy the situation.


Cork Rails
After shaping the board's edges, it was time to add some cork rails. Lindsay used paper templates to guide the placement and to help create a perfect fit. Heavy-duty spray adhesive, clamps, and tape secure the cork, adding style and functionality. The rails are then meticulously shaped and carved by Eric.

Attaching the Fins
Using a handy-dandy fin marker and a router jig, Lindsay expertly positions the spaces for the fin boxes and carves away to make space for fins. To secure them she uses our pre-thickend epoxy in a dispensing tube, Thixo Fast Cure for a secure and sturdy fit. The board is then drilled for an air vent and leash plug, vital for a hollow core board.

Fiberglassing and Hot Coating
Penetrating Epoxy Sealer is applied before fiberglassing to seal the wood and prevent bubbles. Lindsay carefully tapes off the board, ensuring clean lines then fiberglasses the board with High Performance Epoxy and fiberglass cloth. After both the top and bottom have cured, a hot coat of epoxy is applied creating a glasslike, glossy finish. Excess fiberglass is sanded, and the board is prepped for the varnish.


Varnishing and Maiden Voyage
The board is now mostly built, but because it will spend a lifetime in the salt and sun, Lindsay knows to apply a topcoat of varnish over the epoxy. Epoxy resin is waterproof but is NOT capable of handling continued exposure to UV rays. So a topcoat or two or three of our Halcyon Marine Varnish was a perfect solution. Sanded first to 320 grit, the board is cleaned well and is now ready for varnish. And then - it's time to hit the water for the maiden voyage! Eric waxes it up and they head to the beach, showcasing the culmination of their hard work and craftsmanship.

This epic journey of building a wooden kit surfboard showcases the dedication, creativity, and skill required to create a functional work of art. The team’s expertise and passion for tackling this kit make this an unforgettable project, highlighting the joy and satisfaction of crafting a wooden surfboard from start to finish.
Be sure to give Lindsay and Eric some love on their Instagram’s where they share all their latest woodworking adventures, and if you’d like to read more about Lindsay from Wood Brain, be sure to check out her feature in the Customer Spotlight section!


Traditional 5:1 Marine Epoxy Resin Kits


Halcyon Water-Based Marine Varnish
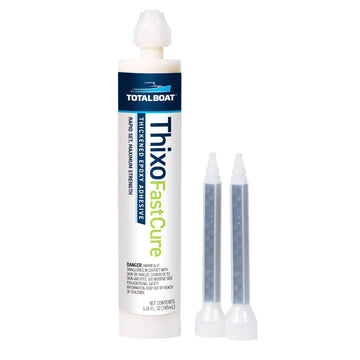

Thixo Fast Cure 2:1 Epoxy Adhesive


1 comment
Any plans or kits available for Stand Up Paddleboards?