


Mike Mills, JD President and TB Forefather, has a super sweet Black Watch 26. With a new paint job completed over the winter of 2015-16 (read about painting the Black Watch here), Mike was eager to top off the cosmetic transformation with a new rub rail to protect his paint job.
A beefy rub rail is a great help with docking, rafting up (something Mike does often) and protecting the hull from paint and fiberglass damage. With such reliance on a strip of hard rubber, you might think it’s a job best handed off to the pros. But the folks at Tessilmare make a rub rail that they swore to us was a DIY boaters dream because it is easy to install and will last a long time.
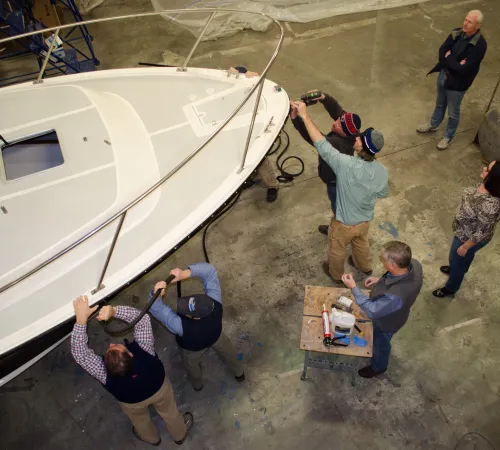
So we invited Tessilmare to the TotalBoat Shop for a live install demonstration on Mike’s Black Watch. The TB Tech team came over to help and to get the scoop on how to best advise customers on how much to purchase and how to install their product. It only took a few hours and was a forgiving process, allowing the team to take their time, pulling back sections that needed more tension and some finessing, resulting in a pro looking install.
The process is simple. The rail comes in 2 parts. First you install the track on the hull using standard self-tapping screws (sold separately). Once the track is properly fitted, the rubber profile snaps into place on the track. A little heat on the track helped bend it around the sharpest aft corners and from there forward it was a breeze.
Our team worked together on the various steps: First, marking off every few inches on the boat for placement of the screws. The track can be attached easily because the holes are not pre-drilled, allowing you to work around stanchions, existing screws and other obstacles that could hold you up. We bedded every screw with TotalSeal, making the holes waterproof and then screwed on the track that will accept the black rubber rail. (it comes in white, too!) There was a technique that definitely helped get the rail on right – which was to bend it backwards on top of itself, opening up the rail’s interior to accept the track, and then pulling forward – and I mean yanking hard – on the rail to make it a tight fit on the track. And BOOM! Like that – it was done.
When we were done, part of the rail looked wobbly but it was easy to pull that section off and reinstall it on the track with more tension to smooth it out.
Their kits look neater than conventional multi-piece rub rails.


