














Dan Lee of Dan Lee Boatbuilding knows how much time a full varnish finish can swallow, between thinning each coat, building film thickness, and measuring components when you choose a two-part system. He also admits that the words “water-based” on a finish usually make him skeptical. In his latest quick guide, Dan puts TotalBoat Halcyon Varnish through its paces, walks you through surface prep, brushing, and spraying, and finishes with an honest look at where this varnish fits in your finishing lineup.
Why Dan Gave Water-Based Varnish a Shot
For some projects, Dan says, the effort of a traditional varnish system doesn’t pay off. A cabin shelf, a weathered handrail, or a piece of furniture rarely calls for days of thinning and mixing, and that’s where convenience carries the day. Dan points to ease of application as the biggest reason to keep a water-based varnish like Halcyon on hand, especially if you want a finish you can grab quickly to touch up, repair, or recoat brightwork on board.
What Is Halcyon Varnish?
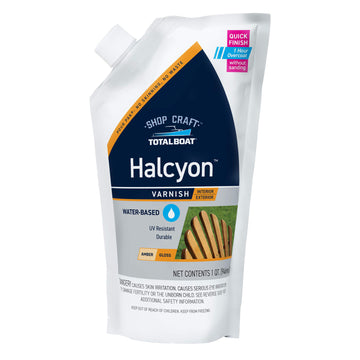
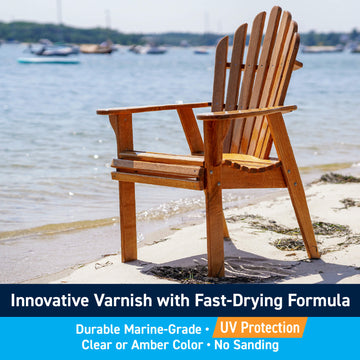
Halcyon is a single-part, water-based polyurethane varnish, so you skip the hardeners, the mixing, and in most cases the thinning. Dan notes that Halcyon still delivers a durable finish with UV protection for the wood underneath. You can use it on interior woodwork and on exterior wood above the waterline, which covers everything from yacht interiors to handrails, furniture, and exposed brightwork.
The water-based formula keeps odor low and lets you clean up with soap and water. Dan saves special praise for the pouch packaging, which he calls genius because it prevents the varnish from skinning over, cuts down on waste, reseals easily, and tucks into tight storage spaces on a boat.
Halcyon comes in four finishes:
- Clear Gloss, which keeps the wood close to its natural color
- Amber Gloss, which adds a warmer tone
- Clear Semi-Gloss
- Clear Satin
Whatever sheen you want in the end, Dan builds the early coats with Halcyon Clear Gloss or Amber Gloss and saves the satin or semi-gloss for the final two coats. That order matters, since satin or semi-gloss applied straight to bare wood can leave white or milky spots, and using them for build coats can cloud the rich tones of the grain.
How Dan Applies Halcyon Varnish
Step 1: Sand, Vacuum, and Wipe Down
Dan starts by sanding with the grain to avoid cross-grain scratches, and he recommends stopping at 180 grit, though the TDS allows 180 or 220 grit for bare wood. He vacuums the dust, then wipes the bare wood with a clean, lint-free cotton rag dampened with denatured alcohol. On teak and other oily hardwoods, Dan reaches for acetone instead and keeps wiping with a white cloth until no more color transfers onto the rag. If your teak has weathered to gray, clean it first with TotalBoat Teak Cleaner and give it at least 48 hours to dry before you varnish. If you plan to varnish over an existing finish, make sure it holds tight with no peeling, cracking, or lifting, and remove any failing areas first.
Step 2: Shake and Massage the Pouch
While the solvent evaporates, Dan preps the varnish by shaking and massaging the pouch until the contents fully mix. He stresses this step for the satin and semi-gloss finishes, since the flatting agent can settle over time. For brushing, you work straight from the pouch with no thinning, so Dan dispenses what he needs into a cup and gets going.

Step 3: Brush and Tip the First Coat
Dan recommends a brush for the first coat so you can work the varnish into the wood, and unlike traditional varnishes, Halcyon needs no thinning to penetrate on that first pass. Lay on a generous coat of 4 to 6 mils wet, since a thicker film gives Halcyon the chance to self-level and leaves fewer brush marks behind. The varnish may look cloudy at that thickness, but the haze disappears as it dries. Dan brushes the varnish out in opposing directions to spread an even film, then finishes with a tipping pass along the grain. As he moves to the next section, he tips from the dry area into the wet varnish and lifts the brush as he crosses into the section he just coated, which feathers out the wet edge.

Step 4: Stack Coats in a Single Day
Halcyon dries so fast that Dan says you can almost watch it happen. At 72°F (22°C), you can recoat without sanding once the previous coat turns tack-free, after a minimum of one hour and for up to 12 hours, a window that lets you build film and fill the grain quickly. Under ideal conditions, you can apply up to five coats in a single day.
Once you stack coats, give the varnish at least 12 hours before you sand between coats or flatten the surface, and plan for at least 48 hours if you built several coats in one day. You’ll get the best results when the air, wood, and varnish sit between 50°F and 90°F (10°C and 32°C) with humidity below 85%, and you should never apply Halcyon below 40°F or above 105°F (5°C or 40°C).

Step 5: Sand Before the Final Coat
Before the final coat, Dan sands with the grain using 320-grit paper, vacuums, and wipes the surface with a rag dampened with fresh water, since water is the only solvent that should touch Halcyon between coats. Once the surface dries, he lays on the next coat, and he warns that Halcyon calls for a heavier application than you may be used to. A thicker coat lets the varnish self-level into a smooth, glossy film, while thin films can dull the final gloss and show brush marks, which is also why he steers you away from foam brushes.
Step 6: Spray Halcyon for a Smooth Shortcut
Dan also sprays Halcyon, and he finds the water-based formula far more pleasant to spray than heavy solvent-based products. He thins it with clean water, and most spray setups need no more than 10%, with 20% as the maximum, since extra water can lower the gloss and cause sags. On an HVLP gun, use a 1.2 to 1.5 mm tip with 25 to 30 PSI inlet pressure (1.7 to 2 bar), set with the trigger wide open. Let each coat turn tack-free, about one hour at 72°F, before you spray the next, and skip wet-on-wet application. The same sheen rule applies here, so save satin or semi-gloss for the last two coats. You can find settings for airless, pressure pot, and siphon cup systems on the Halcyon Technical Data Sheet.

Step 7: Give It 48 Hours to Cure
Keep every solvent except water off the surface for a full 48 hours after your last coat. After that, the finish can handle denatured alcohol, so spills and cleanup won’t harm your hard work.
Working With a Fast-Drying Varnish
Dan stays straight with viewers about Halcyon’s limits. He doesn’t see it as a substitute for a full-gloss oil-based varnish system, and he points out that fast drying shortens your working time. Halcyon dries in about an hour, while a traditional oil-based varnish keeps flowing out for roughly that long and hasn’t started to dry, so you need to lay Halcyon flat and even right off the brush using his crisscross-and-tip method.
Wet edge time shrinks too, down to 45 to 90 seconds with Halcyon compared with 5 to 10 minutes for many oil-based varnishes, and after that point your brush may start to drag and leave lines. Dan’s fix is to work in small sections you can finish swiftly, applying a full, thick coat so the varnish can level itself, and feathering each edge into the previous section by lifting the brush or roller. If you spot marks in your finish, he says, a lingering brush on a drying edge is the likely culprit.
Dan’s Verdict on Halcyon Varnish
For simple projects and convenient application, Dan calls Halcyon a great candidate. He recommends it for furniture, interior and exterior wood components, and quick refinish work, and he suggests stashing a pouch on board so you can tackle touch-ups the moment your brightwork asks for attention. If you love the warm glow of a traditional oil-based varnish, you can lay down two to three coats of TotalBoat Wood Sealer on bare wood first, let it dry for 48 hours, scuff-sand with 320 grit, and then build your Halcyon coats on top. Watch the full video below to see Dan brush, tip, and spray Halcyon step by step.


2-Part Teak Wood Cleaner and Brightening System
Halcyon Water-Based Marine Varnish


