


This week we are excited to share a boat build by none other than Xyla Foxlin! In her latest video, she builds a 10 ft dinghy as a gift for the Youth Nonprofit Sailing Program at the Center for Wooden Boats in Seattle. Follow along as she takes us through two months of boat building using a kit for the first time, condensed down into a 30 minute video.
The process begins with thickening up some High Performance Epoxy with wood flour to glue all the joints together, a common technique for stitch and glue boats. After gluing pieces together, Xyla calls in some help to begin the stitching, help that she inevitably relies heavily on throughout the process to get the boat complete in time.
The next step was to begin fileting the newly formed boat with more thickened HP epoxy. Here, Xyla also demonstrates fiberglassing the bowstem while it was ‘green,’ meaning the epoxy filet hadn’t fully cured yet. This is the ideal time to do a second coat (and add fiberglass if that section calls for extra structural support).

Once all that cured, Xyla and her team then flipped the boat over to add a bead of Thixo between all of the gaps between the shiplap sections. This made it possible for the next step, which was to remove all the stitches.
After many hours of tedious sanding, it was time to fiberglass the boat. They begin with the interior of the boat, which took two layers of fiberglass cloth. Xyla makes an important note here of the importance of prepping your fiberglass. Having all pieces cut and sized correctly, ready to go, makes the fiberglassing so much easier. Awesome reminder Xyla!

Educational Science Side Note from Xyla: Fiberglass changes color with epoxy because it has the same refractive index, so when the epoxy seeps into the glass fibers, light doesn’t bend as it passes through it, and so it becomes clear! ‘Satisfying and cool science!’

The team moves on to continue assembling the boat interior and preparing it before the deck gets glued on top. This involves more fileting, and you guessed it, more sanding. Some closed cell foam gets installed and then it's time to glue the deck.
This task calls for none other than Thixo (if you haven’t noticed yet, this boat is being glued and held together solely with this amazing super product).
The next several minutes of the video, we watch as Xyla describes how the team adds more of the detailed parts and important functional pieces to the boat before adding a final coat of High Performance Epoxy to everything.
Here we finally see the end product start to come together as Xyla and team begin the painting process, beginning with Wet Edge (and Special Brushing Thinner 100), to protect the boat. Bonus, we get to witness Xyla’s artistic skills shine as she experiments to get the perfect shade of purple by mixing red and blue together for all the accent pieces.


Nearing the end of the build with only a week to go, an unfortunate moment of defeat occurs as they decide to paint the entire bottom of the boat in Krypton Anti-Fouling paint, only to discover that the boat will not live in the water all year long, and the anti-fouling paint was not needed. With little time left, they had to STRIP the entire thing- and follow up with Wet Edge.

Be sure to watch her full video to see how the boat turns out, and the delivery to Seattle where it makes its maiden voyage!


Clear High Performance Epoxy Kits


Thixo 2:1 Epoxy Adhesive System


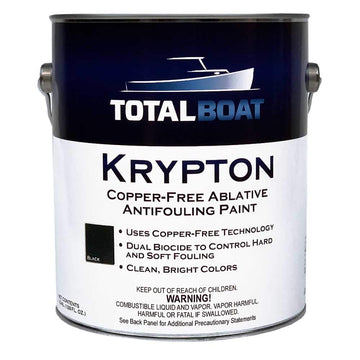

Krypton Copper-Free Antifouling Bottom Paint


1 comment
Why did the Kryton anti-fouling paint have to be stripped off. Does it fail when exposed to air?