


FAIRING
Fairing a surface removes the highs and lows so the surface is level. It can mean filling holes and low areas, reshaping voids, or grinding down bumps so they blend in with the surrounding surface, appearing level, or "fair" to the eye, to the touch, or to the fairing batten.
The material for filling or shaping is called a fairing compound or fairing putty, which contains some type of resin—either epoxy, polyester, or vinyl ester. For convenience, there are premixed fairing putties, or you can make your own.
There are a lot of reasons to fair a surface while building or repairing a boat. Examples include:
- Making the entire hull surface fair during construction, especially for wooden boats
- Fairing large areas of a hull surface misshapen due to, for example, bowing out at the bulkheads as a result of years of hull stresses
- Fairing small gouges and dents on wood, fiberglass, aluminum, or steel hulls before applying primer and painting
- Fairing gelcoat imperfections above the waterline
- Filling in holes after grinding down gelcoat blisters below the waterline before finishing with an epoxy barrier coat and antifouling bottom paint
- Fairing a hull surface prior to wet layup with fiberglass to ensure an even surface because fiberglass is difficult to sand
- Fairing a small area of fiberglass cloth that didn’t quite get filled in by the epoxy overcoats after wet layup and before priming and finishing
- Reshaping and fairing damaged underwater appendages such as the rudder and keel for added speed
- Filling holes after removing hardware
- Fairing an entire hull before a paint job
Choosing a Fairing Compound
Fairing is more than just fixing dings and dents for cosmetic reasons. It entails everything from filling surface scratches in gelcoat, seamlessly repairing osmosis blisters on a hull, reshaping the leading edge of a keel, making a hull repair disappear, or smoothing the hull to get the fastest underwater profile.
A fairing compound contains resin—either epoxy, polyester, or vinyl ester, and each resin is designed for different purposes. Before deciding on a fairing compound, think about whether the faired area is above or below the waterline, and how you plan to finish the faired surface. Will you be finishing with primer, barrier coat, topcoat, or gelcoat? The answers to these questions determine the type of resin required in the fairing compound.
The key to successful fairing is to use a fairing compound that contains the appropriate resin and thickening agents to do the job properly. The fairing compound needs to bond to the substrate being faired, and the finishing material (such as primer, paint, or gelcoat) needs to bond to the faired surface.
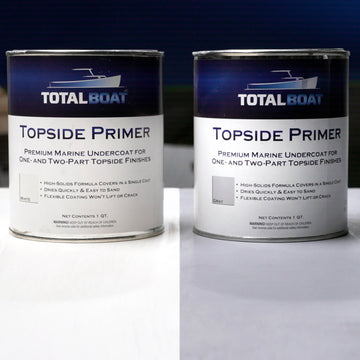
Some manufacturers make high-build epoxy fairing primers that can be brushed, rolled, or sprayed over the prepared surface, which can be either the substrate (if imperfections are not too deep), or atop sanded and cleaned fairing compound. In addition, there are single-component surfacing putty fairing compounds that are not epoxy or polyester resin based. This type of fast-drying surfacing putty is used above the waterline to fill fastener holes and shallow gouges and to fair minor imperfections in fiberglass or bare wood prior to painting.
What’s in a Fairing Compound?
Fairing compounds or putties typically contain the following:
- A resin such as epoxy, polyester, or vinyl ester
- A hardener (for epoxy) or catalyst (for polyester/vinyl ester) for activating the resin and ensuring that it eventually cures to a hard, plastic material. Always use the exact amounts of hardener or catalyst specified by the manufacturer, or the resin will not cure properly.
- A low-density filler such as fumed silica (epoxy) or chopped fiber (fiberglass strands) (polyester/vinyl ester) for thickening the putty so it won’t run or sag
- An additive (such as glass microballoons) that makes the compound easier to sand after curing, since the resin and thickening agent alone result in a cured substance which is very hard to sand smooth
Types of Resins Used in Fairing Compounds
Whether to use a fairing compound containing epoxy, polyester, or vinyl ester resin depends mainly on:
- The material to be used to finish the faired area
- Whether the fairing is being done for cosmetic or structural reasons
- Whether the faired area is above or below the waterline
Use the following table to determine which type of fairing compound is best for your fairing needs.
| Fairing Compound Resin Type | Epoxy | Polyester | Vinyl Ester |
| Fairing Uses | Localized and overall fairing above and below the waterline on wood, fiberglass, and metal when finishing with primer/paint | Filling dings, dents, and gouges or for overall fairing above the waterline on fiberglass when finishing with gelcoat, or when primed and painted | Filling dings, dents, and gouges or for overall fairing above and below the waterline on fiberglass when finishing with gelcoat, or when primed and painted |
| Advantages |
Compared to polyester/vinyl ester resins: ● Better adhesion ● Superior strength and stiffness ● Increased resistance to water penetration (osmosis) ● Less degradation of strength and stiffness if osmosis occurs ● Better resistance to fatigue and micro-cracking (crazing) ● Less shrinkage ● Best secondary, or post-cure, bond strength |
Can be overcoated with epoxy primer | Vinyl ester has less shrinkage and cracking compared to polyester fairing compound |
| Disadvantages | Epoxy resin is more expensive than polyester or vinyl ester resin | Polyester has more shrinkage and less secondary (post-cure) bond strength than vinyl ester |
Types of Fairing Compounds: Premixed or Make Your Own
Fairing putties either come "premixed" with the resin and thickener already mixed and you just mix in the hardener or catalyst when you get ready to use the compound. Or you can use the "recipe method" to mix your own fairing compound using separate resin, hardener/catalyst, filler, and additive. Always follow the manufacturer’s safety instructions and wear appropriate personal protection when working with all resins, fillers, and additives.
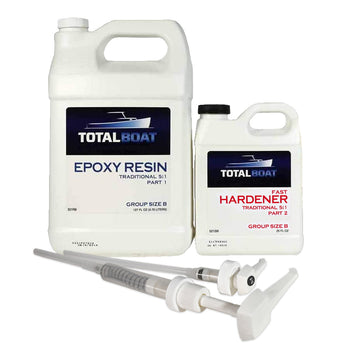
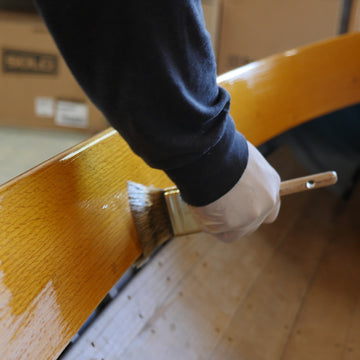
Epoxy Fairing CompoundsThe Recipe Method: With this method, you take separate ingredients and mix them together to the desired consistency (think peanut butter). Ingredients include epoxy resin, hardener, a thickener (colloidal silica) to thicken and prevent sagging, and microballoons to make the putty easier to sand after curing, which might take a day or more. It’s very important to always mix the epoxy resin and the hardener first before mixing in additives. Also, you want to work quickly as the curing reaction, and, therefore, the working time, starts once the resin and hardener are mixed.
Epoxy resin hardeners come in various types. A fast hardener is typically used in cold weather to expedite the curing process. A slow hardener is ideal for extending the working time of epoxy resin in warmer temperatures. This extra working time is especially helpful if it’s your first time using an epoxy resin system, or if you have a particularly complex project. The fast and slow hardeners cure to a light amber color. If you’re doing a clear or bright finish, use a clear hardener. Clear hardeners have a colorless cure, and are typically slow curing, though there are fast curing types.
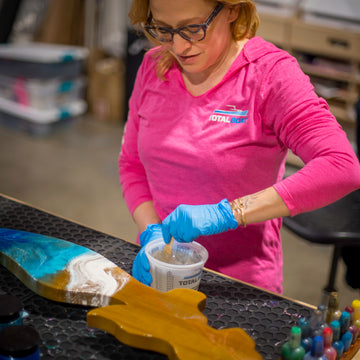
TotalBoat TotalFair. It has a yellow resin paste (part A) that already has the fillers blended in, and a blue hardener paste (part B). Mix them 1 part resin to 1 part hardener by volume until the putty turns a solid green with no swirls, and apply. Its simple 1:1 mix ratio and obvious color change make it much easier to use than other pre-mixed epoxy fairing putties.
With epoxy fairing compounds, the recipe method is good if you’re already using a liquid epoxy resin system for other projects. It’s also good if you’re finishing wood bright and don’t want the fairing putty to show. If this is the case, you would use your liquid epoxy resin, a clear hardener, and a filler that matches the wood to thicken the mixed epoxy. An example of a filler would be to use the dust from the particular wood being used, such as mahogany. Wood flour is a thickening agent, but the color of it does not match all woods, and it is typically used for fillets.
Otherwise, the pre-mixed method has the following advantages over the recipe method:
- Fillers are pre-mixed in the resin, saving you time and guesswork.
- A simple mix ratio makes it easier to get the perfect consistency every time.
- It cures much faster and is ready to sand in a couple of hours.
- The cured color stands out on the surface, making it easy to sand.
The Recipe Method: This method involves mixing together separate polyester resin containing wax and catalyst (MEKP or methyl ethyl ketone peroxide), a thickener such as (colloidal silica) to thicken and prevent sagging, and microballoons to make the putty easier to sand after curing. The resin and catalyst are mixed thoroughly first, then the filler and microballoons are added and mixed to the desired consistency (think peanut butter).
If you want to use a liquid polyester resin system you already have at hand, check to see whether it contains wax. Polyester resins are either "laminating" or "finishing" resins. The difference is that the polyester laminating resin does not contain wax, so it doesn’t cure fully while exposed to air. Polyester finishing resin contains wax. Finishing resin is the final coat in a polyester wet layup application, and needs to cure properly. The wax is what allows this curing to occur. If you want to use a liquid polyester laminating resin, you must add wax to the polyester laminating resin first, before adding the MEKP catalyst.
The Pre-Mixed Method: The faster, easier, cheaper way to fill dents and small gouges is to use a pre-packaged filling/fairing compound. These products typically contain a thickened polyester or vinyl ester resin compound and separate hardener. They provide easy instructions for mixing resin and hardener in precise amounts.
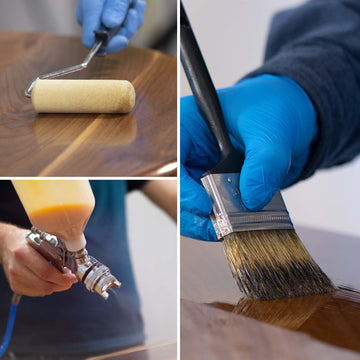
Supplies for Fairing
Some of the supplies you’ll need depend on what type of resin you’re using and whether you’re fairing a small area or a large area, such as a hull. The list below begins with general supplies for fairing, and concludes with optional equipment depending on your particular repair.
- Heavy, abrasive tools such as an angle grinder or a Dremel rotary tool with right angle attachment for grinding out and beveling the edges of cracks, or for grinding down gelcoat blisters
- Clean tongue depressors or a putty knife to dispense resin and hardener
- Plastic spreaders or a putty knife for mixing and spreading the fairing compound
- Personal protection for grinding, sanding, mixing, and application – a NIOSH-approved respirator, with organic vapor cartridges (for grinding/sanding fiberglass or gelcoat), an N95 respirator with vent valve or without (for grinding/sanding wood), eye protection, a hooded paint suit, and gloves
- Sandpaper – From 60 to 180 grit for surface prep; 220-320 grit for sanding fairing compound
- A long, flexible sanding block, or fairing board makes it easier to sand large areas effectively. It bends to the shape of the surface, but is long enough and flexible enough to bridge the low areas and knock down any high spots. To make your own fairing board: For a surface that’s more curved, use ¼" plywood; less curved, ½" plywood will do. The width of the board should be 3". The length should be a multiple of 11" to make the best use of sheets of sandpaper that are 7½" x 11". To make the board easier to control, bond a hand-grip at each end.
- Sanding blocks – For sanding smaller areas. Choose from a variety of commercially available hard and soft sanding blocks for different purposes when sanding by hand. For example, a soft sanding block aids in sanding curves and contours; a hard sanding block is best for sanding straight surfaces.
- Masking tape – For protecting areas immediately surrounding the area to be faired, if necessary, while sanding. Use a high-quality masking tape that removes cleanly. For taping curved surfaces, use a flexible tape.
- Clean, lint-free wiping rags and denatured alcohol or acetone for cleaning the surface to remove dust, dirt, grease, and oil after sanding
- Optional sanding items – Random-orbit sander (dustless, if possible) to expedite sanding large areas during surface prep, large diameter sanding disks and a vacuum cleaner to remove all sanding residue
- Optional if using a recipe method fairing compound made with epoxy resin/hardener and fillers, peel ply is a special fabric that doesn’t bond to epoxy, releases easily, and leaves a smooth-textured surface. Use peel ply to prevent amine blush, which must be removed before applying additional coats of recipe method epoxy fairing compound or a coat of primer.
- Optional if using an epoxy resin recipe fairing compound and finishing the faired wood surface naturally (bright): Sanding dust from the type of wood you’re using to make a fairing putty that matches the wood. As with any thickening agent, the epoxy and hardener are mixed first, then the wood dust is added and mixed thoroughly.
- Optional if using a recipe method fairing compound made with polyester resin/MEKP catalyst and fillers: If your polyester resin is a "laminating" resin (no wax), you need to add wax
- Optional if fairing is to repair gelcoat blisters below the waterline: Epoxy barrier coat
- Optional if fairing a hull or large area: Plaster’s hawk or hand board to hold a large volume of fairing putty. If the hull or other surface is very unfair, a notched applicator is ideal for applying putty instead of a flat plastic spreader. Also, for leveling the fairing compound after it’s applied, you’ll need a plastic fairing batten.
- Optional if applying fairing compound to a metal surface: Need to apply an etching primer first so the fairing compound can bond properly
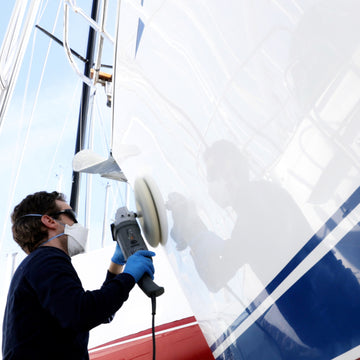
Steps for Fairing
1. Surface Prep
Attention to surface prep ensures the fairing compound will adhere to the surface and stay in place once it’s cured.
Clean
If the surface isn’t clean, sanding will grind dirt, wax, and other contaminants deeper into the substrate, compromising the effectiveness of the fairing compound, and subsequent primers and topcoats. Clean the surface with a solvent, such as acetone or denatured alcohol, using clean rags and the two-rag wipe on/wipe off method: one rag to apply, one rag to remove. Change rags often so you aren’t smearing contaminants or residue over the surface.
(Optional) Grind
Any surface cracks, crazing (micro-cracks), or gelcoat blisters need to be ground out and have their edges beveled using a right angle grinder or a rotary tool with a right angle attachment. Grinding and beveling roughs up the surface so the fairing compound can achieve a sound mechanical bond. The repair will look better and last longer.
Sand
If necessary before sanding, mask any areas that you do not want to be roughed up. Roughing up the surface by sanding helps the fairing compound adhere better. Use 60-180 grit sandpaper, and sand down to solid material.
Clean Again
If not using a dustless sander, remove all sanding residue with a vacuum cleaner. Clean the area again with acetone or denatured alcohol, and allow the solvent to flash.
Additional Surface Prep Considerations:
WOOD
Wood is a very absorbent material, so if you’re using an epoxy fairing compound made with a liquid epoxy resin system, you need to ensure the compound achieves a sound bond on this porous surface. Before applying the compound, brush on a thin coating of properly mixed (that is, resin and hardener only) epoxy resin to first wet out the area to be faired. Then you can do one of two things:
- Wait for the wet-out coat to cure, sand to ensure sufficient key (roughness for mechanical bond), remove sanding residue, and apply the fairing putty.
- Or, you can apply the fairing putty to the wet-out surface once the surface is tacky to the touch.
Note that you don’t need to apply a wet-out coat of epoxy resin first if you are using a premixed epoxy fairing compound.
Before applying fairing compound to a cleaned metal surface, an etching primer is needed to ensure proper adhesion. For best results, follow all manufacturer’s directions for the etching primer.
Return to Top
Mixing Epoxy Fairing Compounds
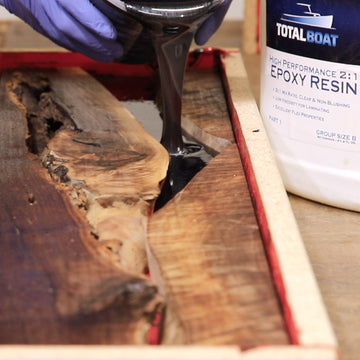
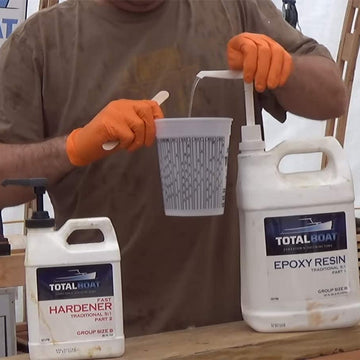
- Combine the accurately measured resin and hardener in a clean container and mix thoroughly for approximately three minutes.
- Working quickly, add the thickening agent and mix thoroughly. The reason you want to work quickly to mix the thickening agent (and the microballoons in Step 3) is that the mixture starts curing once the resin and hardener are combined in Step 1. Don’t be surprised if the epoxy resin absorbs a decent VOLUME of thickening agent before you achieve the desired consistency. For fairing purposes, the desired consistency is typically like peanut butter.
- Add the glass microballoons and mix thoroughly.
For best results, measure and mix only as much putty as you can apply according to the indicated working life (pot life) and temperature specified by the resin manufacturer.
Use clean, dry tools and work as quickly as you can to mix fairing putty thoroughly when using the recipe method. The mixing of the resin and hardener creates an exothermic reaction which begins the curing process, so you’ll only have a small window of time to apply the fairing putty before it becomes unusable.
After adding and mixing in the thickening agents to the mixed epoxy resin, use the mixing stick to "wrap" the mixture evenly around the inside of the mixing cup. This action will reduce the amount of exotherm (heating process the resin goes through while curing), and increase the time you have to work with the fairing compound.
Always be sure of your measurements in order to achieve the proper cure. If improperly mixed, the unwanted results include no cure, soft cure, or shrinkage from too much heat caused by an excessive exothermic reaction.
To create larger quantities of fairing putty, you can gain greater accuracy measuring by weight. Before you begin, know the working time (pot life) of the product and mix only as much compound as you will be able to use in that time, or it’ll be wasted.
Note that even though the mix ratio by volume of a certain pre-mixed fairing compound might be 1:1, 2:1, or 3:1, the mix ratio by weight will not be equal ratios because the resin and hardener are different densities. Be sure to read the product technical data to determine the proper mix ratio by weight.
As an example, we’ll use the mix ratio 100A(resin):90B(hardener). To measure a two-part, pre-mixed epoxy fairing compound by weight, start with two clean measuring containers and a scale, and do the following:
- Measure the resin (Part A) quantity first. Place a clean, empty container on the scale and adjust the scale to zero so the weight of the container is not counted. Dispense the desired quantity of resin paste (Part A) into the bottom of the container, taking care to keep it off the sides. Take note of the weight and remove it from the scale. For this example, let’s say you have measured 12 ounces of resin.
- Calculate the amount of hardener (Part B) you’ll need according to the manufacturer’s specified mix ratio by weight of hardener. Here’s a calculation you can use to determine the needed weight of hardener. Note that PHR means parts per hundred.
PHR of Part B/PHR of Part A x Weight of Part A measured = Weight of Part B neededIn this case, the equation would be: 90/100 x 12 oz. = Amount of hardener needed
So, 1080/100 = 10.8 oz.
- In this example, in Step 1 you measured 12 oz. of resin (Part A), so you would need to measure 10.8 oz. of hardener (Part B) into the second clean container (making sure the scale is set to zero again before adding hardener).
- Place the two weighed amounts of resin and hardener on a clean surface and mix as indicated below.
- Use a clean tongue depressor to dispense and place the correct mix ratio of Part A and Part B on a clean surface.
- Use a plastic spreader to mix the two parts together.
- Mix thoroughly until the putty is a uniform color, with no swirl marks.
Mixing Polyester or Vinyl Ester Fairing Compounds
- Combine the accurately measured polyester finishing resin and MEKP catalyst in a clean container and mix thoroughly.
- Add the thickening agent and mix thoroughly. Don’t be surprised if the polyester resin absorbs a decent VOLUME of thickening agent before you achieve the desired consistency. For fairing purposes, the desired consistency is typically like peanut butter.
- Add the glass microballoons and mix thoroughly.
For best results, measure and mix only as much putty as you can apply according to the indicated working life (pot life) and temperature specified by the resin manufacturer.
If using a polyester laminating resin (which typically doesn’t contain wax), you need to mix wax in thoroughly first, then the MEKP catalyst. After those three are thoroughly mixed, you can add your thickening agent and filler.
For best results, measure and mix only as much putty as you can apply according to the indicated working life (pot life) and temperature specified by the resin manufacturer.
If using a premixed polyester or vinyl ester fairing compound: These products typically contain a thickened polyester or vinyl ester resin compound and separate hardener. They provide easy instructions for mixing resin and hardener in precise amounts. Premixed compounds are typically faster and easier to mix and apply, cure faster than recipe compounds, and are easier to sand.3. Applying the Fairing Compound
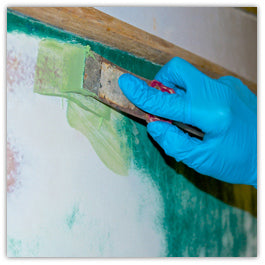
Use a plastic spreader to apply the fairing putty. It’s not a good idea to try to fill deep holes in a single application because a layer of epoxy that’s too thick can cause excessive heat build from the exothermic curing reaction.
For holes that are deeper than ½", apply the fairing compound in two or more layers. It’s easier to apply a few times in low spots because it builds up easier with greater control. Take care to follow the manufacturer’s recommendations for sanding and cleaning between applications of fairing compound.
- Fill the low areas proud (meaning just above the fair level) so you can sand them down to fair without having to refill.
- To avoid extra sanding after the compound cures, use the spreader to smooth out the compound as close to the desired shape as you can. Blend it into the surrounding areas.
- For fairing larger areas, use a spreader to apply the compound, slightly overfilling the area to be faired. If the surface is very unfair, use a notched spreader to apply the fairing compound. To level the applied compound, bend a plastic fairing batten so it matches the contour of the surrounding fair areas, and drag it slowly over the filled area.
- Allow to cure completely before sanding.
- You may need repeat the process of filling and sanding low spots until you are happy with the fairness of these areas. Before you know it, your hull will be fair and ready for priming.
Optional for Certain Epoxy Resins: Use of Peel Ply to Prevent Amine Blush
If applying a fairing compound made from the recipe method of epoxy resin, hardener, thickening agent, and filler, the cured surface may develop a film of amine blush, depending on the particular brand of epoxy resin. If amine blush is present, it must be removed before sanding. You can remove it using a ScotchBrite pad and water, and allow the area to dry completely. It’s not hard to do, but it does add extra time, especially if you have a number of areas to fill. Check with the resin manufacturer to determine if amine blush is an issue.
If it is, you can prevent amine blush, by placing a layer of peel ply over the applied fairing compound. Peel ply won’t react with the epoxy, and it’s easy to peel off after the epoxy cures. Be sure to remove the peel ply before sanding. Amine blush is not an issue if you’re using a pre-mixed epoxy fairing compound.
4. Sanding and Wiping
To prepare for application of a primer, barrier coat, topcoat, or gelcoat, allow the last layer of fairing compound to cure completely, then sand. Sanding makes the surface fair by smoothing down the high spots, and it roughs up the surface so the primer can adhere better. How much sanding you need to do depends on how smoothly the fairing material was applied. Sand the surface until it is fair and smooth.
Use a vacuum cleaner to remove sanding residue, then use a clean, lint-free cloth and denatured alcohol or acetone to wipe down the surface. Allow the solvent to flash.
Note that if using a high-build primer, it will only cover fine sanding marks or small pinholes in the faired surface. Refer to the primer manufacturer’s recommendation for the type of sandpaper to use for surface preparation prior to priming with a high-build epoxy primer.
Sanding generates toxic dust, so work in a well-ventilated area and wear protective clothing, and use proper dust collection methods. Be sure you also wear appropriate eye protection and a high-quality respirator at all times during this process.