


WET LAYUP
To make your boat waterproof and add strength, or create composite parts, use a combination of reinforcement material and resin in a method called wet layup. At a basic level, it involves using a liquid resin system to saturate a reinforcement material like fiberglass, then applying the saturated material to a prepared surface, such as a boat or mold. Wet layup is used for building and repairing boats, and making composite parts.
In this article, we’ll describe the types of resin and reinforcement fabrics, explain how to calculate the materials you’ll need, and provide steps for completing a project using the wet layup method.
READ ABOUT IT
Choosing a Resin for Wet Layup
What are Primary and Secondary Bonds?
Curing Agents for Resins
Epoxy Resin Basics
Polyester Resin Basics
Vinyl Ester Resin Basics
Safety Precautions When Using Resin Systems
Choosing Laminants for Wet Layup
How Loads Affect Laminates
Considerations for Choosing Laminants
1. Strand Direction
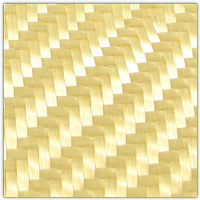
2. Weave Style
3. Fiber Composition
4. Weight
The Importance of Ply Orientation in Laminates
Resin and Laminant Combinations
DO IT!
Wet Layup Overview
Exposure to the toxic resins, corrosive hardeners and catalysts, and fibrous reinforcement materials used in the wet layup process can be hazardous to your health. Personal safety and the use of proper personal protective gear should always be your first priority.
Other considerations for wet layup include the layup method, resin type, fiber reinforcement material, fiber orientation, resin/fiber ratio, and curing.
Layup methods
The most common ways to saturate reinforcement fabric with resin include wet or prepreg hand layup, and resin infusion.
Wet layup involves wetting out the reinforcement material and laying it onto a prepared surface by hand. We’ll cover this method in detail on this How To page.
Prepreg layup Prepreg (pronounced pree’ preg) is reinforcement material that’s been pre-impregnated with resin and stored at very cold temperatures until ready to be applied by hand to a prepared surface.
Resin infusion involves placing reinforcement material on a prepared mold inside a plastic bag, sealing the bag, injecting resin, and applying vacuum pressure to distribute the resin evenly to saturate the reinforcement material.
Resin types
Resins used in wet layup can be epoxy, polyester, or vinyl ester. They look similar but are very different in terms of their curing mechanisms, primary and secondary bonding strengths, and chemical compatibility.
Choose a resin system that creates the strongest bond between the reinforcement materials and the substrate, and between the top reinforcement layer and the finishing material.
Fiber types
There are many types of reinforcement materials including fiberglass (cloth, woven roving, unidirectional, multidirectional), carbon fiber (graphite), Kevlar (aramid), hybrids, CSM (fiberglass chopped strand mat), and many others.
The reinforcement material needed depends on where, why, and how you’re applying it, the type of resin you’re using, and how much you want to spend.
Fiber orientation
It’s important to position the direction of the fibers in the layer(s) of reinforcement material according to the direction of the loads placed on the area being laminated.
Because laminates are built from plies (layers), the fibers in the plies need to be placed so that loads are distributed evenly and shared among the plies. Fiber orientation has a direct effect on strength, stiffness, and dimensional stability.
Fiber to resin ratio
In a layup, this is the percentage of reinforcement fabric to the percentage of resin needed for wet out and to achieve the desired properties.
Typically, the heavier the reinforcement material, the greater the amount of resin needed to saturate the material. It’s most important to know that to achieve greater strength, the laminate needs to include more fiber content than resin.
An optimal fiber to resin ratio is typically 60 percent fiber to 40 percent resin.
Curing methods
Resin can cure either in the open air or in the presence of applied vacuum pressure through a process called vacuum bagging. This Wet Layup page focuses on the air-curing method.
The vacuum bagging process involves placing the layed up piece inside a plastic bag, applying layers of release and breather fabric atop the resin-saturated laminant layer(s), sealing the bag, and applying vacuum pressure until completely cured.
The benefit of vacuum bagging is that it removes all excess resin and trapped air, resulting in a laminate that is lighter and void-free giving it better strength. Please refer to the Vacuum Bagging page for more information on this process.
Return to TopChoosing a Resin for Wet Layup
Proper bonding is the key to a strong laminate, and different resins form different types of bonds. The resin you choose depends on what type of bond you’re trying to achieve.
The type of bond you need depends on what you’re doing. Are you building or repairing? If you’re building, are you finishing with gelcoat, or with primer and paint? If you’re doing a repair, how large is the repair area, and what are you finishing with?
For a successful layup, it’s important to understand a little about primary and secondary bonds because they will dictate the resin you choose.
What are Primary and Secondary Bonds?
A primary bond is a chemical bond that occurs between chemically compatible resins during the initial curing stage. A primary bond, such as in a newly molded boat hull is much stronger than a secondary bond, such as a repair.
A secondary bond is a mechanical bond that forms between a newly applied resin and a properly prepared surface that has already cured. Epoxy resin forms stronger mechanical bonds than polyester/vinyl ester resins.
Polyester/vinyl ester resins are chemically compatible with each other, but are not completely chemically compatible with epoxy resins.
For this reason, epoxy resins can be applied over polyester/vinyl ester resins to achieve a chemical bond, but polyester/vinyl ester resins can not be applied over epoxy resin.
For primary bonds, the "wet-on-wet" bonding is strongest between chemically compatible resins, so if you’re finishing with gelcoat, you have to use polyester resin or vinyl ester resin in the layup.
For secondary bonds, epoxy resin is recommended because of its superior strength. It’s typically used to repair fiberglass that’s finished with epoxy primer and paint, or to attach structural parts to a previously cured surface. It’s also used in structural layups where the hull will be finished with primer and paint, not gelcoat.
The common wisdom is that gelcoat is not recommended over epoxy because they’re chemically incompatible and it’s not possible to achieve a primary bond.
However, for relatively small cosmetic repairs, epoxy resin can be used in the repair layup as long as you do the following:
- Measure the epoxy and hardener accurately, mix properly, and apply as directed
- Allow to cure completely
- Use a Scotch-Brite pad and water (not solvent!) to remove amine blush properly and completely, and dry completely
- Prepare the surface properly, according to the gelcoat manufacturer’s directions
- Apply the gelcoat finish beyond the edges of the repair area
Curing agents for Resins
Epoxy and polyester/vinyl ester resins are all types of thermoset polymers, meaning they remain solid once cured, and can’t be affected by exposure to high temperatures.
Although these resins look similar, they’re curing mechanisms are very different. Epoxy resin uses a hardener, and polyester/vinyl ester resins use a catalyst, usually MEKP – methyl ethyl ketone peroxide.
An MEKP catalyst is mixed with polyester/vinyl ester resin in a very low ratio–just a few drops of catalyst per ounce of resin. You can vary the cure time for polyester/vinyl ester resins by reducing or increasing the amount of catalyst, as specified by the resin manufacturer.
To achieve a proper cure, it’s important to note the minimum and maximum amounts of catalyst, so you’re not over-catalyzing or under-catalyzing the mix.
A hardener is mixed with epoxy resin, creating a heat-generating exothermic reaction that initiates the curing process. A proper cure happens only if the hardener and epoxy resin were measured exactly as specified in relation to one another (a ratio), both parts are mixed thoroughly, and the temperature and humidity conditions are ideal.
If you want to speed up the cure rate of epoxy resin, you have to adjust the temperature of your work area. For example, to make epoxy cure faster, apply a heat source, such as a heat lamp. Do not add additional hardener hoping to make epoxy resin cure faster. Doing so will actually result in an improper cure.
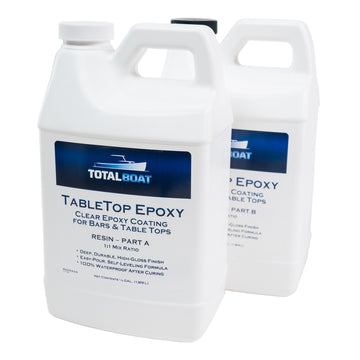
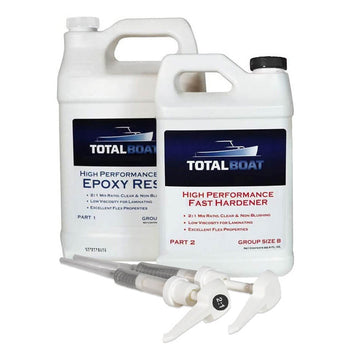
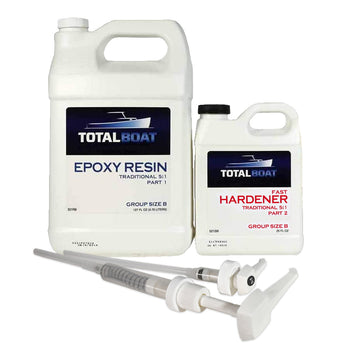
Epoxy Resin Basics
Epoxy resin is a two-component system consisting of liquid resin and a hardener, which allows the resin to cure. When mixing epoxy resin, it’s very important to use proper mix ratios specific to each resin manufacturer, and to mix the resin and hardener thoroughly before adding any thickening agents or fillers.
When to Use Epoxy Resin: Because of its strength, epoxy resin is often used for wet layup in repairs on fiberglass boats or wooden boats. It’s also used in layups to sheath new wooden boats in a layer of resin and reinforcement material because of its strength, flexibility, durability, and abrasion resistance over polyester and vinyl ester. Advantages: Compared to polyester and vinyl ester resins, epoxy resin forms better primary and secondary bonds and so provides better adhesion for repairs and higher strength. It also has increased flexibility, is more impermeable to water, and has greater chemical resistance.
Disadvantages: Epoxy resin should not be used under polyester and vinyl ester resins, so it’s not advised to be used in layups that are to be finished with polyester-based gelcoat.
Epoxy is also much more expensive than polyester and vinyl ester resins, and so is not typically the primary resin used to laminate a new hull. It’s commonly used to achieve the highest strength to weight ratio in a layup.
Types of hardeners for epoxy resin: Mixing a hardener with epoxy resin creates a heat-generating exothermic reaction that starts the curing process to turn the mixture into a hard plastic.
A proper cure happens only if the hardener and epoxy resin are measured exactly as specified in relation to one another (a ratio), and both parts are mixed thoroughly.
Fast and slow hardeners are used to either accelerate or slow down the working and cure times of the epoxy resin. Use a slow-cure hardener if you’re new at working with epoxy or if you’re doing a layup that might take a long time.
The last thing you want is for the epoxy to start to harden, or “kick” before you’re done with the layup. If you’re experienced and prepared, a small layup can be done with fast-curing hardener. Fast cure hardener is also used to expedite the curing process in cold weather.
When cosmetics dictate a resin/hardener choice, certain epoxy resin systems may offer a clear hardener to give you a clear or bright finish.
Return to TopPolyester Resin Basics
Polyester resin is commonly used in building fiberglass boats. It does not cure completely in the presence of air, so wax is typically mixed in to achieve a proper cure. For this reason, polyester resin comes in two forms, a laminating resin that does not contain wax, and a finishing resin that contains wax.
- Polyester finishing resin – This resin contains wax, which allows the resin to cure. Finishing resin is typically used as the final coat in a layup or laminating schedule.
- Polyester laminating resin – This resin remains tacky to the touch and does not cure in the presence of air. This makes it ideal for layups because you want the build up laminate layers to achieve a proper bond.
Polyester resin typically contains an accelerator (styrene or cobalt) to ensure that the resin can cure at room temperature. The type of acid used in polyester resin is either orthophthalic (ortho-polyester) or isophthalic (iso-polyester). Orthophthalic polyester resin is the cheaper, more brittle of the two. Isophthalic polyester resin is also more chemical resistant and water resistant.
Styrene can also be used to thin polyester gelcoat resin when spraying. To initiate the curing reaction, polyester resin requires a catalyst called MEKP (methyl ethyl ketone peroxide). You mix in the catalyst when you’re ready to use the resin.
Unlike epoxy resin, which requires exact amounts of resin and hardener to achieve a proper cure, you can manipulate the cure rate of polyester resin based on the percentage of catalyst mixed into the resin.
The higher the percentage of catalyst, the faster the resin will cure. Typical percentages are 1%, 1.25%, 1.5%, and 1.75%. In colder temperatures, you can sometimes add up to 2% catalyst to expedite a cure.
It’s important that you heed the resin manufacturer’s minimum and maximum catalyst percentages and don’t over-catalyze or under-catalyze or the resin won’t cure properly.
When mixing polyester resin, it’s also important to mix the resin and catalyst thoroughly before adding any thickening agents or fillers.
When to Use Polyester Resins: Because of its brittleness, ortho-polyester is not typically used for structural layups. Iso-polyester resin is not as brittle, and is slightly more water resistant and chemical resistant than ortho-polyester resin.
For this reason, it is typically used in the external layers of a laminate, just beneath the gelcoat, and the less expensive ortho-polyester resin is used in the laminate layers to add bulk beneath the iso-polyester resin laminate layers.
Advantages: Polyester resins are relatively inexpensive and are compatible with gelcoat finishes. Polyester resins are compatible with CSM (fiberglass chopped strand mat), so it dissolves the binder in the CSM and cures to a strong composite. CSM is typically the last laminate layer beneath the gelcoat paint due to its strength and smoothness.
Disadvantages: Polyester resin is weaker and more brittle than vinyl ester resin, and has a relatively short shelf life (1 year) compared to epoxy resin (3 years). Shelf-life should be monitored carefully, because this resin will eventually harden in the container.
Return to TopVinyl Ester Resin Basics
Vinyl ester resin is chemically similar to polyester resin and they both bond well to each other. Vinyl ester resin also requires a catalyst, MEKP, to be mixed in to initiate the curing process, and the resin and catalyst must be mixed thoroughly before adding any fillers or thickening agents.
When to Use Vinyl Ester Resin: Vinyl ester resin can be used on the outer laminate layer for blister prevention (instead of iso-polyester resin), and the less expensive polyester resin can be used on the inner laminate layers to add bulk.
Advantages: Vinyl ester resin is much stronger and less prone to blistering because although it’s not as impermeable as epoxy resin, it’s much more water resistant than polyester resins.
Because polyester and vinyl ester resin are compatible chemically, they can be used together in a layup to best advantage.
Vinyl ester resin is also Compatible with CSM (fiberglass chopped strand mat), so it dissolves the binder in the CSM and cures to a strong composite. CSM is typically the last laminate layer beneath the gelcoat paint due to its strength and smoothness.
Disadvantages: Not as strong, flexible, or waterproof as laminates created with epoxy resin. Shelf-life should be monitored carefully, because this resin will eventually harden in the container. Once opened, it can harden in approximately three months.
Return to TopSafety Precautions When Using Resin Systems
Safety isn’t just for the pros. Casual DIY use of resins requires that you limit your exposure to the vapors and dust created when using various resin systems. It’s important that you have sufficient ventilation in addition to proper personal safety gear that includes gloves, eye protection, a Tyvek suit to cover your body or sleeve covers to protect your arms and long pants to protect your legs because the epoxy hardeners and polyester/vinyl ester resin MEKP catalyst is highly corrosive.
protect your lungs from resin vapors, you must wear a respirator with appropriate organic vapor cartridges. An N95 respirator/dust mask is sufficient protection only against nuisance dust or dust generated from sanding cured resin.
Return to TopChoosing Laminants for Wet Layup
In a wet layup, a laminant is the reinforcement material, a laminate is a single laminant layer saturated with resin, a composite laminate is multiple combined layers of laminants and resin (known as a laminate stack), and resin is the "glue" that holds it all together.
The type of reinforcement material to use for a wet layup project depends on the project. Deciding from the multitude of reinforcement materials available is a bit easier if you focus on three things: strength, flexibility, and weight. An effective laminant needs to:
- Be strong and flexible (or stiff) enough to do what you need it to do based on where the stresses (loads) are Weigh no more than it needs to
- To maximize strength, it’s important to position the fibers in the reinforcement material so they run parallel with expected loads on your boat, surfboard, kiteboard, canoe, or whatever you’re laminating.
This means also paying attention to the orientation of the fibers in the consecutive plies (layers) of fabric in a laminate stack and placing them so the loads are balanced across all the fibers in the stack.
How Loads Affect Laminates
Different types of boats undergo different types of loads under normal use. For example, the areas of expected load are different for sailboats compared to power boats.
To understand how to use laminants to take maximum advantage of their strengths, it’s important to understand the types of loads they experience.
Any fiber reinforcement not aligned with the applied loads can separate from the resin holding it together and create micro-cracks, which will propagate until full laminate failure occurs eventually.
The table below illustrates the four common loads used to determine where the stresses are.
| Load Type | Effect On Laminate | What it Looks Like |
| Tension | A tensile load applied to a laminate will stretch it to the degree allowed by the tensile strength and stiffness of the particular type of reinforcement fibers. |

|
| Compression | A laminate under a compressive load relies on the adhesive properties of the resin to keep the fibers straight and prevent buckling. |

|
| Shear | A laminate undergoing a shear load relies on the strength of the resin’s mechanical bond to transfer the stresses throughout all the fibers. The resin also needs to have a strong bond to the reinforcement fabric. If not, the adjacent reinforcement layers will slide over each other. |

|
| Flexure | A laminate experiencing flexural loading is undergoing a combination of tension, compression, and shear loads. To remain strong, the fibers in the laminate layers need to be oriented in all applicable directions to balance the loads. |

|
Considerations for Choosing Laminants
The intent here is not to make you an engineering expert, but to help you design laminates so most of the fibers are aligned with the loads that are associated with regular use of your boat or other watercraft.
To decide which laminant is best for your laminating project, there are four important areas of focus. The first three address the strength of the laminant, and the last addresses the weight of the laminant.
- Strand direction
- Weave style
- Fiber composition
- Weight, in ounces per square yard of reinforcement material
1. Strand Direction
A strand or fiber is the main load-bearing element in a laminant. The more fibers a laminant contains, the heavier and stronger it is. One way to categorize laminants is by the direction of their fibers, as follows:
- Unidirectional fabrics have fibers that are continuous and all oriented in the same direction. The fibers are usually held together by stitching. Because all the fibers are running in the same direction, unidirectionals are considered to be nonwoven.
Unidirectionals, also called tow fabrics, are available with their fibers positioned in various orientations in relation to the fabric edge: 0°, 30°, 45°, or 90°, for example.These fabrics are available in many fiber types including fiberglass, carbon fiber, and aramid (Kevlar).Unidirectionals have a high fiber content and therefore a high fiber-to-resin ratio. The more fiber a composite has compared to the amount of resin, the stronger it is.
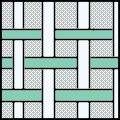
- Multidirectional fabrics have fibers that are continuous and oriented in more than one direction. They can be woven or nonwoven. A woven multidirectional fabric is a single layer of fabric with fibers interwoven in two directions, with strength in those two directions.
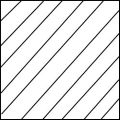
An example of a woven multidirectional fabric is a plain weave fiberglass cloth in which the fibers run at 0° and 90° in relation to the edge of the fabric.
As mentioned earler, the fibers in a nonwoven fabric are unidirectional. More than one layer of nonwoven fabric stitched together is called a multi-axial fabric, for example biaxial or biax (two layers), tri-axial or triax, quadraxial, and so on.
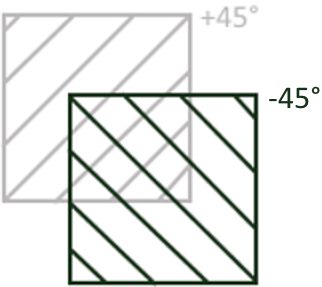
An example of a commonly used nonwoven, multi-axial fabric is 1708 +/-45 biax. It has two layers of 45° unidirectional fabric placed one on top the other.
One layer has its strands running unidirectionally at an angle of +45°, the strands in the second layer are at an angle of -45°. These two layers are stitched together to create a biaxial fabric.
Multidirectional fabrics are available in many fiber types including fiberglass, carbon fiber, aramid (Kevlar), and hybrids.
The fiber-to-resin ratio varies for multidirectional fabrics depending on whether they’re woven or nonwoven, their thickness–usually the heavier they are, the thicker they are, and other factors.
In general, woven fabrics wet out well, with some weave styles (see below) wetting out more readily than others.
Nonwoven fabrics, such as unidirectionals and multi-axials, lay flatter and carry loads more efficiently. Multi-axials use less resin to wet out than multiple, separate layers of unidirectional fabric.
Multi-axial fabrics are available in a wide variety of orientations including 0/30°, 0/60°, 0/90°, +30/-30°, +45/-45°, +60/-60°, and +90/-90°, and can be oriented in multiple ways to create very strong composites.
-
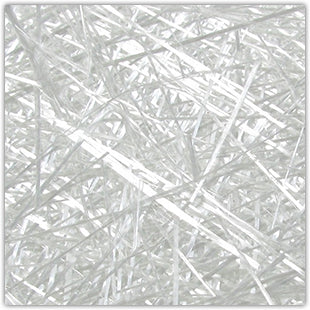
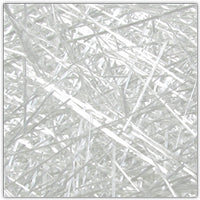
Omnidirectional material has fibers that are short, not continuous, and oriented in all directions, which gives this fabric strength in all directions.
Fiberglass CSM (chopped strand mat) is an example of an omnidirectional fabric. It has a mat backing to which short fibers have been attached with a styrene binder.
Polyester or vinyl ester resin is typically used to wet out CSM because the solvent, styrene, in these resins dissolves the binder in the mat backing and wets it out completely.
Which is not to say you can’t use epoxy resin to wet out CSM, but epoxy resin won’t dissolve the mat, so the mat stays white instead of turning transparent. Also, since the stiff mat doesn’t dissolve completely, it still has some flexibility, but not enough to conform to complex contours.
Omnidirectional mat requires almost twice as much resin to wet it out, and so has a low amount of fiber to a high amount of resin, producing a laminate that’s not as strong as a unidirectional or omnidirectional laminate. For this reason, CSM is used mainly to create composite parts, usually finished with gelcoat.
CSM is typically used either to minimize weave print through and create a smooth layer under gelcoat, or to provide good bonding and interlaminar strength between fiberglass or carbon fiber layers in a multi-ply layup.
CSM is available in a variety of weights and widths to suit a wide range of applications. In addition, many multi-axial fabrics are also available with a mat backing.
2. Weave Style
Remember that a strong laminate has more fiber in it than resin.When it comes to resin, you want to use only enough to wet out the fabric, and no more.
The excess resin adds weight, does not add strength, and is just plain wasteful. In addition to affecting the amount of resin needed, the type of weave in a laminant affects a wide range of factors, including the following:
- Ease of saturating, or "wetting out", the laminant with resin
- Mechanical strength
- Dimensional stability
- Surface smoothness
- Conformability (also known as "drape", which is the laminant’s ability to conform to complex contours)
- Crimp
All woven cloth has a small amount of fiber crimping (bending) that happens during the process of weaving fibers together.
A little crimp is unavoidable, but severely crimped or bent fibers are unable to support loads properly, especially compressive loads–the resin won’t be able to keep the fibers straight because the severely crimped fibers aren’t straight to begin with, and the laminate can buckle.
When you order woven cloth, whether fiberglass, carbon fiber, or aramid (Kevlar), be sure it’s sent to you rolled on a cardboard roll, and not folded.
Woven reinforcement cloth that’s been folded will have crimps and won’t be as strong as woven cloth on a roll.
There are several weave styles in reinforcement materials, so only the three most common weave styles, their advantages, and disadvantages are summarized in the following table.
| Weave | Description | Advantages | Disadvantages |
Plain
|
Each warp (0°) fiber passes over and under each weft (90°) fiber | Good stability; wets out reasonably well | Most difficult weave style to drape; higher possibility of crimping |
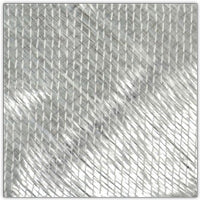
Twill
|
One or more warp (0°) fibers weave alternately over and under two or more weft (90°) fibers to create a 45° bias pattern | Exceptional drape and ability to wet out; creates a smoother surface than other weave styles, and is less prone to crimping | Minor reduction in stability compared to plain weave |
| Satin | Satin weaves come in many forms, but are typically modified twill weaves with fewer warp and weft intersections | Tightly woven so easier to wet out; flat; superior drape; good mechanical strength due to low crimping | Weave pattern is less symmetrical making it less directionally stable than the other weave styles |
3. Fiber Composition
The strongest laminates contain more fiber than resin. So the properties of the fiber type will dominate and determine the degree of a laminate’s strength, flexibility, and abrasion resistance, among other things.The three common reinforcements used in laminating are fiberglass, carbon fiber, and aramid (Kevlar).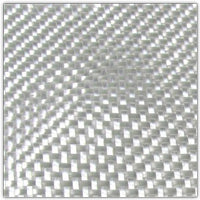
Fiberglass: Fiberglass comes in E glass and S glass types. E-glass is more commonly used and is less expensive. S-glass is more expensive, and has been altered chemically to make it stronger than E-glass.
Fiberglass is typically white, but is available in other colors, is relatively lightweight and strong, easy to work with, and can handle tension (pulling), compression (pushing), and cyclical loads well.
Fiberglass comes in various weights as woven cloth and woven roving, nonwoven material such as knitted fabrics or unidirectional materials, and CSM (chopped strand mat).
With the exception of CSM, lower weight fiberglass materials turn completely transparent when wet out with epoxy, polyester, or vinyl ester resin; CSM turns transparent only when wet out with polyester or vinyl ester resins, which contain a solvent (styrene) that breaks down the mat that bonds the fibers in place.
You can still wet out CSM with epoxy resin, but the CSM will stay white, and will not conform to complex contours. Fiberglass is the least expensive of the reinforcement materials.
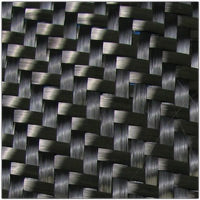
Carbon Fiber: Carbon fiber has the lightest weight and the highest strength and stiffness of all the reinforcement materials, and is best at handling tension (pulling), compression (pushing), and flexural (bending) loads well.
Carbon fiber is either black or dark gray, and retains its original color after wet out, which is why it’s often used for its "wow" in cosmetic applications. Carbon fiber is generally more expensive than fiberglass or aramid.
Aramid (Kevlar): Aramid fibers lack good compressive strength, but provide high tensile strength for their weight, and have excellent abrasion resistance and impact resistance.
Aramid is not easy to work with—it’s hard to cut, and it frays easily. The cost is in the range between fiberglass and carbon fiber.
Here are the relative properties for fiberglass, carbon fiber, and aramid (Kevlar).
| Properties | Fiberglass | Carbon Fiber | Aramid |
| Tensile Strength | Fair | Excellent | Good |
| Compressive Strength | Good | Excellent | Poor |
| Abrasion Resistance | Fair | Fair | Excellent |
| Moisture Resistance | Good | Good | Fair |
| Density | Poor | Excellent | Excellent |
| Sanding Ability | Excellent | Excellent | Poor |
4. Weight
All reinforcement materials come in different weights, such as 1.5 ounces, 4 ounces, 6 ounces, 12 ounces and more.
As an example to help you understand how weight is a consideration when choosing fiberglass, if you wanted a natural or bright finish on a small wooden boat, you need to use 4 oz. fiberglass cloth because it turns completely transparent when wet out. Heavier fiberglass cloth may not be as transparent. If your goal is better abrasion resistance, you need to use a heavier 10 to 12-oz. fiberglass cloth for your layup.
When buying reinforcement materials, it’s important to note the following:
- Woven and nonwoven material is specified in ounces per square yard (oz/yd2)
- CSM is specified in ounces per square foot (oz/ft2)
Generally, the heavier the reinforcement material, the stronger the composite will be.
When considering reinforcement materials, understand that the outermost plies (layers) in a laminate need to be the strongest because that’s where the loads are the greatest, and the innermost plies can be less expensive materials to provide bulk because they are not under as much stress.
The Importance of Ply Orientation in Composite Laminates
A composite laminate is a laminate that contains more than one layer, or ply, of reinforcement materials.
This pile of materials is called a laminate stack.
In a composite laminate, structural properties, such as strength, stiffness, and dimensional stability depend on the stacking sequence of the plies.
Understanding where the stresses and direction of the loads are is key to estimating the number of plies and the orientation of plies needed in the laminate stack.
What loads is the area to be laminated subject to? Knowing where the loads are gives you an idea of the type and weight of reinforcement material you need, and helps you visualize how to orient the fibers, that is, parallel to the loads, for maximum strength.
This knowledge, in turn, helps you cut and then position the layers of the laminate stack for strength, stiffness, and stability.
For example, if you’re using a plain weave fabric with warp and fill fibers running respectively at 0° and 90°, you’re getting strength in two directions. But if you need strength in a different direction, you would place the next layer at an angle to the first, typically + or – 45°.
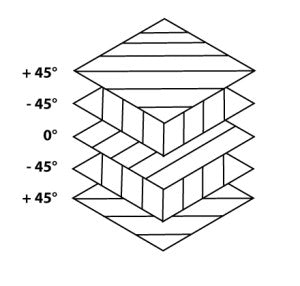
Another example, of using +/-45°, would be to use a 0° unidirectional fabric and a 45° unidirectional fabric and orient the plies in a balanced stack as +45°, -45°, 0°, -45°, 0°, +45°. This example is symmetrical and balanced. In a symmetrical stack, the plies above the center or mid-line of a laminate are a mirror image of the plies below.
In a balanced stack, there are equal numbers of + and – angle plies.
Here are some examples of how symmetry and balance affect composite laminates:
- Symmetrical/Balanced: Laminate remains flat, with consistent stress on the midline. Example +45,-45,0,-45,+45
- Nonsymmetrical/Balanced: Causes curvature of the laminate. Example 0,+45,90,0,-45,90
- Symmetrical/Nonbalanced: Causes the laminate to twist. Example -45,0,-45
- Nonsymmetrical/Nonbalanced: Causes the laminate to twist and curve. Example 90,+45,0,90,+45,0
Resin and Laminant Combinations
| Fiberglass/ CSM | Fiberglass/ Uni and Multidirectional | Kevlar or Carbon Fiber | |
| Epoxy | Tough to wet out. Not recommended. | High strength. Most effective use of laminant. | Highest strength |
| Polyester | Wets out easily. Laminant is drapable | Lower strength than epoxy. Lower cost. | Not recommended |
| Vinyl Ester | Best resin for CSM | Higher strength than polyester | Not as strong as epoxy |
What is Prepreg?
Prepreg (pronounced pree’ preg) is a type of reinforcement material that’s pre-impregnated with resin and hardener; the curing reaction is active, but has been delayed by low storage temperatures. It uses high-end epoxies, and comes in all fiber types and in many forms including unidirectional, biax, triax, quadrax, and so on.
Though prepreg has a short working time, it has many advantages such as lack of dry spots and/or resin-rich areas, less waste, less mess, and excellent results that are easy to duplicate. It comes ready to use, and doesn’t require additional resin for layup.
But there’s a price for all that convenience because prepreg is very expensive. If you estimate the cost of the resin system and laminants separately, prepreg will usually be more expensive. You also need a place to store it since prepreg must be kept in a freezer at very low temperatures to slow the curing process until you’re ready to use it.
Because the curing process is active, prepreg has a relatively short shelf life compared to traditional reinforcement materials. It varies but is typically about a year, if stored according to the manufacturer’s specifications.
When handling prepreg, it’s important to observe all safety precautions specified by the manufacturer, including adequate ventilation and skin and eye protection.
Estimating Amounts of Resin and Reinforcement Material
Once you decide on the resin and reinforcement fabric, it’s not hard to estimate how much of these materials you’ll need for your project. Just keep in mind thata laminate created using the hand layup method will have a typical fiber-to-resin ratio of 50:50, meaning 50% reinforcement material to 50% resin by weight.
An accurate estimate helps you figure out the entire weight and cost of the laminate–whether it’s covering an entire hull, or just a composite part.
If the estimate is too high, you can rethink the individual laminant layers and ply orientations in ways that might lower the weight and cost before beginning your project, and better yet, before placing your order.
All woven cloth has a small amount of fiber crimping (bending) that happens during the process of weaving fibers together.
A little crimp is unavoidable, but severely crimped or bent fibers are unable to support loads properly, especially compressive loads–the resin won’t be able to keep the fibers straight because the severely crimped fibers aren’t straight to begin with, and the laminate can buckle.
When you order woven cloth, whether fiberglass, carbon fiber, or aramid (Kevlar), be sure it’s sent to you rolled on a cardboard roll, and not folded.
Woven reinforcement cloth that’s been folded will have crimps and won’t be as strong as woven cloth on a roll.
Option 1: Calculation to Wet Out One Layer and Fill the Weave
For a bright finish if you’re sheathing a boat in a single layer of reinforcement material, you’ll need enough resin to wet out the material, plus extra resin to fill in the weave texture that is still exposed after the initial layup. For these fill coats, you’ll need to apply an extra one to two coats of resin.
For a bright finish if you’re sheathing a boat in a single layer of reinforcement material, you’ll need enough resin to wet out the material, plus extra resin to fill in the weave texture that is still exposed after the initial layup. For these fill coats, you’ll need to apply an extra one to two coats of resin.To complete the estimate to use resin to wet out and fill the weave of one layer, you’ll need to know:
- The total surface area to be laminated
- The ounce-weight of the laminant per square yard
How much surface area are you laminating? Think in terms of rectangles. Begin by looking at all sections to be laminated, including any irregularly shaped areas, as rectangles. Then do the following:
- Measure the length and the width of each rectangle, either in inches (if fairly small) or in feet (if large).
- For each rectangle, multiply the length times the width to determine the area.
- Add the individual rectangle area calculations to get the total surface area.
- If your original measurements are in feet, the surface area calculation will be in square feet. Use this number as "A" in the equation.
- If your original measurements are in inches, you’ll need to convert the total to square feet first. Divide the number by 144 square inches to get square feet. Use this number as "A" in the equation.
A = The total area (A) to be covered by reinforcement fabric. Units are in ft2 (square feet)
Wf = The total weight (W) per square yard of reinforcement fabric f to be used in the laminate. Units are in oz/yd2
(ounces per square yard) because that is how woven reinforcement cloth is specified. For example, 10 oz. fiberglass cloth weighs 10 oz/yd2.
3 Use the Area Measurement to Calculate the Amount of Reinforcement Material Needed Other than CSM which is specified in ounces per squarefoot, reinforcement materials are typically specified in ounces per squareyard.
The area measurement you calculated above is in square feet. To calculate how much woven or nonwoven reinforcement material you need, convert square feet to square yards.
The area measurement you calculated above is in square feet. To calculate how much woven or nonwoven reinforcement material you need, convert square feet to square yards.
For example, if your total area is 126 ft2, 126 divided by 9 square yards is 14 square yards. You need 14 square yards of reinforcement material.
If you want to know the weight of the dry laminant, multiple the ounce-weight of the fabric times the total area in square yards.
For example, if you need 5 square yards of a 12 oz/yd2 fiberglass cloth, the total fabric weight is 60 oz.
Return to Top
Option 2: Calculation to Wet Out Multiple Layers
To simplify the process of calculating materials for a layup using multiple layers of the same type or different types of laminants, think about it like this:
- First, determine the surface area to calculate the amount and weight of a single layer of the laminant. If using different fabric types/weights or different weights of the same type of fabric, repeat for each.
- Second, add the weight of all the layers and use the total weight to determine the amount of resin needed for wet out.
Your initial estimate should be for wetting out one layer of laminant. Once you know the estimate for one layer, you can add or subtract as needed.
How much surface area are you laminating? Think in terms of rectangles. Begin by looking at all boat sections to be laminated, including any irregularly shaped areas, as rectangles. Then calculate the surface area of the project in square yards by doing following:
- Calculate the total surface area of your laminating project.
- Measure the length and the width of each rectangle, either in inches (if fairly small) or in feet (if large).
- For each rectangle, multiply the length times the width to determine the area.
- Add the individual rectangle area calculations to get the total surface area.
- If your original measurements are in feet, the surface area calculation will be in square feet. Divide the number by 9 to get square yards.
- If your original measurements are in inches, the surface area will be in square inches. Divide the number by 144 to get square feet. Then divide the number again by 9 to get square yards.
- Multiply the square yard number times the ounce weight per square yard of the reinforcement material (laminant).
- If you’re using more than one type of reinforcement material, repeat the step above for each type, and add the numbers together to get the total ounce weight.
- For Fiberglass, Carbon Fiber, or aramid (Kevlar): The weight of the laminants equals the weight of the resin needed. This amount of resin is only for wetting out the cloth. An additional amount will be needed if you are also filling the weave (see Note below).
- For nonwoven cloth (such as 1708 biaxial): The weight of the resin needed is approximately 1½ times the weight of the nonwoven cloth. Nonwovens use more resin for wet out due to their added stiffness and weight compared to woven cloth.
- (Optional if using CSM) Calculate the ounce weight of CSM for one layer. Note that CSM is specified in ounces per square foot, and the weight of the resin needed will be twice the weight of the mat, since mat is heavier than cloth.
- Calculate the total surface area to be laminated with CSM, as indicated above. The surface area calculation will be in square feet.
- Multiply the amount of CSM times the weight (in ounces) of the particular CSM you’re using to get the total ounce-weight of CSM needed.
- Multiply the total ounce-weight of the CSM times 2 to determine the amount of resin needed to wet out one layer of CSM.
Wetting out means saturating the cloth completely so there are no air pockets or voids, which look like white spots. Wetting out is done during layup. After curing, the weave of the cloth is still partially exposed, and needs to be filled using additional resin. This is known as filling the weave, and it’s done for cosmetic purposes only after the final reinforcement layer is in place.
The amounts of resin calculated previously are what’s needed to wet out one layer of laminant. After applying the laminant layer(s), you need an additional amount of resin to fill the weave, prevent print through, and create a surface that’s level and smooth for finishing.
Once you know the amount of resin needed for wet out, double that amount to get the amount of resin needed to fill the weave.
Additional Note: For a painted finish if sheathing a boat using epoxy resin, instead of filling the weave with epoxy resin, you can spray the prepared surface with a high-build epoxy primer. Spraying has the advantage of creating a surface without the pinholing effect you might get applying the primer by brush or roller. Spraying a high build primer to fill the weave may also save you some time over filling with epoxy resin.
What is a Laminating Schedule?
A laminating schedule keeps track of the individual plies and the fiber orientation of each ply in a laminate stack, including the weave style and the weight of each ply.
Use this schedule to create the order of operations you’ll use to complete your layup successfully. Factors to consider are:
- Resin type, working time, air temperature, substrate temperatures, and humidity
- Fabric type, and number of plies needed, and the orientation of the plies. This is called the stacking sequence.
- Cure time of the resin (epoxy, polyester, or vinyl ester)
The order of operations will differ depending on the purpose of the layup, such as building, repairing, or creating a composite part.
Return to TopSupplies for Hand Layup
The list below is for doing wet layup by hand and air curing, and does not cover supplies for resin infusion wet layup or curing using the vacuum bagging method. Please refer to the
- Personal protection for sanding and working with epoxy, polyester, or vinyl ester resin systems – paint suit with hood, eye protection, a respirator with appropriate vapor/dust cartridges, and gloves
- For sanding, use large diameter sanding disks and a right angle grinder or sander, dustless, if possible
- Sandpaper and sanding blocks of various sizes for hand sanding in areas the power sander can’t fit into.
- Denatured alcohol or acetone for wiping surface down prior to layup
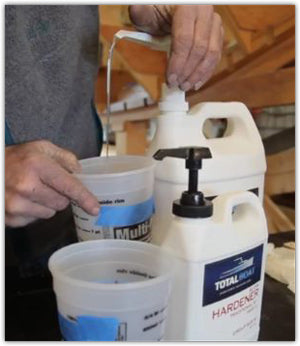
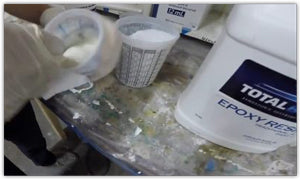
- Plastic mixing containers for mixing epoxy resin/ hardener, or polyester resin/MEKP catalyst
- A scale if measuring materials by weight
- A small plastic "grunge" cup or container for holding excess epoxy that is wiped off of the epoxy spreader
- Tongue depressors or wooden stir sticks for mixing purposes
- For protecting adjacent surfaces, use poly sheeting and masking tape – Solvent and water-resistant tape releases cleanly and lifts of easily, leaving no gummy residue
- Lint-free cleaning and wiping rags
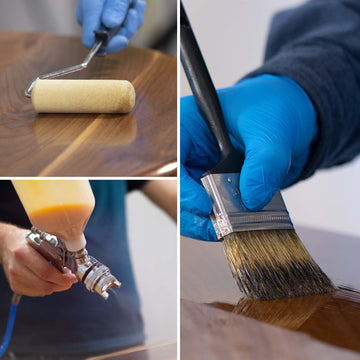
- Stiff, natural bristle brushes and epoxy safe solvent-resistant foam rollers for wetting out cloth with resin
- Laminating rollers for consolidating fabric and releasing trapped air bubbles during wet layup
- Utility knife and blades for trimming excess or overlapped cloth and tape
- Flexible plastic spreaders for spreading and distributing resin
- Shears or electric scissors for cutting fiberglass and other laminates
- If laminating on a mold – a release agent, such as wax and PVA (polyvinyl alcohol) to expedite the removal of a composite laminate from the mold. If using a tabletop as a flat surface mold, cover the tabletop with plastic sheeting.
- Chip brushes
- A calculator – for estimating resin and laminant amounts
- (Optional) If doing a layup for a small fiberglass repair – acid brushes to apply epoxy resin and to smooth out any peel ply used to prevent amine blush, smooth the surface, and prevent air bubbles.
Surface Prep for Hand Layup
The amount of surface prep depends on whether the layup is for building or repairs, and whether the construction is on a large area such as a hull, or on a composite part such as a hard top.
The general steps include sanding, masking, wiping, and preparing the mold so resin-saturated laminants don’t stick to it.
| Step | Description |
| Sanding and Vacuuming | Sand the area to be laminated, either by hand or with a power sander and 36 grit sandpaper to rough up the surface. If not using a dustless sander, use a vacuum cleaner to remove sanding residue. |
| Masking | Apply quick-release masking tape and poly sheeting to cover any areas you want to protect. |
| Wiping | Use clean, white, lint-free rags and the solvent recommended by the resin manufacturer to remove any remaining sanding residue, grease, dirt, or oil. |
| Prepare the Mold | A "mold" can refer to a male or female mold used to create a composite part, or a flat surface where fabric is wet out before being applied to a boat.
Clean the mold first using clean, white, lint-free rags and acetone to remove any dirt, grease, or oil on the surface. For a male/female mold, apply a mold-release wax according to the wax manufacturer’s directions; buff. After waxing, apply a thin coat of PVA (polyvinyl alcohol). For a flat surface, cover with poly sheeting. PVA is like liquid cellophane. It helps resin cure, and it makes it easier to remove a composite part from the mold after curing. |
How to Do a Hand Layup
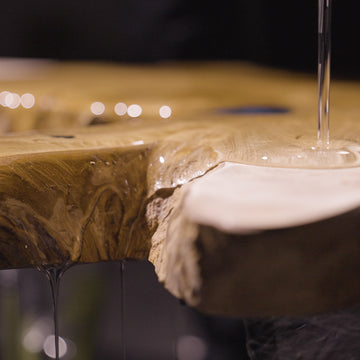
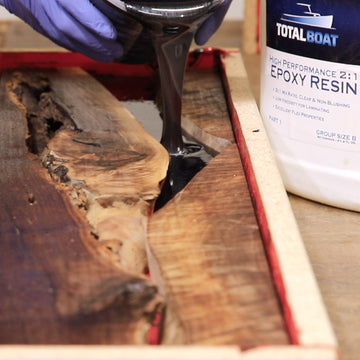
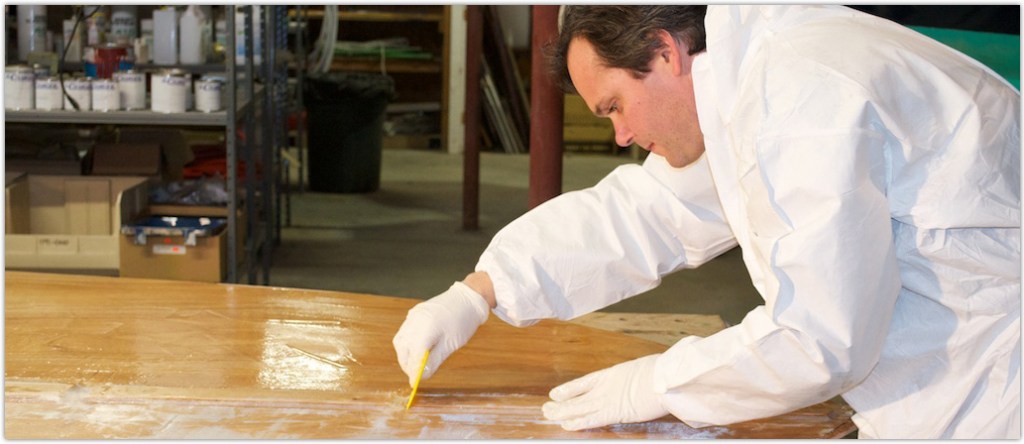
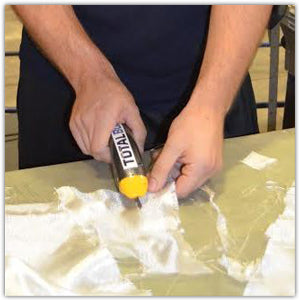
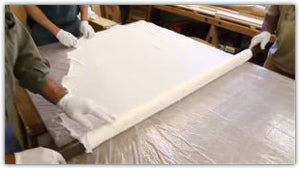
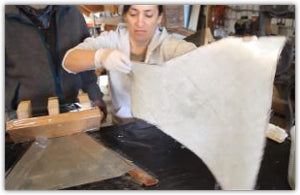
The hand layup process involves using resin to wet out reinforcement fabric, then applying the fabric to a prepared surface.
To prevent air pockets and shifting layers, we recommend you wet out the fabric on a separate surface before transferring it to the prepared boat surface or male/female mold. This "wet" method saturates the cloth thoroughly without stretching it and maintains the ply orientation to produce a high-strength laminate free of resin-rich or resin-starved areas.
The alternative is to lay the dry material directly on the boat or mold surface and wet it out there. This "dry" method is ok for smaller pieces of laminant or for persons more experience doing hand layups. It’s harder to wet out the material completely without stretching it and introducing air bubbles, both of which weaken the final laminate.
Basic Steps for Hand Layup
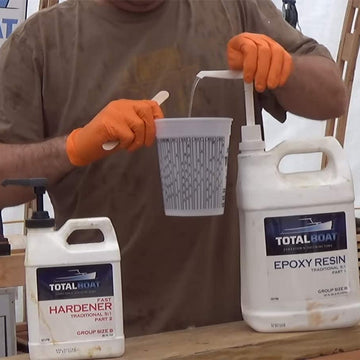
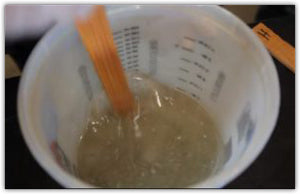
2 Mix the resin.
Mixing Epoxy Resin
For best results, mix only as much resin as you can apply during the working time specified by the resin manufacturer. Measure carefully in order to achieve the proper cure. If improperly mixed, the unwanted results include no cure, soft cure, or shrinkage from too much heat caused by an excessive exothermic reaction.
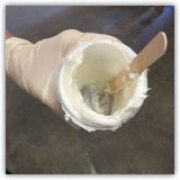
Option if doing wet layup for a small fiberglass repair: After mixing the resin needed for the repair layup, create an additional small amount of thickened epoxy resin to use under the repair layup to smooth the prepared surface. After the thickened epoxy is applied, you’ll brush on a layer of unthickened epoxy resin before applying the layers of reinforcement material and wetting them out with the unthickened epoxy resin.
To make the thickened resin, pour a small amount of your mixed epoxy resin into a separate clean container, then add a thickening agent and mix thoroughly. Work quickly to mix the thickening agent because the mixture starts curing once the epoxy resin and hardener are combined.
Don’t be surprised if the epoxy resin absorbs a decent VOLUME of thickening agent before you achieve the desired consistency, which is typically like peanut butter.
After adding and blending the thickening agents into the mixed epoxy resin, use the stir stick to "wrap" the mixture evenly around the inside of the cup.
This action will reduce the amount of exotherm (heating process the resin goes through while curing), and increase the time you have to work with the thickened resin.
Mixing Polyester or Vinyl Ester Resin
For best results and minimal waste, mix only as much resin as you can apply according to the indicated working time specified by the resin manufacturer.
Measure and combine polyester or vinyl ester resin and the MEKP catalyst in a clean container and mix thoroughly. Be sure to scrape the material along the bottom and sides of the mixing cup to ensure that all material is blended completely.
Any final coat of a polyester resin-based layup must contain wax in order to cure properly. Either use a finishing resin which has wax in it, or add wax to laminating resin.
Because of the danger involved, the resin manufacturer normally adds an accelerator or promoter to polyester resin so the resin cures at room temperature.
If your polyester resin does not contain the accelerator, you must add the accelerator to the resin and mix thoroughly first, before adding and mixing in the MEKP catalyst.
NEVER allow the accelerator and the MEKP catalyst to come into direct contact with each other or an explosion and/or fire can occur.
4 Place the dry laminant ply onto the working surface. Press the laminant gently into the resin.

Optional: If you’re creating a relatively small laminate stack, you can continue adding, positioning, and wetting out one ply at a time at this stage. After all plies are wet out, use a laminating roller to remove air bubbles and voids, and remove any excess resin with a plastic spreader, before transferring the stack to the mold or application surface.
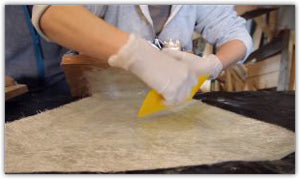
7 Remove trapped air bubbles and voids. Use a ridged, laminating roller to remove any trapped air bubbles. This process is called compaction or consolidation.
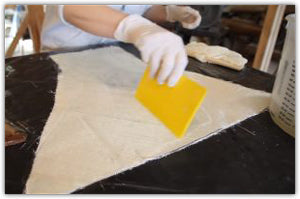
8 Remove excess resin. Use a squeegee or plastic spreader to remove excess resin and wipe it off into a "grunge" cup.
These steps will vary based on your particular layup.
When doing a simple fiberglass repair, wet out the target surface with a layer of thickened resin, followed immediately by a layer of unthickened resin, to which you would begin adding the small laminant plies, dry, one at a time, and wetting out in place with the unthickened resin.
When sheathing a boat, allow the laminant layer to cure to a soft consistency, tacky to the touch, then start applying additional coats of resin to fill the weave of the reinforcement materials.
To do this, pour or brush on a coat of unthickened resin. Allow this fill coat to level the texture of the reinforcement material. Use a spreader to distribute this fill coat evenly across the surface.
Again, allow the epoxy to cure to a soft but tacky consistency. Apply the second fill coat of resin, and allow to cure completely before sanding and finishing.
Take care not to sand into the fiberglass or the color will change from clear to white, which indicates that you’ve weakened the structural strength of the glass fibers in that area. The whiteness will show through any final coats of epoxy, which is not good if you’re going for a natural finish.
For surfaces to be finished naturally, avoid excessive sanding because any over-sanded areas will be visibly lighter on recoating.
The build-up laminate layers are saturated in "laminating" resin, which does not cure completely in the presence of air. This is necessary to achieve sound primary bonds in the laminate.
However, the final laminant layer should be saturated in a polyester or vinyl ester "finishing" resin, which contains wax.
The wax prevents all air exposure to the surface of the laminate and allows it to cure properly.
If the polyester or vinyl ester resin doesn’t contain wax, and you want the finish coat to cure properly, you can either coat the final laminant layer with PVA (polyvinyl alcohol) or use vacuum bagging to make the cure happen.
Curing Methods
Resin can cure either in the open air or in the presence of applied vacuum pressure using a method called vacuum bagging). This Wet Layup page focuses on the air-curing method.
An epoxy resin layup will cure in the presence of heat.
The cure rate of a polyester or vinyl ester resin layup can be accelerated by using a higher percentage of MEKP catalyst. Polyester and vinyl ester resin that does not contain wax, needs some other mechanism for effecting a cure, such as PVA (polyvinyl alcohol) or vacuum pressure.
Only the final layer in a polyester or vinyl ester laminate needs to contain the wax in order to cure; the build-up layers should not contain wax.
The vacuum bagging process involves placing the layed up piece (either a part or an entire hull) inside a plastic bag, applying layers of release and breather fabric atop the resin-saturated laminant layer(s), sealing the bag, and applying vacuum pressure until completely cured. The benefit of vacuum bagging is that it removes all excess resin and trapped air, resulting in a laminate that is lighter and has better strength. Please refer to the Vacuum Bagging page for more information on this process.