


TOPSIDE PAINTING
A new paint job protects your boat, makes it look great, and makes it easier to clean. Which makes you happy. Lots of factors besides cost will influence your paint choice. It’s important to understand that topside boat paint formulas differ by brand, and each has its own recommended primers, thinners, substrates, and surface prep methods. If you don’t have experience with a product, stick with the manufacturer’s recommendations or get stuck with a paint job that didn’t turn out as planned.
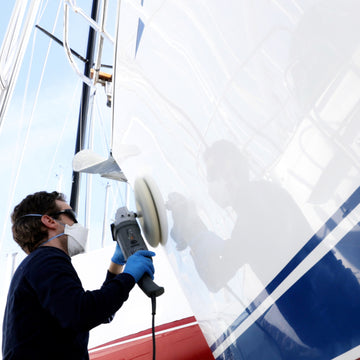
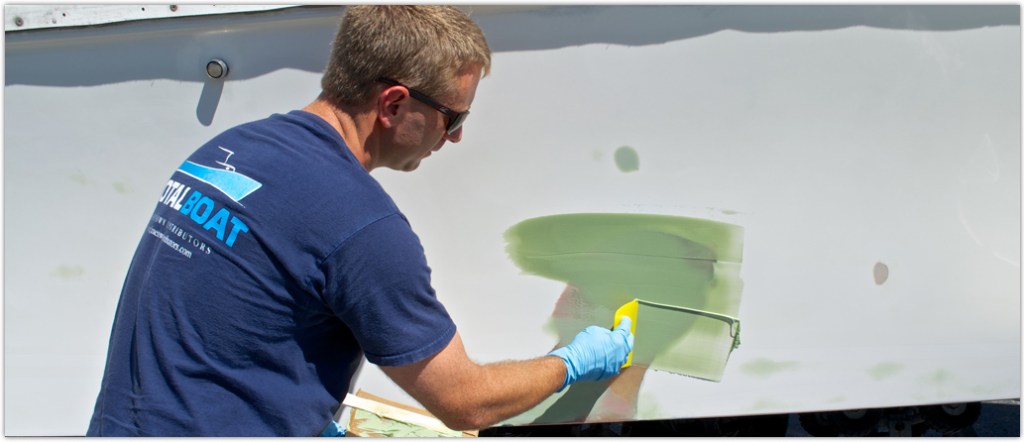
Tackling topside painting yourself can give you a professional-grade finish at about a tenth of what the boatyard charges—but only if you approach it the way the boatyard does. About 90% of your focus has to be on surface prep. If the surface is super smooth and faired before you pry open the paint can, it should be that way after the final coat has cured..
Choosing a Topside Paint
Types of Topside Paints
A topside paint is any paint you apply above the waterline anywhere on your boat. This includes the sides of the hull, deck, and interiors. Marine topside paints are commonly one of the following types: one-part polyurethane, two-part polyurethane, and alkyd marine enamel. There are also buffable, two-part acrylic urethanes. Here’s what they all have in common:- They’re resistant to moisture and abrasion, and are very durable.
- They have the flexibility to withstand hull expansion and contraction.
- They’re designed to resist exposure to both direct and reflected, water-intensified ultraviolet light, maintaining color and finish.
But here the similarities end. These paints differ in the degree to which they withstand exposure to sun and water, in gloss, flexibility, durability, cost, and ease of application. There are also specialty topside paints, which are poly or enamel that contain additives to achieve a specific purpose. For example non-skid deck paint contains additives to achieve the non-skid properties.
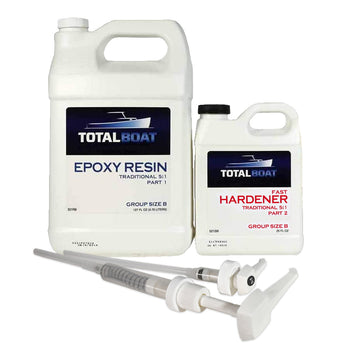
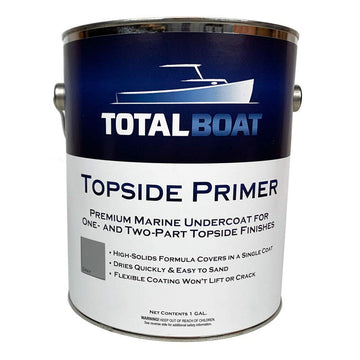
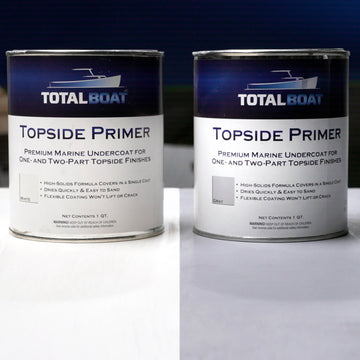
In addition to topside paint, you’ll need a compatible primer to give the paint something to bond to. TotalBoat Topside Primer can be used as an undercoat for one-part polyurethane and enamel topside paints, as well as two-part polyurethane topside paints, unlike other topside primers. It covers in just one coat, dries quickly, and is easy to sand.
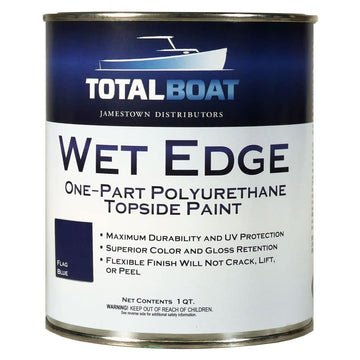
For do-it-yourselfers, this popular high-solids topside paint is easy to apply and produces beautiful finished results that’re almost as glossy as two-part polyurethanes. Besides being significantly more affordable than two-part polyurethane, one-part polyurethane is also much safer to mix and apply, and is easier to touch up if scratched or dinged. It’s a DIYer’s dream paint. Even one-part alkyd enamels can’t match one-part polyurethane for durability.
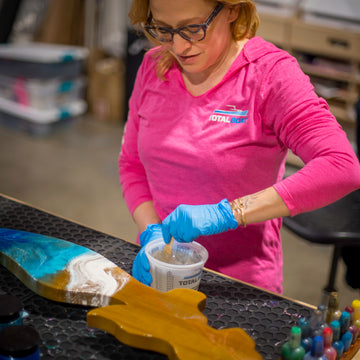
Simplicity is one of the best things about one-part polyurethane. It’s uncomplicated and easy to apply to interior and exterior surfaces above the waterline. No converters to measure and mix, and no induction times. Just stir to blend any solids that settled to the bottom of the can, then paint. And all you need to get a gorgeous, long-lasting finish is a brush and a roller. No special (expensive!) equipment needed.
We now offer an improved one-part polyurethane paint called TotalBoat Wet Edge that provides better self-leveling, stain and abrasion resistance, UV protection, flexibility, and durability. And it comes in 21 colors ranging from the more common ones to bold, vivid hues with exceptional color retention.
Two-Part Polyurethane
Two-part polyurethanes out-perform one-part poly in terms of hardness, scratch resistance, DOI (distinctness of image, or gloss), gloss retention, color retention, and UV resistance. But all that beauty comes at a much higher price in terms of paint costs, painting equipment, additional personal safety equipment, and time–for surface prep, mixing, application, and curing. Also, they’re not as flexible as one-part polyurethane, and any repair touch ups will show.
Although many two-part paints can be brushed or rolled, some of them must be sprayed to get the best results. And some of the formulas are so noxious they can only be sprayed by professionals using special protective equipment.
If you want to use spray equipment, take the time up front to learn about the different spray guns and how they work, because some of them put more paint into the air and less on the surface than others, resulting in more wasted paint. Which you don’t want because expensive two-part polyurethanes require you to apply more and thinner coats than one-part polyurethanes. Also familiarize yourself with the types of personal protective gear required by each spray method.
If you decide to use a two-part polyurethane, know that it commonly requires a specific epoxy primer and is very sensitive to precise mix ratios of converter, paint, and reducer. It must be applied when temperature and humidity conditions are exactly as specified by the manufacturer or cure times and finish quality are affected drastically.
If you decide to use a two-part polyurethane, know that it commonly requires a specific epoxy primer and is very sensitive to precise mix ratios of converter, paint, and reducer. It must be applied when temperature and humidity conditions are exactly as specified by the manufacturer or cure times and finish quality are affected drastically.
To apply by brush or roller, be sure you work in a well-ventilated area. If you want to apply with a sprayer, be sure you have sufficient ventilation, and obtain high-quality personal protective gear, including gloves, eye protection, and a proper vapor respirator because the overspray from these paints is toxic and extremely dangerous to inhale or to have absorbed into the skin.
Alkyd Marine Enamel
These one-part alkyd enamels are widely used because they’re glossy, affordable, and easy to apply by brush. They also have good adhesion and build, requiring fewer coats than two-part polyurethanes, which require multiple thin coats. Because they’re oil based, alkyd enamels are good at handling the expansion and contraction of wood, and are compatible with wood’s natural oils. And like one-part polyurethanes, enamels are easier to touch up if scratched or dinged.
On the downside, one-part enamels are not as durable, requiring an annual maintenance coat, and they don’t have the higher gloss and color retention of the polyurethane paints.
Return to TopCompatibility with Previous Topside Paints
In cases where the previous topside paint is in good condition, but you’re not sure what it is, it might be best to use a one-part polyurethane, or completely strip it. This is because one-part polyurethanes can be painted over other one-part polyurethanes or two-part polyurethanes. But two-part polyurethanes can only be painted over other two-part polyurethanes. They can’t be painted over one-part polyurethanes because the solvents in the two-part paint are likely to damage the underlying coat.
Painting options:- If you’re starting with a surface that had one-part paint applied previously and it’s still in good shape, just scuff with a ScotchBrite pad and paint with a one-part paint. If it’s in bad shape, remove it, then prime and paint.
- If you’re starting with a surface that had two-part paint applied previously and it’s still in good shape, just scuff with a ScotchBrite pad and paint. If it’s in bad shape, remove it, then prime and paint.
- If you’re not sure what the previous coating was, one option is to strip the previous paint. Otherwise, certain paint manufacturers have a solvent test you can do on the unknown surface to check for compatibility.
If the previous paint is showing widespread signs of separation, or is cracking and peeling, you won’t need to worry about compatibility. In this case, you’ll be scraping and sanding the surface down to the bare substrate, then applying a primer or undercoat before applying topside paint.
Return to TopFiguring Out How Much Topside Paint You’ll Need
How heavily you apply the topside paint is a factor in determining the quantity. The amounts recommended below are calculated assuming maximum film thickness without causing runs and sags, and the application of two coats.
| Type of Boat | Topside Polyurethane | Topside Enamel |
| 10′ dinghy | 1 quart | 1 quart |
| 14′ outboard | 1 quart | 1 quart |
| 18′ runabout | 1 quart | 2 quarts |
| 20′ sailboat | 2 quarts | 2 quarts |
| 24′ runabout | 2 quarts | 2 quarts |
| 30′ sailboat | 3 quarts | 1 gallon |
| 32′ cruiser | 3 quarts | 1 gallon |
| 36′ auxiliary | 1 gallon + 1 quart | 2 gallons |
| 40′ sailboat | 1 gallon + 2 quarts | 2.5 gallons |
| 45′ sailboat | 2 gallons | 3 gallons |
| 50′ sportfisher | 2 gallons | 3 gallons |
Due to many variables (for example, topside height and excessive beam) the paint quantities listed above are a general guide only. For specific quantities and film thicknesses, always follow the manufacturer’s recommendations.
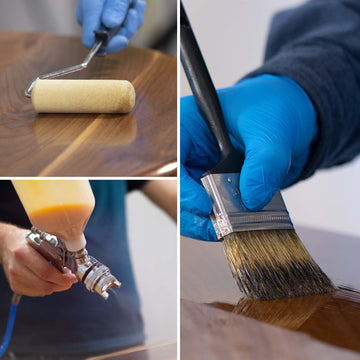
Topside Painting Equipment
For surface prep, the equipment is the same regardless of whether you’re rolling or spraying. When it comes to applying the paint, however, each application method requires its own tools. The following list indicates common tools for surface prep, priming, and paint application. After that, specific equipment is listed according to whether you’re rolling & tipping, or spraying the topside paint.- Personal protection for sanding and spray application of paint – paint suit with hood, eye protection, a NIOSH-approved chemical organic vapor cartridge-type respirator or fresh supplied air, and gloves
- If the previous topside paint is cracking, peeling, or lifting, sand it off or save time by using a chemical stripper to remove it. Our TotalBoat TotalStrip paint remover is safe for gelcoat and fiberglass, and it’s easy to apply, odor-free, biodegradable, can strip multiple layers in a single application, requires no acid wash neutralization, and cleans up easily with just plain water.
- Pressure washer if paint is loose, or a scraper and cleaning brush – for cleaning the hull before sanding
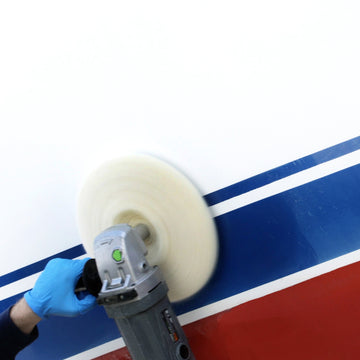
- If sanding down old topside paint and not removing completely, use large diameter sanding disks and a right angle grinder or sander, dustless, if possible
- ScotchBrite pads for scuffing between coats of topside paint.
- Masking tape – use a high-quality masking tape that can be removed cleanly to protect non-painted surfaces. For taping curved surfaces, use a flexible tape that’s durable enough to snap a really nice line.
- Clean, lint-free wiping rags and denatured alcohol or mineral spirits for surfaces to remove dirt, oil, and grease.
- Dewaxing solvent for removing wax during cleaning, prior to sanding.
- Tack cloth – tacky cloth for wiping down the surface before applying coating. Removes any lingering dust.
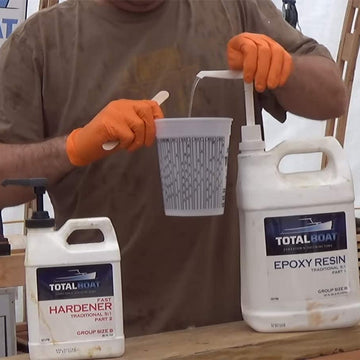
- Synthetic mesh strainers for filtering contaminants when pouring paint from the can into your paint pot.
- Optional items – Epoxy fairing putty to fill surface imperfections before priming and painting, a random-orbit sander to expedite sanding large areas and for sanding epoxy fairing compound, and a vacuum cleaner to help remove any sanding residue, even if using a dustless sanding system.
- Appropriate thinner for the topside primer or paint – Use the solvent recommended by the manufacturer.
Supplies for Rolling & Tipping
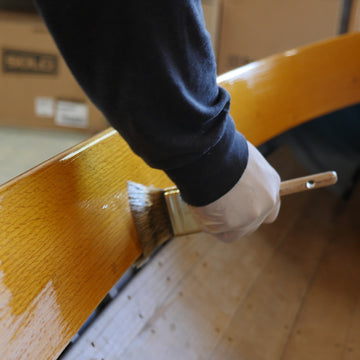
With the roll & tip method, you apply the paint with a roller, then follow immediately with a brush–and a light touch–to smooth out the paint. This method lets you apply paint evenly, and achieve high gloss results that are similar to spraying. It takes a little practice to establish a rhythm, but yields a very smooth finish with no roller or brush marks. It’s also faster than brushing. Both the topside primer and the topside paint can be applied using this method.
- Brushing thinner – Use the solvent recommended by the paint manufacturer for application by roller/brush. Mineral spirits is commonly used as a thinner for rolling and brushing.
- For rolling: Use a high-density, closed cell foam roller to help prevent air bubbles. These foam rollers are best because nap rollers will leave hairs and will apply the paint too thickly and inconsistently.
- For tipping: Use a soft-bristled, 3″ badger hair brush to smooth out the applied paint and remove any air bubbles introduced by the roller.
- Paint trays and liners
- Small sizes of badger hair brushes or foam brushes for cutting in.
If using a solvent-based topside paint, it’s important to use solvent-resistant roller covers, brushes, paint trays, and liners because the solvents in topside paint are strong enough to dissolve regular household-type versions of these painting tools.
Spray Equipment Basics
If you want to use spray equipment, understand that two-part polyurethane paints contain isocyanates and are extremely toxic–especially when sprayed. It’s best to leave the spraying of two-part polyurethanes to the professionals because the protocols for masking, air handling/filters, and respiratory protection are much more serious. The information provided here is intended to help you learn more about various types of spray equipment, not to teach you how to use a certain type of spray gun.
If you’re applying a one-part polyurethane by spraying, aside from good ventilation, make sure you have personal protective gear that includes a hooded paint suit, vapor respirator with proper cartridges (not a dust mask), gloves, and goggles. Also, check that you have the correct spray tip for your spray gun and your type of topside paint. For example, certain types of spray equipment and larger spray tip sizes are better for applying topside paints with a higher solids content. Both the topside primer and the topside paint can be applied using the spray method.
There are many types of spray guns available, but we’ll describe the ones most often used by do-it-yourselfers: conventional air guns, HVLP (high volume, low pressure) guns, and air-assisted airless spray equipment. Below is a brief overview. It’s important to take more time to learn all you can about the spray equipment you plan to use to ensure it can do what you want it to do.
| Spray Gun Type | Description | Advantages | Disadvantages |
| Conventional spray | Uses compressed air to operate at a constant, high pressure to atomize the paint. Produces extremely fine particles. | Creates a smooth finish and is relatively inexpensive compared to HVLP and air-assisted airless sprayers. | Because the target surface is bombarded with a high-pressure blast of atomized paint, only about 30% of the paint actually reaches the surface, the rest goes into the atmosphere. That’s a lot of wasted paint and money, and a serious environmental hazard. |
| HVLP (High Volume, Low Pressure) | Depending on the HVLP system, uses either an air compressor or an air turbine to apply the atomized paint in a higher volume, but at a much lower pressure. |
|
Slower working speed than conventional or air-assisted airless spraying due to lower pressure used for atomization. |
| AAA (Air-Assisted Airless) | Uses fluid pressure and air pressure to complete a two-stage atomization process. An airless pump provides the fluid pressure to feed the paint to the spray tip; an air compressor introduces compressed air into the spray tip to increase the fineness of atomization. |
|
Most complicated and expensive system to use. Requires use of a small compressor and a pump. |
Spray Tip Basics
The amount of paint that flows through the sprayer and onto the target surface depends on the pressure setting and size of the spray tip. Spray tips are rated according to orifice size, and vary by manufacturer.
- Choose a spray tip of a size that’s appropriate for the job you’re doing, and the type of paint you’re using. For example, lighter coatings are sprayed with the smaller tip sizes, and heavier coatings, such as high-solids primer or topside paint, require a larger spray tip size.
- Make sure your spray equipment can handle the tip size you need.
- Some paint manufacturers include spray equipment specifications, gun types, and spray tip sizes in their product data sheets. Contact the paint manufacturer if you have questions or need recommendations.
Surface Prep for Topside Painting
A beautiful paint job is 90% preparation and only about 10% actual painting. The professionals put their greatest effort into prep, and so should you. Here are seven basic steps for preparing your surface.1. Wash, De-Wax Twice, and Wash Again
Start by cleaning the hull with soap and water, rinse thoroughly, and let dry. Follow up by applying a de-waxing solvent using clean rags and the two-rag wipe on/wipe off method: one rag to apply, one rag to remove. Change rags often so you aren’t smearing the old wax over the surface. Repeat the dewaxing process. Finally, wash the hull thoroughly with a strong detergent such as TSP (trisodium phosphate) to remove any last traces of wax.
If the surface isn’t clean, sanding will drive dirt, wax, and other contaminants deeper into the substrate, compromising the quality of the finish. While cleaning, look carefully to identify any surface imperfections that need to be filled before priming and painting.
2. Fill Dents and Gouges
New paint will only hide the old color–not the old dings and dents, and will actually make imperfections stand out. Although a high-quality topside primer does have some minor filling abilities, it’s best to use a quick-drying, easy-sanding fairing compound to fill any surface imperfections first.
Apply the fairing putty. If using an epoxy fairing putty, apply it proud so it stands above the surrounding surface. This way it’s easier to sand down smooth after drying. To fair and smooth it, use a random-orbit sander. Start with heavy grit sandpaper to rough sand the area. For the final smoothing and contouring, switch to finer grit paper. Once you reach 220-grit, you’re ready for primer.
3. Sand and Wipe
This initial sanding is to prepare for application of the primer. Sand fiberglass or gelcoat, previously painted surfaces in good condition, or previously painted wooden boats with 220-grit sandpaper. For wood, use 180 grit and sand down to 220. After sanding, wipe the surface down with the solvent recommended by the primer manufacturer, for example, xylene or mineral spirits, and let flash.
4. Priming
Primer provides a solid foundation for subsequent coats of paint by doing the following:
- Bonding to the underlying surface, and allows the topcoat to achieve a sound mechanical bond with it.
- Sealing and hiding any repairs. Some higher solids primers even fill small scratches.
- Separating the old topside paint from the new preventing any adverse chemical reaction.
5. Sanding Again
Lightly sand the primed surface with 220 or 320-grit sandpaper, or the grit recommended by the coating manufacturer. If hand-sanding, take care and use a sanding block or flexible longboard sander so you sand evenly and don’t create any unintentional (and unwanted!) dips in the surface.
If sanding with a random-orbit sander, set the mode switch to "random orbit" action (for finish sanding), not "random orbit with forced rotation" action (for aggressive sanding and polishing). It’s also very important to hold the sander flush with the surface and keep it moving to prevent swirl marks and dishing (low spots).
6. Masking
Certain masking tapes tear easily and leave traces of residue on removal. Use a high-quality masking tape that removes cleanly to protect non-painted surfaces. For taping curved surfaces, use a durable, flexible tape that lets you lay down a clean line quickly and easily.
Many masking tape manufacturers will indicate the safe time frame for removing the tape without having residue problems, especially for outdoor use.
7. Wiping Again
Ensure that any hand or fingerprints from masking, and any final traces of dust are removed prior to painting. Wipe the surface with a clean, lint-free rag soaked in mineral spirits, or the paint manufacturer’s recommended solvent, and allow to dry completely. Take care not to touch the surface before painting because the cure will be affected by any contaminants.
To keep as much dust as possible away from the surface while painting, we recommend that you change to a new paint suit between sanding and painting.
Best Conditions for Topside Painting
Plan your painting schedule ahead of time, taking into account the number of coats you need and the dry time needed between coats. Watch the weather and make sure the humidity and the temperatures for the paint, substrate, and ambient air match the paint manufacturer’s recommendations, which is especially important when spraying, or when rolling & tipping a two-part polyurethane topcoat.
To make painting easier, set up your scaffolding ahead of time. Start painting in the morning on a clear, dry day and avoid painting in windy conditions or in direct sunlight. Ideally, paint in the late morning when dew is not a factor. Time it so the final coat has time to dry before falling temperatures and nighttime dew set in. Any condensation on the uncured surface will decrease the glossiness of the finish. For best finish results, time your painting so rain will not affect full cure.
Return to TopEasy Techniques and Expert Tips for Topside Painting
No matter what application method you use, be sure you have adequate lighting. Also, to minimize dust, dampen the floor or ground before you start painting. And if you’re painting outside, consider positioning the boat in a north-south orientation, so you can work on the shaded west side in the morning, and the shaded east side in the afternoon.
Thinning Topside Paint for Rolling & Tipping
Topside paints can be thinned with solvent to lower viscosity and improve consistency, making them flow more easily for rolling and tipping. Thinners, or reducers, come in several different types. Commonly, paints will have a different brushing/rolling or spraying reducer for optimal time for the solvent to flash off (evaporate). Certain paints may have a warm/cold weather reducer to optimize flow based on temperature conditions.
Always thin according to the paint manufacturer’s directions. Use the specified thinner in the amount suggested according to conditions such as air/substrate temperature and humidity. The goal is to only thin the paint enough so it lays down smoothly and levels out evenly, without runs, sags, or skips (holidays).
It’s a good idea to keep the thinner with you on the staging, so you’re prepared to make slight thinning adjustments while painting a section if the brush starts to drag while tipping. You want just enough thinner, so add only one capful at a time. Too much thinner will cause streaking.
If you’re applying a two-part polyurethane paint, mix the paint and converter first, taking care to mix these two parts thoroughly first. Then wait the designated induction time before adding any reducers or additives. Induction time refers to the initial slow stage in a reaction before the reaction accelerates. Induction times are typically required in two-part paints and epoxies after they are mixed but before they are ready to be applied.
Return to Top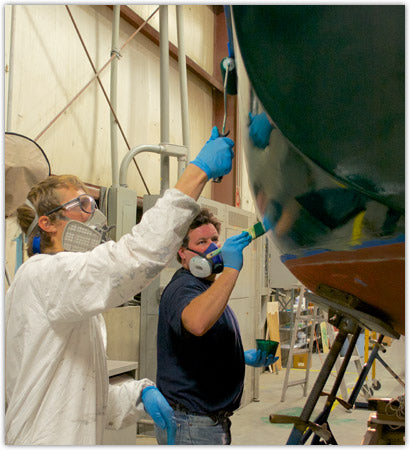
Rolling & Tipping Topside Paint Like a Pro
The roll & tip method is a non-stop, fast-moving, two-person paint-a-thon where one person applies a thin coat of paint with a roller, and the other person follows immediately behind with a brush to remove the roller stipple (the so-called ‘orange peel’ texture) and smooth out the surface.There’s no stopping and no do-overs, so be sure you have the paint mixed properly, and enough paint in the roller tray and paint pot to complete each large section. Also, have the thinner handy to replace that which evaporates.
As far as what direction to roll and what direction to tip, the variations include: roll horizontally and tip horizontally, roll vertically and tip fore and aft, or roll fore and aft and tip vertically. To gain confidence, you might want to practice first on a piece of primer-coated plywood, and use the method that works best for you and your painting buddy.
Whichever style you adopt, get into a rhythm and keep moving or the paint will dry and the brush will drag. If you run out of paint part-way down one side and stop to get more paint, you’ll get an ugly ridge at the point where you stopped and started up again. Here are a few other things to keep in mind:
- Check that your roller and brush are solvent resistant or the solvent in the paint will ruin them and they’ll fall apart.
- To help prevent surface bubbles when rolling, be sure to use a 1/8″ nap high-density, closed cell foam roller. Large cell foam rollers or other types of rollers will cause bubbles and other texture problems, including sags.
- Mix enough paint to do one whole section at a time, planning ahead for logical stopping points, such as after you finish one side of the hull. To make it less noticeable, pick the bow or a corner of the transom.
- Load the roller evenly. If too heavy, the paint will run. If too light, you’ll get places where the paint is thinner and the gloss won’t be as good, or you’ll see skips (also called holidays) where there’s no paint at all.
- Holidays are no picnic when you’re doing a rolling and tipping session, but they happen. If you get them, leave them alone. Touching them up will make them worse. After sanding, you’ll cover them with the next coat.
- Avoid rolling the paint on too thickly. Aside from the potential for runs and sags in the paint, solvents can get trapped beneath the film when it skins over and affect the cure time.
Don’t get discouraged or intimidated if the first coat is spotty or sags. You’ll develop a better feel as you continue, and by the final coat, you’ll have it figured out, and it’ll look great.
Don’t get discouraged or intimidated if the first coat is spotty or sags. You’ll develop a better feel as you continue, and by the final coat, you’ll have it figured out, and it’ll look great.
- Roll the paint on in small sections (for example, approximately 2 feet wide) that are appropriate for the size of the boat and the temperature (hot or cold) conditions. This gives the person rolling adequate time to distribute the paint evenly and keep the wet edge, and the person tipping enough time to tip without the brush dragging from drying paint.
- Roll back toward the freshly tipped paint.
- When tipping, use a light hand. You’re not applying or distributing the paint, just smoothing it out. Don’t overwork the paint or it will pull and fail to level out properly.
- If the brush starts to drag even a little bit while tipping, mix a capful of thinner into the paint cup.
- Paint starts drying really fast, especially when rolled out thinly on a hull. Don’t rush, but don’t relax or stop until you reach a logical end point, or it may be noticeable.
- Apply 2-3 coats in this way, allowing for proper curing and any necessary sanding between coats.
- Sanding between coats: Sand with 220-grit paper. Remove sanding residue by vacuuming, then wipe with a tack cloth, then wipe again with a lint-free rag dampened with the solvent recommended by the paint manufacturer. Allow the solvent to flash before applying the next coat.
- After the last coat, remove the masking tape after–and no earlier than–1 hour for the best-looking line.
- When you’re done, take a bow and give yourself a pat on the back. Sit back and admire your beautiful handiwork for a few days, giving the paint a rest and keeping it out of the hot sun until it cures.
Thinning and Spraying Topside Paint
Topside paints can be thinned with solvent to change viscosity and improve consistency, making them flow more easily for spraying. Thinners, or reducers come in several different types: some are better for warmer (slow reducer) or cooler (fast reducer) conditions; some are necessary for either brush/roll or spray application. Due to the extreme toxicity of sprayed two-part polyurethanes containing isocyanates, we do not recommend DIY spray application.
Thin one-part polyurethane according to the manufacturer’s directions using the specified thinner in the amount suggested according to conditions such as air/hull temperature and humidity. The goal is to thin the paint so it can be applied consistently. Typical thinning for spraying polyurethane paint is anywhere from 5-20%, depending on the paint. Be careful not to over-thin the paint or it will sag when sprayed on the hull, and will lessen gloss retention after curing.
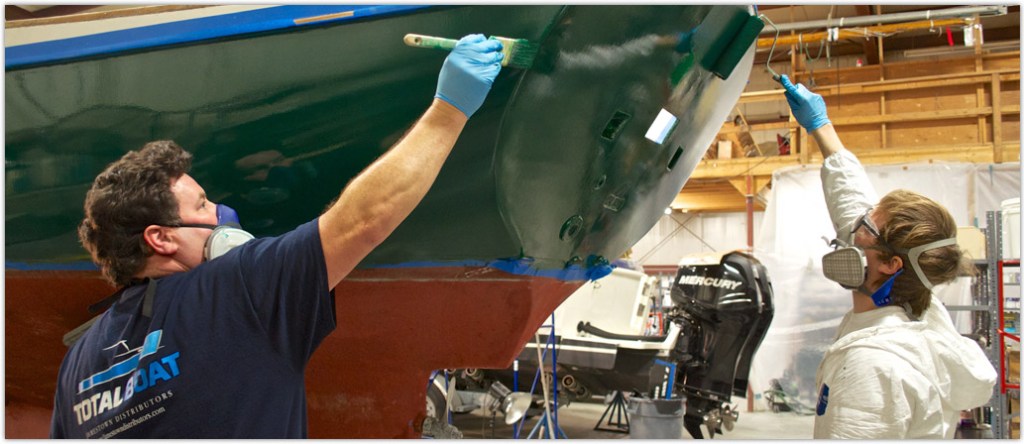
Before you begin spraying, ensure that your work area is well-ventilated, and that you’re wearing appropriate, high-quality personal protective gear, such as a paint suit with hood, eye protection, a NIOSH-approved chemical organic vapor cartridge-type respirator or fresh supplied air, and gloves.
Results depend on the type of sprayer, and attention to the paint manufacturer’s recommendations for spray tip type and size, pressure, flow, and angle of spray.
Proper spray technique usually focuses on three things: aiming the spray pattern, your triggering technique, and your overlapping technique.
- Aiming the spray pattern: Hold the gun upright at a consistent distance from the surface while spraying and move your arm while keeping the gun pointed straight at the target surface for a smooth, even finish. If, instead, you keep your arm still and move the gun in a fan pattern from side to side, the finish will be uneven.
- Pressing and releasing the spray trigger: Start moving the gun before you press the trigger, and continue your arm motion after releasing the trigger to avoid creating added thickness at the beginning and end of each stroke.
- Proper overlapping technique: To apply the paint evenly, each time you make a pass to spray, overlap by 50%. Point the spray tip at the bottom edge of the previous spray pass to ensure efficient overlap.
Common problems encountered while spraying include runs and sags, pin-holing, solvent pop, fish eyes, blistering, mottling, and orange peel. Practice your technique on something other than your hull, such as a primed piece of plywood. Sometimes the problem requires nothing more than applying the material in lighter coats, speeding up the gun movement, or holding the gun closer or further from the surface while spraying. Consult the manufacturer of your spray equipment or the paint manufacturer for specific usage and troubleshooting instructions.
Return to Top