


BOTTOM PAINTING
As a boat owner, getting dragged to the depths of the ocean by a giant sea monster is probably not high on your list of concerns. But make no mistake, there are some very foul creatures lurking beneath the waves.
We’re talking microscopic sea monsters: acorn barnacles, zebra mussels and slime-causing bacteria that cause serious hull drag, and wallet drain from higher fuel costs and repair bills.
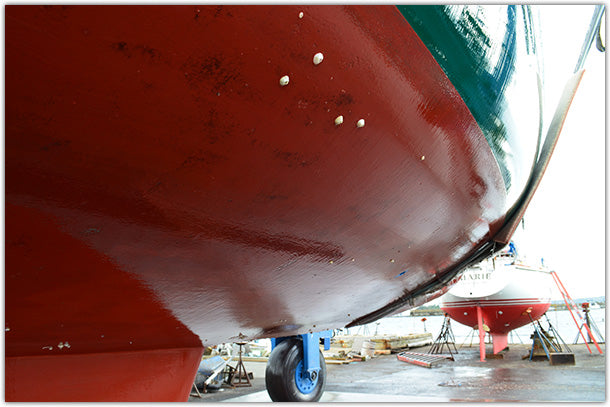
You may not even know they’re there until it’s too late because they don’t come at you flailing ferocious tentacles, at least not ones you can see. What you will see—and want to prevent—is the ugly, dirty, slimy mess they make on the bottom of your hull that decreases your speed and increases your fuel bill because your engine has to work harder. A fouled hull bottom is also a safety risk because it can decrease your ability to maneuver.
Battle the barnacles and other biofouling bottom huggers with the right bottom paint for smoother sailing.
Choosing an Antifouling Bottom Paint
The purpose of applying antifouling bottom paint is to prevent hard biofouling organisms like mussels, barnacles, and tubeworms, and soft growth like weeds and algae (slime!) from attaching to your hull below the waterline.
There are several different antifouling coatings available, with new ones being formulated all the time, making it very difficult to choose the paint that’s right for your boat and your budget. Some coatings work better in different locations, including fresh or salt water. Some are more environmentally friendly than others, and some cost more based on the type of biocide and the protection they provide.
The key antifouling ingredient in bottom paint is some type of biocide for deterring hard marine growth. Some antifouling paints also include an algaecide for preventing soft growth.
Biocide basics: For centuries, some form of copper has been used successfully to prevent the attachment of barnacles and other marine growth on hull bottoms. Today, the type of copper most commonly contained in antifouling paint is either cuprous oxide or cuprous thiocyanate. Cuprous thiocyanate has the added benefits of being a lighter copper in terms of color, so it produces brighter, truer paint colors. Also, paints using cuprous thiocyanate use half the amount of copper used in conventional, heavier cuprous oxide paints.
Because copper in the concentrations used in antifouling paints is a potential threat to some marine ecosystems, there are now equally effective, eco-friendly, antifouling paints that contain a metal-free biocide called Econea™ (main ingredient is tralopyril). Econea’s main benefit is that it dissolves after it is shed into the water, leaving no byproduct to harm marine life. Its secondary benefit is that it allows for the creation of brightly colored paints, unlike bottom paints containing cuprous oxide as the biocide.

Algaecide basics: If you use your boat in an area where slime, algae, and grass growth on the bottom of your hull are common, you need an antifouling paint that also contains an algaecide to prevent this soft growth. In the past, some antifouling paints contained an algaecide called Irgarol, which is no longer being used. Irgarol was discontinued because of its persistence after release into the water, and harmful effects on marine life. Zinc pyrithione (Zinc Omadine™) is now the slime-fighting agent used in many antifouling bottom paints. Its effectiveness is similar to Irgarol, but it dissipates quickly and harmlessly into marine or fresh water ecosystems. Zinc pyrithione is found in chemical solvent-based and water-based antifouling marine paints.
Chemical solvent-based or water-based antifouling paint? Another consideration is the type of solvent in the paint. Solvents keep the biocide, algaecide (if included), and pigment suspended in the paint so they’re distributed evenly in the coating as it’s applied to the hull surface. In the past, most antifouling paints contained harsh chemical solvents, and required the use of chemical solvents for thinning and cleanup. Those harsh chemical solvents contain toxic VOCs (volatile organic compounds) that evaporate easily into the atmosphere. To help meet environmental regulations in some areas of the country, and the world, there are now water-based paints, that also use water for thinning and cleanup. Many of these water-based antifouling paints contain the biocide Econea, and zinc pyrithione as the algaecide, because both dissolve in the water after release.
Won’t a water-based antifouling paint just dissolve and leave the hull unprotected while the boat is in the water?: The short answer is no. As the water-based paint cures, the water evaporates, leaving behind a protective film of biocide and/or algaecide, and pigment.
Teflon and vinyl bottom paints: Teflon paints are expensive, dry quickly, cure to a very thin film, and are ideal for fresh water areas where algae is a problem. Vinyl bottom paints are hard bottom paints that can be burnished smooth for racing, and are especially effective in saltwater, though not as effective as ablative paints for battling biofouling organisms. Both Teflon and vinyl bottom paints are used more to enhance performance, as in race boats, instead of antifouling.
Proprietary two-part bottom coatings: These products are new and expensive, using patented chemical formulas to create a hard and very slippery biofilm that doesn’t allow living organisms to attach to the boat.
Location, Location, Location
Deciding on bottom paint is a regional, sometimes section-of-the-harbor-specific choice. It’s based on lots of variables like water temperature, silt, substrate, pollution, water flow, biofouling organisms present, and the frequency and type of boating you do.
Making that choice is made even harder because a bottom paint that works in one part of the harbor may not be as effective a few hundred yards away in that same harbor–even on the same type of boat.
The general consensus is there’s more fouling activity in warmer water and still water, and less growth in water that’s colder or where there’s more current flowing beneath the hull. It’s also harder for biofoulers to attach to a moving target, so the more you use your boat, the cleaner the bottom should remain.
At any rate, it’s always a good idea to ask fellow boaters and local boatyard professionals to help pinpoint paints that work best where your boat floats.
Types of Antifouling Bottom Paint
Bottom paints are usually one of two types: hard or ablative, with variations whose effectiveness depends on how much time the boat spends in the water, and how often it moves.
Hard bottom paints are typically less expensive than ablative antifouling paints. However, hard paints are effective for a single season, and they build up season after season, eventually requiring costly removal. Ablative paints come in single-season and multiseason varieties and don’t build up.
Hard bottom paint dries hard, stays that way, and doesn’t wear away gradually like an ablative paint. It works constantly while the boat is in the water, regardless of whether the boat is moving, and stops working once all its copper biocide gradually leaches out. So the coating can still be in great shape, but the biocide is gone and so is the protection. Water can seep in to the unprotected coating and damage the hull. Also, because hard bottom paint doesn’t wear away, it builds up and eventually has to be removed–a costly, labor-intensive endeavor.
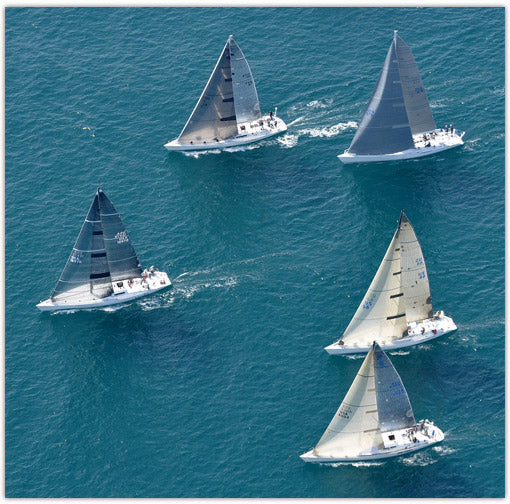
Another problem for hard bottom paints is they lose their copper faster–and their effectiveness–if the boat is kept out of the water more than 60 days after applying bottom paint. For this reason, hard bottom paint is typically used on boats that remain in the water for extended periods. It’s also great for boats operated at faster speeds, like racing boats, because it can be burnished to increase hull smoothness and speed, unlike ablative bottom paints.
Ablative bottom paint wears away gradually as water flows under the hull, either from use or tidal movements. As the paint wears away, it exposes a fresh burst of biocide to keep biofoulers from attaching to the surface. There are ablative paints for multiple season use, and others that are effective for a single season. The single-season ablatives are typically less expensive than the multiple season ablatives.
For most ablative paints to work effectively, motion is required, so this paint is best if you use your boat fairly often–at least once a week. A hull painted with a single-season ablative antifouling paint can be pulled and left out of the water up to two weeks, but will require a light scuffing with a Scotch-Brite pad to reactivate the antifouling properties directly prior to launching.
A hull coated with a multi-season ablative can be pulled and left out of the water up to two weeks, without scuffing to reactivate the antifouling. However, after two weeks, scuffing is required directly before launching.
Self-polishing, copolymer ablative bottom paint also wears away gradually to expose fresh layers of biocide. However, it’s effective whether or not the boat is moving because it uses a self-polishing, controlled-release, copper copolymer formula. Some copolymer ablatives can last multiple seasons, requiring only a light scuffing to reactivate the antifouling in the spring, directly before launching.
Hybrid copolymer ablative bottom paint has all the self-polishing, controlled-release biocide benefits of a copolymer ablative. The difference is that it can also be burnished–like a hard bottom paint–for smoothness and speed, unlike other ablative bottom paints. And there’s less buildup to remove next season, as with hard bottom paints.
Which Bottom Paint is Best for Your Boat?
Preventing biofouling is not a one-shot-and-you’re-done deal, and no bottom paint is best for every boat. Your decision depends on answers to these practical questions.
What type of hull do you have?
Most bottom paints contain copper as their antifouling biocide, which is fine for wooden, and fiberglass/gelcoat hulls, but causes galvanic corrosion, which will destroy a pontoon boat or an aluminum hull. For use on aluminum hulls, aluminum bottom paint typically uses a copper-free biocide such as Econea. Underwater metals such as outdrives and trim tabs also need this metal-free antifouling paint.
And don’t forget the bottom of your inflatable, it needs protection, too. Inflatable bottom paint is ablative, so it wears away gradually, and is designed not to crack or peel while the boat is being rolled up, or after drying.
What kind of water is your boat sitting in, and what’s the water temperature?
In terms of temperature, biofouling levels are typically higher in warmer waters than cooler waters.
Fresh water biofouling, while not as severe as saltwater (marine) biofouling, still poses problems which are compounded if the water is brackish or polluted. By far the biggest challenge comes from hard, marine biofouling organisms such as zebra mussels and barnacles, which destroy the hull surface and allow moisture in, causing blistering and other expensive damage.
If moderate to heavy fouling is a problem in your region, you might consider a bottom paint that offers greater protection and lets you haul and relaunch without repainting, such as a multi-season paint. In lower fouling waters, you can get adequate single-season protection from a more economical bottom paint.
The copper biocide (cuprous oxide or cuprous thiocyanate) or copper-free biocide (Econea) in these paints is designed primarily to combat hard shell marine growth. If slime is a problem in your area, use a slime-shedding bottom paint boosted with a slime-fighting agent (zinc pyrithione) that controls slime growth at the waterline.
How and when do you use your boat?
For example, do you trailer your boat? If so, you should use a harder ablative bottom paint that can withstand trailering. Do you race it or just like to go fast? Try a hybrid copolymer ablative that allows you to burnish the surface, and provides good single or multiple season protection. Do you go out every weekend? Every day? Do you want to be able to do your bottom painting at the end of the season so you’re ready to launch first thing in the spring? At TotalBoat, we’re DIY boaters that create products to suit every type of use in all types of waters.
Do you live in an area that restricts the use of solvent and copper-based bottom paints?
To address ever-increasing environmental regulations, some ablative bottom paints are now water-based and/or copper-free, containing an environmentally friendly biocide called Econea™, and fewer volatile organic compounds (VOCs). Other water-based ablatives contain copper for added antifouling protection, but offer easy soap and water cleanup.
How much money do you want to spend on bottom painting?
With bottom paint, usually the more biocide, or different types of biocide, the greater the cost. Also certain properties, like self-polishing, single or multi-season effectiveness, or slime-fighting ability, require the inclusion of certain additives, which can increase the cost. If you don’t need it, you shouldn’t have to pay for it, which is why we created a complete line of bottom paints to balance every boater’s needs and budget.
Figuring How Much Paint You Need
Figuring out the approximate surface area (in square feet) of your hull below the waterline is a good way to determine the amount of bottom paint you’ll need. Here’s an easy formula to use:
Length x Beam x .85
How heavily you apply the bottom paint is another factor in determining the quantity. The amounts below assume you want to coat the surface as thickly as possible without causing runs, and that you are applying two coats. For specific quantities, always refer to the manufacturer’s details on coverage areas.
| Type of Boat | Bottom Paint |
| 14′ outboard | 1-2 quarts |
| 18′ runabout | 2 quarts |
| 20′ sailboat | 3 quarts |
| 24′ runabout | 3-4 quarts |
| 30′ sailboat | 1.5 gallons |
| 32′ cruiser | 1.5-2 gallons |
| 36′ auxiliary | 2 gallons |
| 40′ sailboat | 2.5 gallons |
| 45′ sailboat | 3-3.5 gallons |
| 50′ sportfisher | 4+ gallons |
How to Strike a Waterline On Your Boat
Applying two coats of bottom paint up to the old waterline is a fairly straightforward task–if you know where the waterline is. Sometimes the line gets covered up by topside coatings, or it needs to be raised as the boat gets outfitted for cruising. Or you may have a new boat and need to find the waterline. Here’s a simple way to mark the waterline on your boat in preparation for bottom painting.
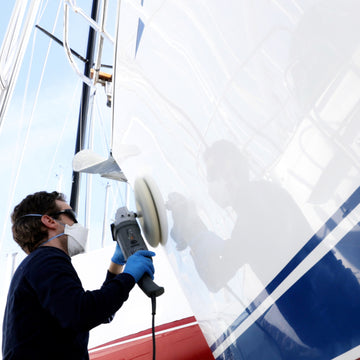
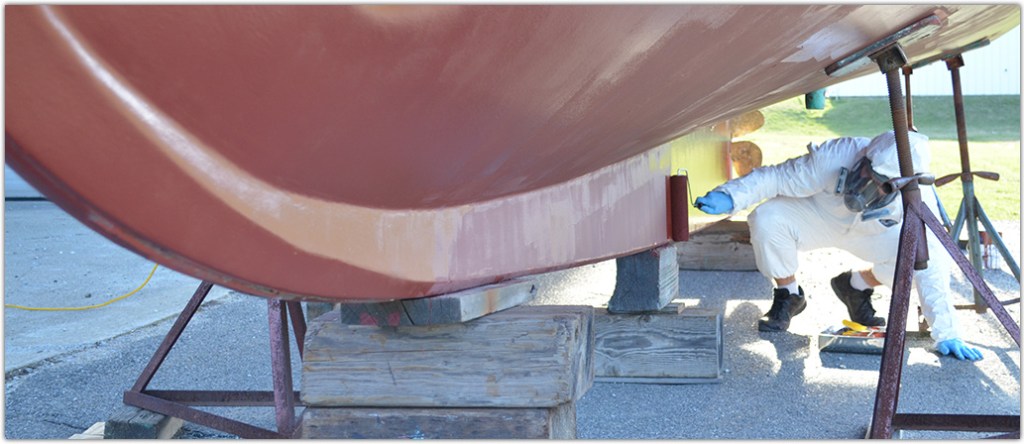
Bottom Painting Equipment
What You’ll Need for Bottom Painting
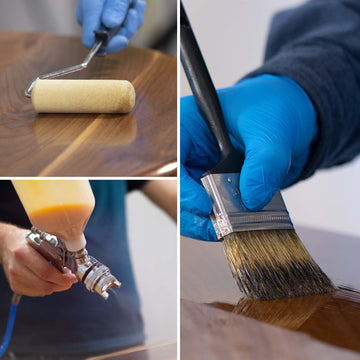
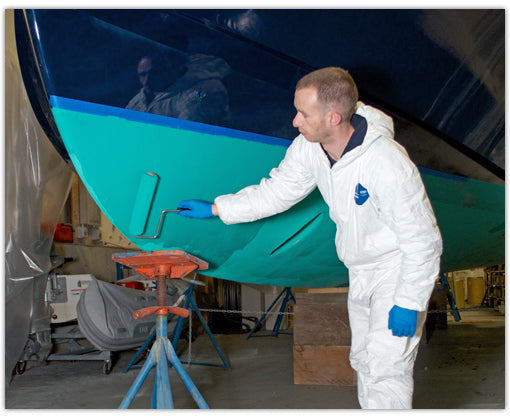
The safest and best way to do a DIY bottom paint job involves applying the paint with a brush or roller. Due to the substantial toxic hazards, spraying is not recommended.
If using a solvent-based antifouling paint, it’s important to use solvent-resistant roller covers, brushes, and paint trays and liners because the solvents in bottom paint are strong enough to dissolve regular household-type versions of these painting tools.
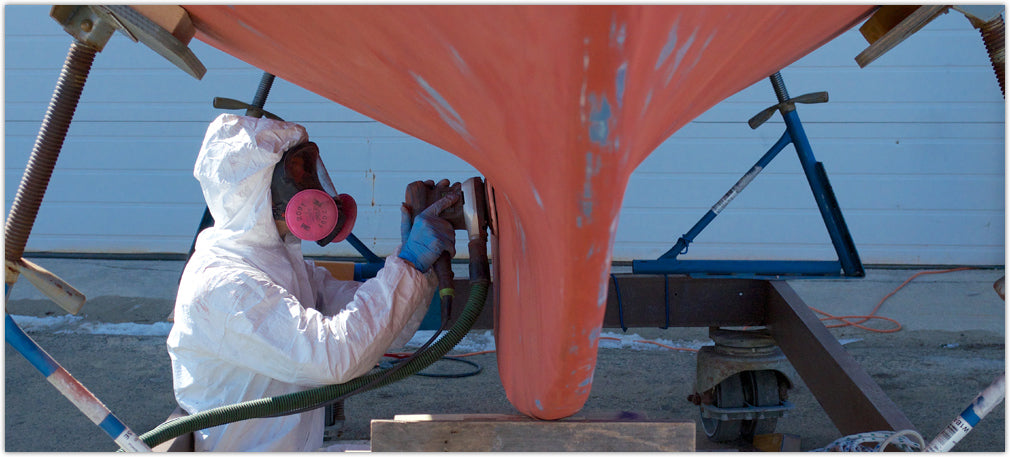
- Personal protection for sanding – paint suit with hood, goggles, and a respirator with appropriate cartridges, and gloves
- If bottom paint is cracking and peeling or otherwise requires removal (as in the case of hard bottom paint) use chemical stripper to remove it. Our TotalBoat TotalStrip paint remover is safe for gelcoat and fiberglass, and it’s easy to apply, odor-free, biodegradable, can strip up to 25 layers in a single application, requires no acid wash neutralization, and cleans up easily with just plain water. It’s also very effective on bottom paint.
- If previous bottom paint is in good condition and not too thick (only a couple of previous coats), you don’t need to sand it down, just scuff it up using a clean, maroon Scotch-Brite pad
- Paint scraper for removing loose or chipping antifouling paint to clean up the hull bottom before sanding
- When sanding down old bottom paint, use 80-grit large diameter sanding disks and a right angle grinder or dustless sander (recommended). 80-grit paper is the most common grit for sanding antifouling paint. Always use a dustless sander to keep the toxic antifouling paint sanding residue contained.
- Masking tape – solvent and water-resistant tape is ideal for lengthy bottom painting jobs that require two coats. This clean-release masking tape lifts off easily, leaving no gummy residue.
- Scratch-free cleaning and wiping rags and acetone or mineral spirits for removing surface dust and residue
- Solvent-resistant paint brush or 3/8" nap roller, paint tray and liner, plus small-width chip brushes for cutting in
- Drop cloths for any sanding debris, and for catching paint drips and spills
Surface Prep for Bottom Painting
To ensure the best possible bond and the most effective antifouling results, take time to assess the type and amount of surface preparation needed. Typically, most ablative bottom paints can be applied over hard paints, but not the other way around. Also most other antifouling paints can’t be painted over vinyl or Teflon bottom paints. Incompatible paints must be removed first. Substrate matters, too, so for example, if you’re painting on steel or aluminum, check that you coat the surface with an appropriate metal primer first. Incompatible bottom paint or previous bottom paint that is extremely deteriorated should be stripped first. Use a chemical stripper that works with bottom paint to remove it.
If you stripped the old antifouling and found hull damage or damage to the barrier coat, or if you’re painting a new boat for the first time, you’ll need to apply an epoxy barrier coat before applying bottom paint.
Cleaning Tips
In many cases, you’ll be painting over a previous bottom paint job that’s in good condition, so you don’t need to strip the paint or sand. Just chip away any loose paint with a paint scraper or putty knife, then abrade with a medium-grade 3M ScotchBrite pad, then wipe the surface with a clean, lint-free cheesecloth, rag, or tack cloth dampened with acetone or mineral spirits (or thinner recommended by the paint manufacturer) to remove residual dust and grease, let dry, then apply masking tape.
Sanding Tips
If you need to sand, sanding makes a mess, so first lay down some drop cloths under and around your work area. Sanding bottom paint also creates toxic dust, so use a dustless sander. And protect your exposed eyes, skin, and lungs with high-quality protective equipment before you begin sanding.

Masking Tips
For the cleanest line, try to position the tape as close to the bootstripe as you can, beginning at a natural start point in the line. Draw the tape out slowly, outlining every 1.5 to 2 feet. In addition, mask around underwater metals to protect them from contact with any copper-based antifouling paint.
Use 80-grit sandpaper to sand the entire bottom to smooth it out and remove any high or uneven spots. Sand lightly so you don’t sand through a protective barrier coat or damage gelcoat. After sanding, wipe down the surface using the solvent recommended by the bottom paint manufacturer.
Wiping
After masking, and before painting, wipe the surface with a clean, lint-free cloth to remove any residual dust or dirt.
Return to TopBest Conditions for Bottom Painting
Getting great performance from your antifouling paint takes more than just completing the surface prep properly so the paint has every chance to bond mechanically and chemically to the hull. You also have to apply the paint when the timing is right in terms of temperature and humidity.
Resist the urge to start painting until temperatures are between 50°-85°F and the humidity is between 65 and 90%, or according to the manufacturer’s specifications. Be patient and wait for the weather to cooperate. You’ll be rewarded not just with optimal antifouling effectiveness, but with better looking, longer lasting results.
Bottom Painting Like a Pro
Before you start, pay attention to the dry time between coats and the recommended number of coats, as indicated by the manufacturer. Also, be sure to check if there are any maximum limits on the amount of time the boat can remain out of the water after bottom painting and prior to launch. For example, copolymer ablative paints dry faster, which means their overcoating times are shorter. They also have longer or unlimited launch windows.
Once you know the characteristics of your coating, and you’re ready to paint, here are some tips to expedite the process.
- To make it easier to get as much copper off the bottom of the can and into the paint, take it to a paint shop and have it shaken first. This will make it easier for you to stir the paint thoroughly.
- Do not thin bottom paint or it will lose its antifouling effectiveness.
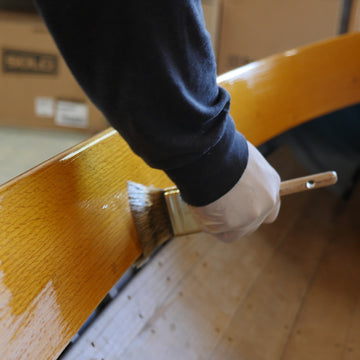
- Use a solvent-resistant brush or 3/8" nap roller to apply paint thickly, without drips, onto the hull. Keep the thickness even, and paint from one end of the boat to the other.
- Because ablative paints wear away faster in areas of greatest turbulence, apply extra coats to these places such as the leading edge of the keel and the bow.
- Remember to paint underwater metals such as transducers, with a copper-free antifouling paint that will not cause galvanic corrosion.
- Recoat based on the manufacturer’s directions for overcoat times. Ensure that the weather conditions are optimal for recoating.
- After the final coat of bottom paint has dried, remove the masking tape slowly and carefully. After cleaning up, be sure to dispose of used solvent and paints properly.